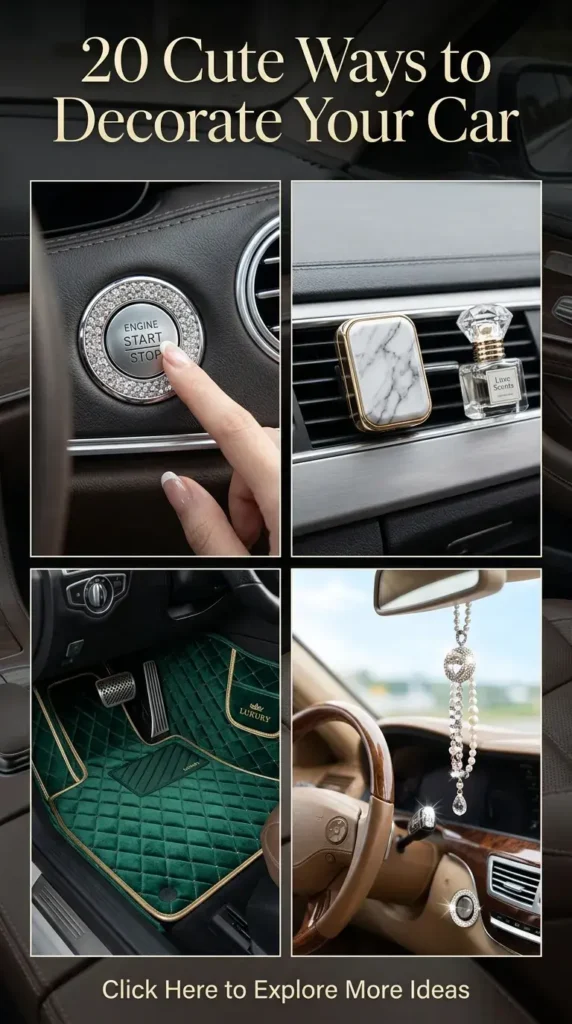
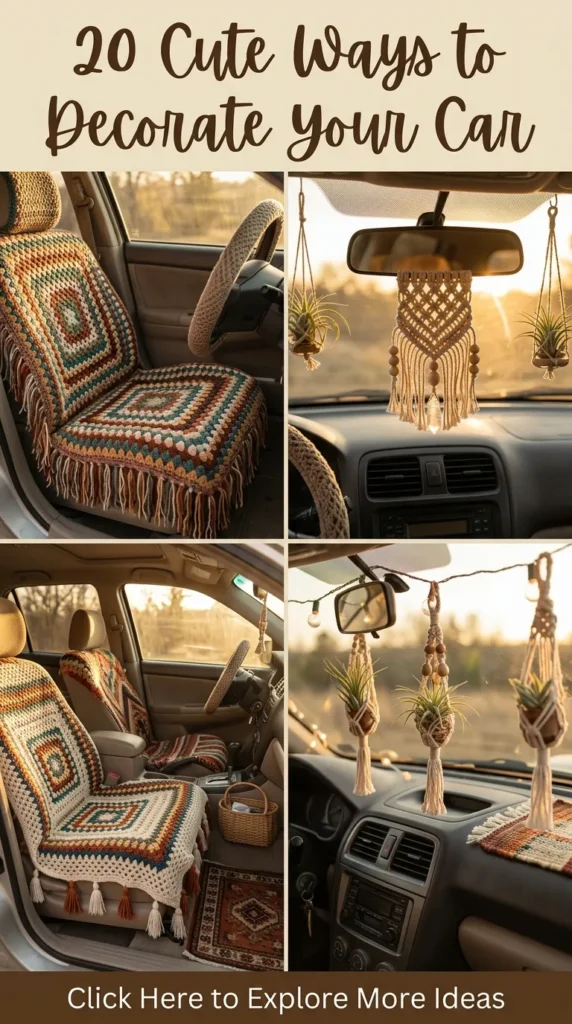
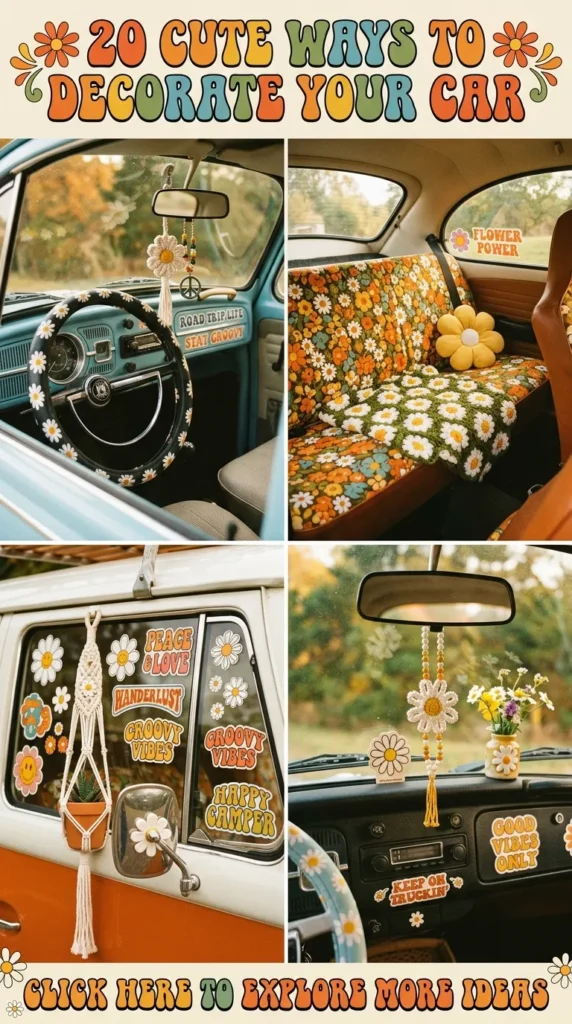
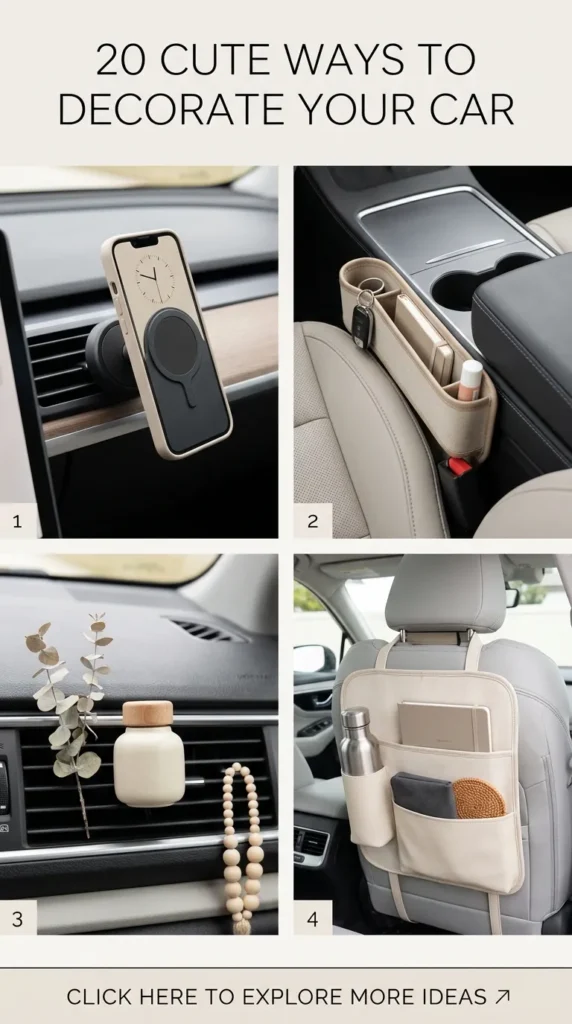
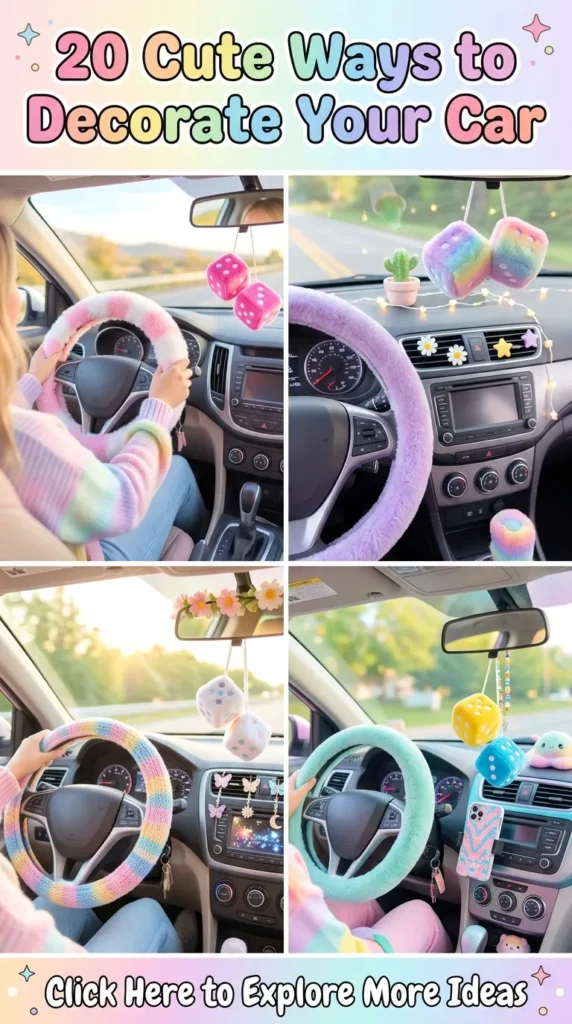
Transforming your vehicle into a personalized, cozy sanctuary turns everyday commutes into inspiring journeys. Car aesthetics have evolved beyond standard air fresheners and generic seat covers into an art form of personal curation, blending textures, color palettes, functional elegance, and creative DIY elements. Whether you lean toward dreamy cottagecore, sleek minimalist pastels, botanical greenery, or warm boho textures, styling your car interior lets you express your personality while creating an organized, mood-boosting mobile haven.
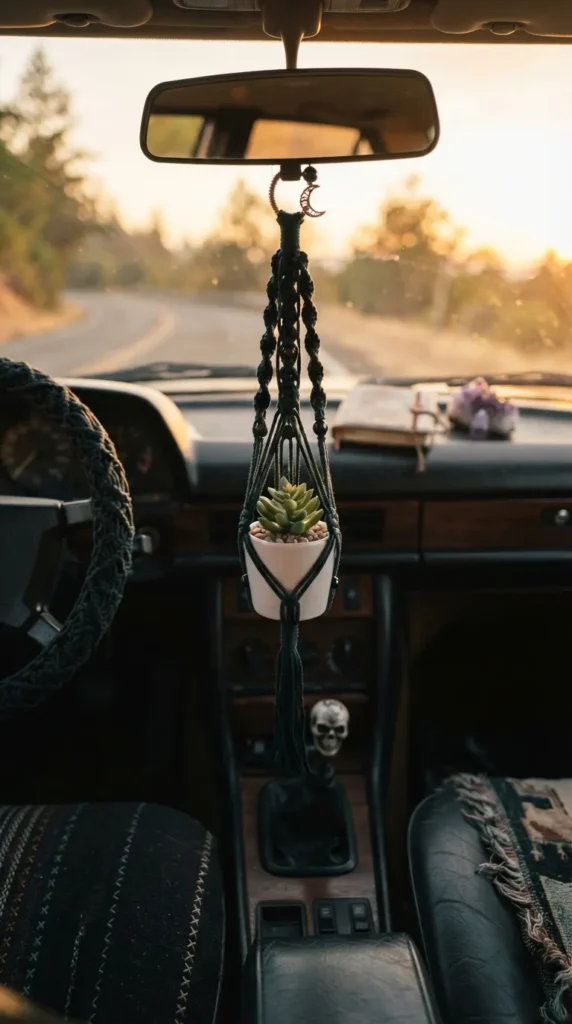
1. Handcrafted Macramé Hanging Plant Pods
Introduction
Hanging micro-macramé plant pods bring natural vitality into your car cabin, infusing boho-chic warmth right at the center console or rear-view mirror area.
What This Idea Means
This concept involves weaving miniature plant holders from natural cotton cord, jute, or soft pastel yarn to cradle tiny faux succulents, air plants, or dried floral bundles. It softens hard plastic car interiors with organic, handmade texture.
How to Make It
- Materials Needed: 2mm cotton macramé cord, 1-inch wooden ring, mini faux ceramic succulent pot (plastic or lightweight resin), measuring tape, scissors.
- Step 1: Cut four strands of cotton cord to 30 inches each. Loop them through the wooden ring using a secure lark’s head knot to create eight working strands.
- Step 2: Group strands into pairs and tie basic square knots roughly 1.5 inches below the ring.
- Step 3: Alternate the cord pairs and tie another row of square knots 1 inch down to form a small diamond mesh basket.
- Step 4: Gather all eight strands together at the bottom and tie a tight gathering knot, trimming excess cord to leave a 1.5-inch fringe tassel.
- Step 5: Place the faux succulent pot inside the woven basket and loop the wooden ring securely over your rear-view mirror stem or utility hook.
Tips & Variations
- Keep cord lengths short (under 4 inches hanging length) to prevent obstruction of driving vision.
- Swap natural cream cord for sage green, terracotta, or dusty rose to match your interior color story.
- Insert preserved moss around the plant base for an ultra-realistic botanical finish.
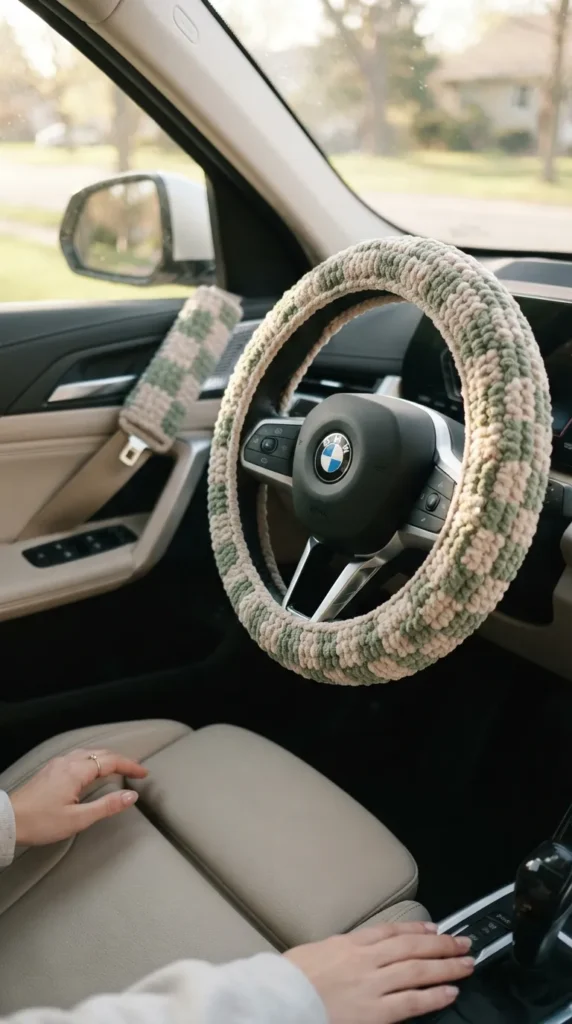
2. Chunky Knit Steering Wheel & Seat Belt Cozy Sets
Introduction
Tactile steering wheel covers and matching seat belt pads knitted from soft chenille or velvet yarn add instant warmth, ergonomic comfort, and cozy cottagecore charm.
What This Idea Means
Dressing your primary touchpoints in soft, hand-knit textiles eliminates freezing-cold or scorching-hot steering wheels while replacing utilitarian black straps with plush, pastel accents.
How to Make It
- Materials Needed: Chunky chenille velvet yarn, 6mm crochet hook (or knitting needles), non-slip silicone backing tape, hook-and-loop velcro strips, fabric glue.
- Step 1: Measure the outer circumference and grip thickness of your steering wheel.
- Step 2: Crochet a long, flexible ribbed strip using half-double crochet stitches until the length matches the wheel circumference under slight tension.
- Step 3: Line the interior side of the knit strip with thin silicone grip dots or non-slip ribbon to prevent slipping.
- Step 4: Wrap the strip firmly around the steering wheel and whipstitch the interior seam shut using a tapestry needle and matching yarn.
- Step 5: For seat belt covers, crochet an 8×6 inch rectangle, stitch hook-and-loop tape onto the long edges, and wrap it around the chest strap.
Tips & Variations
- Prioritize non-slip interior linings for absolute safety and firm steering control.
- Experiment with checkerboard patterns, strawberry motifs, or neutral oatmeal tones.
- Choose washable yarn types so covers can be removed and hand-washed seasonally.
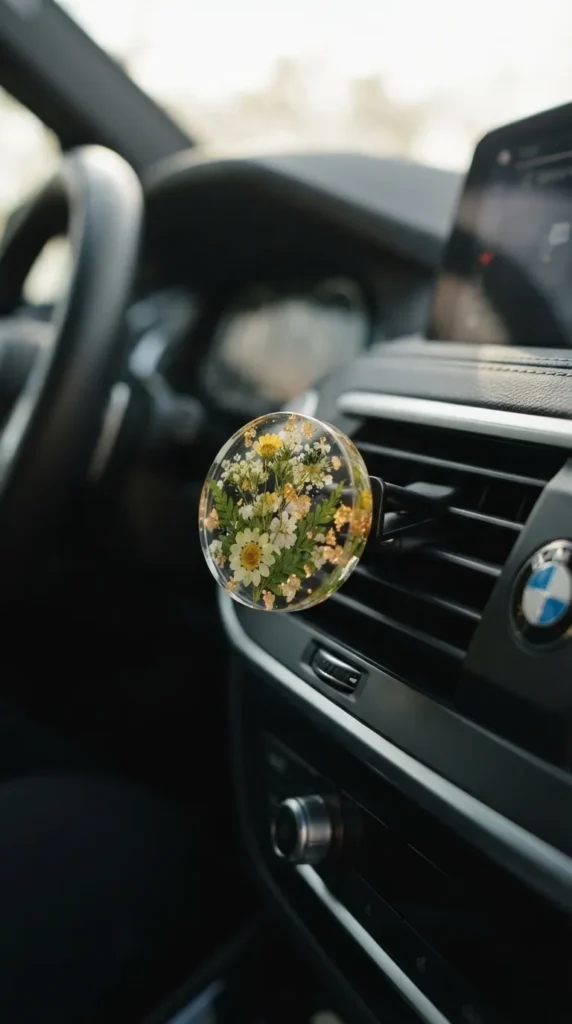
3. Botanical Resin Vent Diffuser Clips
Introduction
Custom air vent clips made from crystal-clear epoxy resin and pressed wildflowers elevate your dashboard by functioning as both visual jewelry and natural aromatherapy diffusers.
What This Idea Means
This decor piece replaces disposable plastic car fresheners with durable, artistic resin pieces encapsulating dried baby’s breath, miniature daisies, and gold leaf flakes, backed by felt scent-absorbing pads.
How to Make It
- Materials Needed: UV resin or two-part epoxy resin, silicone floral/geometric molds, pressed dried flowers, gold flake foil, metal vent clips with flat bezels, essential oils.
- Step 1: Pour a thin base layer of clear resin into the silicone mold and cure under a UV lamp for 60 seconds (or let epoxy settle).
- Step 2: Arrange pressed flowers, dried ferns, and delicate gold flakes carefully using tweezers.
- Step 3: Pour a top coat of crystal-clear resin to dome the piece completely, removing micro-bubbles with a heat gun, then cure fully.
- Step 4: Use high-strength jewelry adhesive or E6000 to bond the resin charm to the flat back plate of a metal air vent clip.
- Step 5: Attach a small piece of natural wool felt to the rear clip structure and infuse with 2-3 drops of lavender or sweet orange essential oil.
Tips & Variations
- Use real dried lavender sprigs or miniature eucalyptus leaves inside the resin for botanical depth.
- Craft seasonal versions: pressed autumn leaves for fall, pastel petals for spring, tiny sea glass for summer.
- Reapply your favorite non-toxic essential oils to the felt pad weekly.
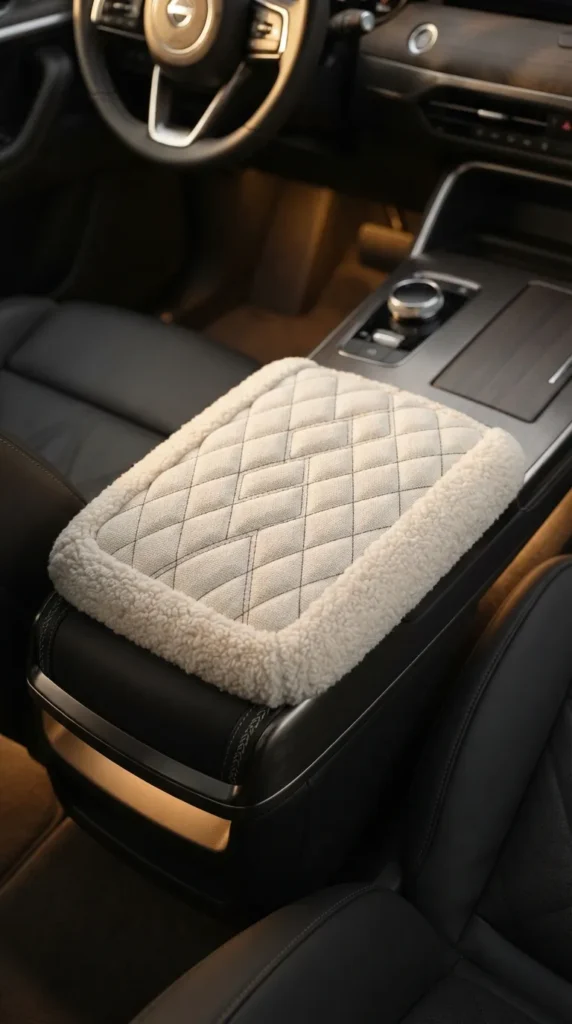
4. Quilted Linen & Teddy Fleece Center Console Armrest Cushions
Introduction
The center console is the focal anchor of your car’s interior; draping it in tailored quilted linen or fluffy teddy boucle gives high-end comfort and textural richness.
What This Idea Means
A custom-fitted, padded console sleeve protects the original upholstery from wear and scratches while tying together front seat styling through soft-touch fabrics and elegant diamond stitching.
How to Make It
- Materials Needed: 1 yard of quilted linen or sherpa fleece fabric, 0.5-inch high-density foam sheet, elastic bands (1 inch wide), matching thread, sewing machine.
- Step 1: Measure the length, width, and depth of your car’s center console lid.
- Step 2: Cut your main fabric and foam sheet to dimensions, adding a 0.5-inch seam allowance around all edges.
- Step 3: Sandwich the foam between the top decorative fabric and a breathable cotton backing, stitching diagonal quilt lines across the surface.
- Step 4: Sew two elastic anchor straps across the underside corners to create a slip-on pocket mechanism.
- Step 5: Slide the elasticized cover over the console lid, smoothing down corners for a snug, bespoke finish.
Tips & Variations
- Add a slim side slip-pocket onto the cover to hold parking cards, sunglasses, or lip balm.
- Contrast neutral beige interiors with cream boucle or soft gingham patterns.
- Choose water-resistant linen blends if you frequently carry to-go iced drinks.
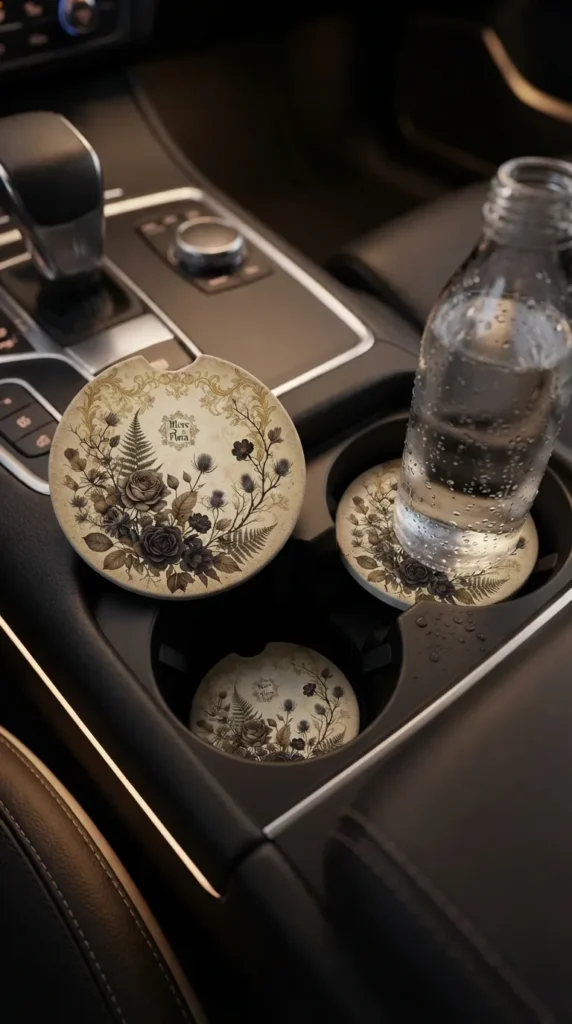
5. Ceramic Stone Coaster Inserts with Floral Decoupage
Introduction
Cup holders often collect dirt, crumbs, and drink condensation; custom ceramic stone coasters with botanical decoupage turn these functional pockets into delightful design surprises.
What This Idea Means
Absorbent unglazed ceramic blanks or natural sandstone discs decorated with delicate floral artwork, sealed against moisture, sit neatly in the bottom of your cup holders.
How to Make It
- Materials Needed: 2.75-inch round unglazed ceramic car coaster blanks with finger notches, floral paper napkins or rice paper, matte Mod Podge, waterproof acrylic sealant, sponge brushes.
- Step 1: Separate the printed top layer of your decorative floral napkin, discarding the plain white backing plies.
- Step 2: Apply a smooth, thin layer of matte Mod Podge over the top face of the ceramic coaster blank.
- Step 3: Gently lay the floral napkin tissue over the wet base, smoothing outward with a soft brush to prevent creases or air bubbles.
- Step 4: Allow to dry completely, then trim excess napkin edges using fine sandpaper in a downward motion.
- Step 5: Apply two coats of waterproof, heat-resistant clear acrylic sealer to protect against hot coffees and icy condensation.
Tips & Variations
- Ensure you buy coaster blanks featuring the semi-circle finger slot for easy removal and cleaning.
- Create themed designs matching your floor mats, such as vintage botanical roses or modern abstract brushstrokes.
- Back the coasters with a thin layer of cork to eliminate vibration rattling on bumpy roads.
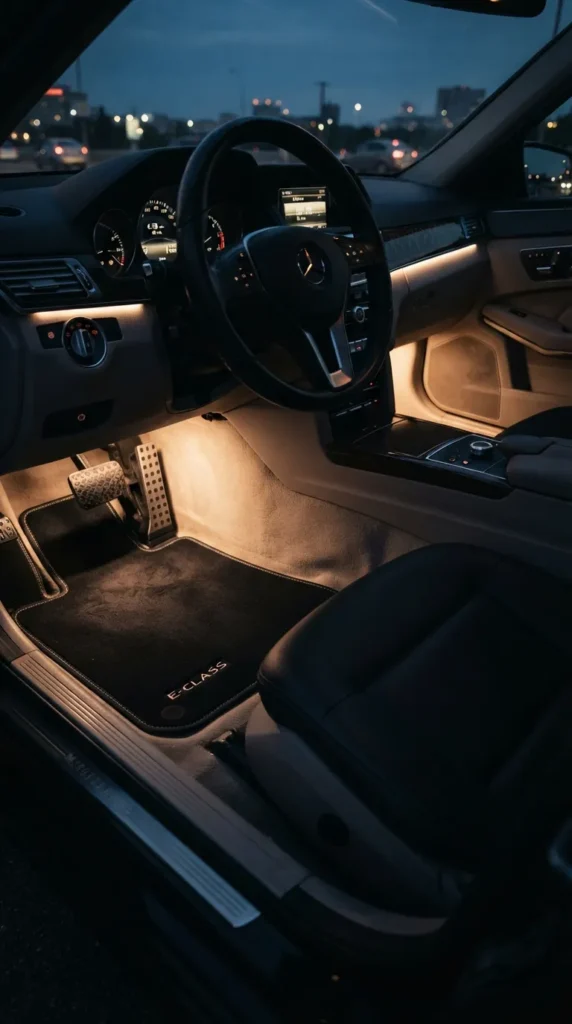
6. Ambient Under-Dash Fairy LED Glow Strips
Introduction
Subtle, warm ambient lighting under the dashboard and beneath front seats creates a serene, relaxing twilight lounge atmosphere during night drives.
What This Idea Means
Instead of harsh, glaring neon tubes, this technique uses diffuse, warm white or soft pastel LED ribbon strips tucked discreetly out of view to illuminate footwells with a gentle glow.
How to Make It
- Materials Needed: 12V USB-powered dimmable COB LED light strip (warm white, soft amber, or pastel pink), adhesive mounting clips, surface cleaning wipes, zip ties.
- Step 1: Thoroughly clean the underside plastic trim panels of your driver and passenger dashboards with isopropyl alcohol wipes.
- Step 2: Peel the backing tape from the COB LED strip and press firmly along the hidden underside ledge of the footwells.
- Step 3: Route the wiring cleanly along interior console seams, tucking excess cable behind plastic trim using adhesive clips.
- Step 4: Run secondary strip extensions beneath the front seat rails to softly illuminate the rear passenger foot areas.
- Step 5: Plug into your car’s USB port or 12V adapter, setting brightness levels low to avoid any night-driving glare.
Tips & Variations
- Choose COB (Chip-on-Board) LED strips rather than standard spaced LEDs to achieve a continuous, seamless glow without dot reflections.
- Select controllers with dimming presets so you can tune the luminance to a relaxing whisper.
- Keep all primary light sources facing downward away from window glass to preserve exterior visibility.
7. Hand-Embroidered Canvas Headrest Collar Accents
Introduction
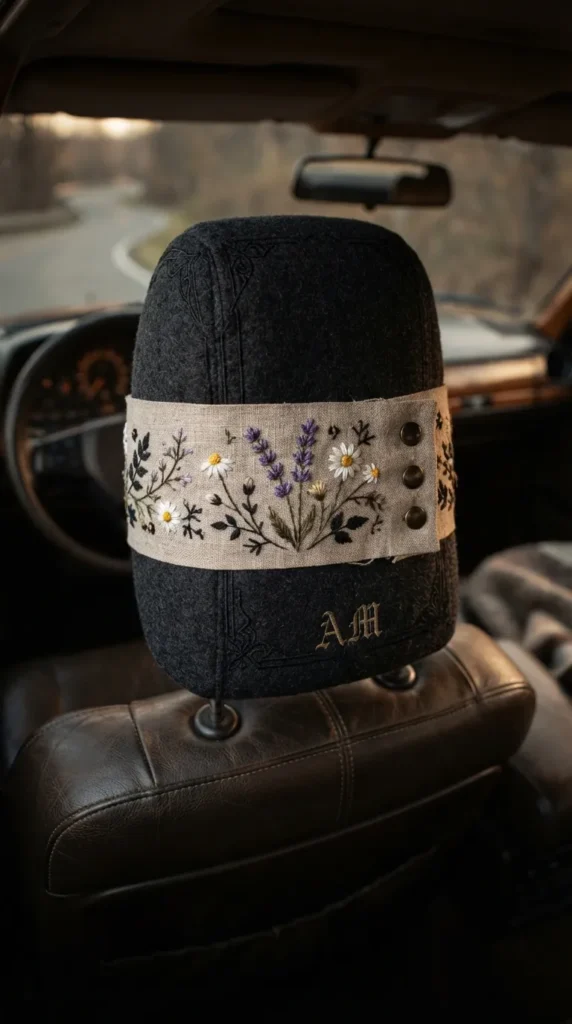
Subtle botanical embroidery wrapped neatly around headrest posts or slipcovers provides bespoke elegance visible from every angle of the cabin.
What This Idea Means
Custom-tailored fabric cuffs or collars crafted from raw linen and stitched with wildflower bouquets, daisies, or celestial constellations that snap gracefully around headrest support bars.
How to Make It
- Materials Needed: Natural raw linen or duck canvas strips (3×8 inches), embroidery floss in earthy tones, embroidery hoop, needles, brass snap fasteners.
- Step 1: Trace minimalist botanical patterns (lavender stalks, chamomile blossoms, or delicate leaves) onto the center of your linen strips.
- Step 2: Secure fabric into an embroidery hoop and hand-stitch designs using French knots, satin stitches, and backstitches.
- Step 3: Fold fabric edges inward by 0.25 inches and hem with a clean topstitch.
- Step 4: Install small brass snap fasteners on opposing ends of the band.
- Step 5: Wrap the embroidered band around your seat’s metal headrest posts and snap securely in place.
Tips & Variations
- Personalize with your initials, zodiac constellations, or inspirational mini quotes.
- Match thread colors to seat piping or dashboard accent colors.
- Make matching sets for both front and rear headrests to achieve a unified theme.
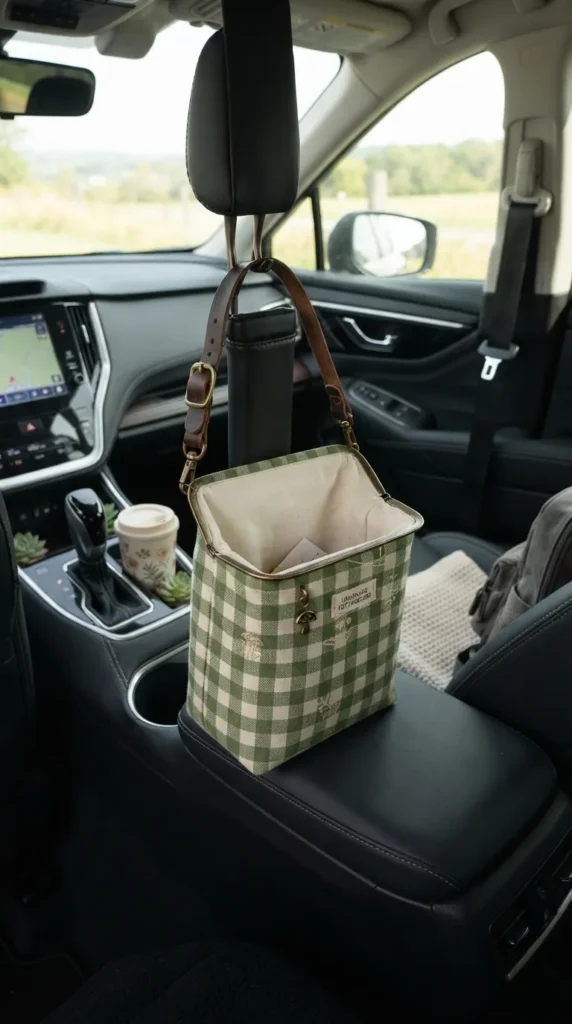
8. Tufted Velvet & Gingham Trash Pod Organizers
Introduction
Car trash cans are essential for cleanliness, but utilitarian plastic bins ruin car aesthetics; a handmade tufted or gingham organizer elevates practical storage into intentional decor.
What This Idea Means
A structured, leak-proof mini container wrapped in rich emerald velvet, soft corduroy, or countryside gingham that hangs discreetly behind the center console or front seat back.
How to Make It
- Materials Needed: 0.5 yard heavyweight gingham canvas or corduroy, waterproof vinyl interior liner fabric, stiff interfacing, adjustable buckled strap, magnetic snap closure.
- Step 1: Cut exterior fabric, stiff interfacing, and vinyl liner into matching rectangular panels (8×10 inches with 3-inch gussets).
- Step 2: Fuse interfacing to exterior fabric to give the pouch self-standing structural integrity.
- Step 3: Stitch the vinyl liner inside to ensure complete protection against accidental liquid spills.
- Step 4: Attach an adjustable nylon or fabric strap with a snap buckle at the top seam.
- Step 5: Loop the strap around the center console hinge or front headrest bars, letting the bag sit flat against the back panel.
Tips & Variations
- Use removable, biodegradable mini liner bags inside for quick, clean emptying.
- Add side mesh pockets for extra sanitizing wipes and tissues.
- Switch fabrics seasonally—warm mustard corduroy for autumn, pastel gingham for spring.
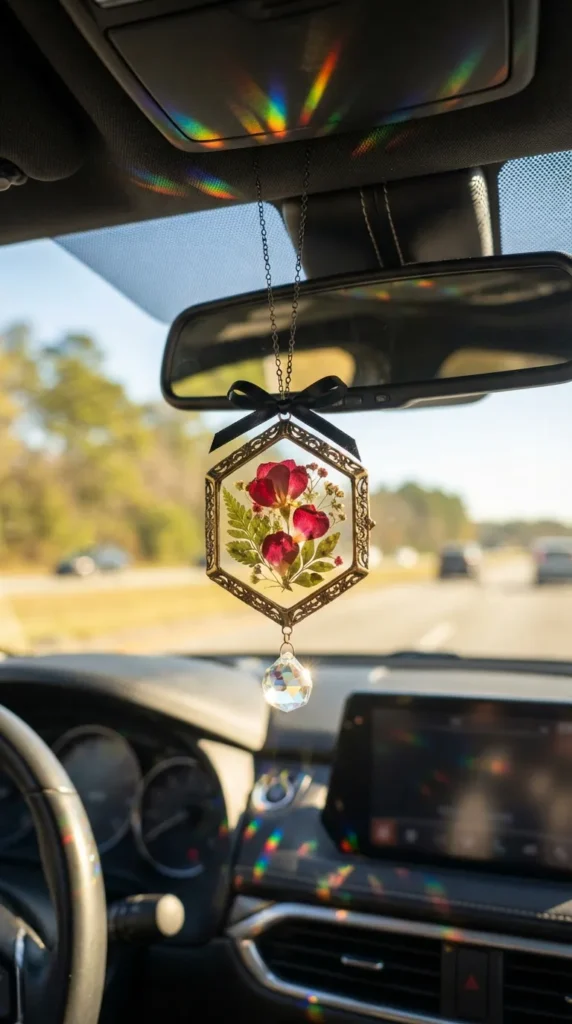
9. Pressed Flower Suncatcher Rear-View Mirror Medallions
Introduction
Catching golden-hour sunbeams, a delicate glass-and-copper framed suncatcher medallion turns natural outdoor light into dancing cabin highlights.
What This Idea Means
A mini double-glass charm encapsulating delicate dried flowers, fern fronds, and micro-crystals suspended on a short beaded chain directly below the rear-view mirror.
How to Make It
- Materials Needed: Mini geometric hinged brass glass frame (2-inch hexagon or circle), pressed dried flora, copper foil tape, small faceted crystal bead, soft suede cord.
- Step 1: Open the glass frame and carefully lay down pressed petals and fern foliage using tweezers to create a balanced micro-collage.
- Step 2: Close the glass securely, ensuring no botanical edges protrude past the seal.
- Step 3: Thread a mini faceted suncatcher crystal onto a short piece of brass wire attached to the bottom loop of the frame.
- Step 4: Thread soft suede cord or gold chain through the top loop.
- Step 5: Tie the cord securely around your mirror base, making sure it hangs high and tight to maintain an unobstructed road view.
Tips & Variations
- Use iridescent glass to cast rainbow prism spots across the interior roof lining.
- Combine birth month pressed flowers for a personalized touch.
- Keep the entire medallion assembly under 3 inches in total drop length.
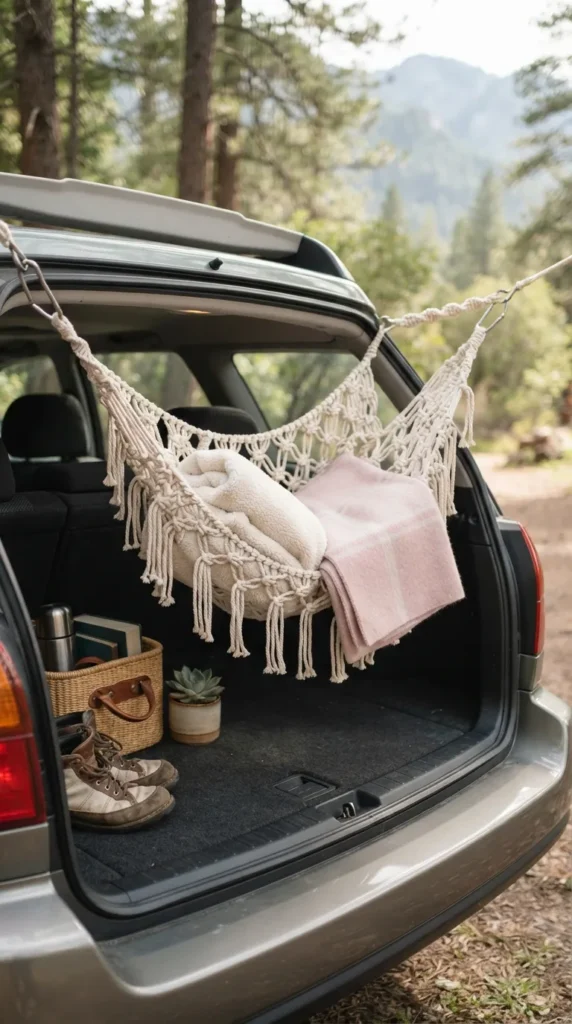
10. Tiered Macramé Trunk Cargo & Blanket Hammock
Introduction
The trunk and cargo area often turns into an unorganized catch-all; a suspended macramé storage net provides structured, photogenic organization for cozy travel blankets and pillows.
What This Idea Means
A woven bohemian cargo hammock mounted across the rear trunk space that cradles extra throws, picnic rugs, or emergency umbrellas off the cargo floor.
How to Make It
- Materials Needed: 4mm braided cotton rope, 4 heavy-duty carabiner clips, 2 wooden dowel rods (optional for structure), measuring tape, scissors.
- Step 1: Measure the interior width between the rear trunk tie-down anchor hooks.
- Step 2: Create a wide diamond-mesh cargo net by knotting horizontal and vertical cords using alternating square knots.
- Step 3: Reinforce the outer perimeter with thick double-half-hitch border cords.
- Step 4: Attach heavy-duty carabiner clips to all four outer corners of the net.
- Step 5: Clip the hammock securely onto the existing cargo rings or back seat tether anchors in your trunk.
Tips & Variations
- Store rolled rolled fleece blankets, travel neck pillows, or canvas tote bags cleanly inside.
- Choose dyed cotton cords like deep olive green or charcoal to prevent visible road dust.
- Weave wooden decorative beads into the outer fringe for an elevated boho look.
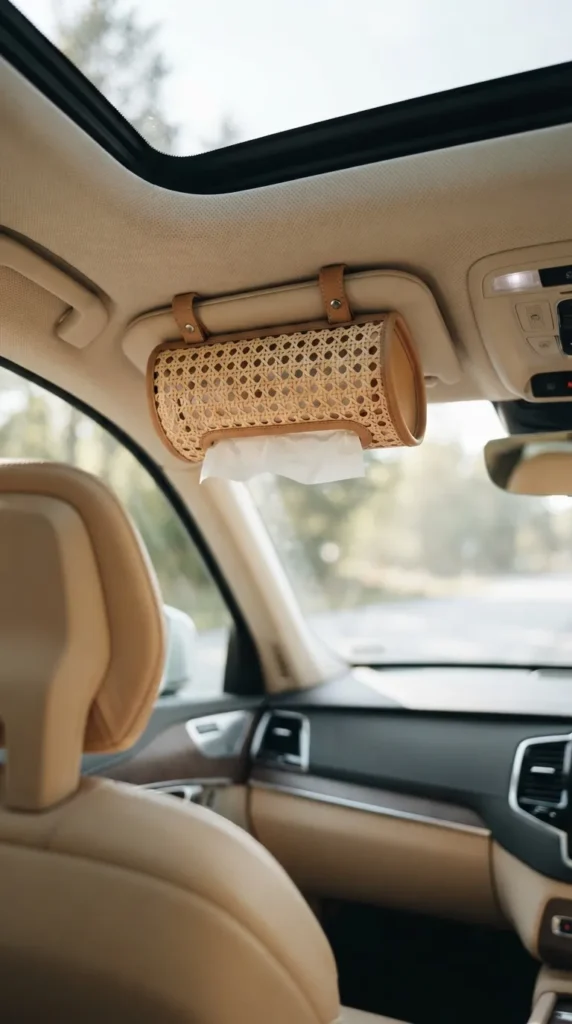
11. Minimalist Rattan & Woven Cane Visor Tissue Holder
Introduction
Tissue boxes sliding across the dashboard are messy; a woven natural cane visor case mounts essentials overhead in clean, Scandinavian-inspired style.
What This Idea Means
A slim, structured dispenser crafted from woven open-mesh cane webbing and vegan leather that clips directly to your sun visor for seamless, one-handed access.
How to Make It
- Materials Needed: Pre-woven natural cane webbing (fine open box weave), tan vegan leather trim, heavy-duty elastic bands, fabric glue, heavy thread.
- Step 1: Soak cane webbing in warm water for 15 minutes to make it pliable, then cut to fit standard travel tissue pack dimensions (9×5 inches).
- Step 2: Cut an oval dispensing opening in the center of the cane panel and bind its edges with stitched leather piping.
- Step 3: Stitch the cane front to soft vegan leather side and back panels, leaving a bottom snap-flap for refilling.
- Step 4: Sew two durable elastic bands onto the rear panel spaced to fit your sun visor thickness.
- Step 5: Slide the holder onto the passenger-side sun visor and insert a fresh pack of pocket facial tissues.
Tips & Variations
- Ensure the placement on the visor does not block the vanity mirror when opened.
- Pair with a matching cane-weave registration and document holder in your glove box.
- Use light honey or natural bleached rattan shades to brighten dark automotive ceilings.
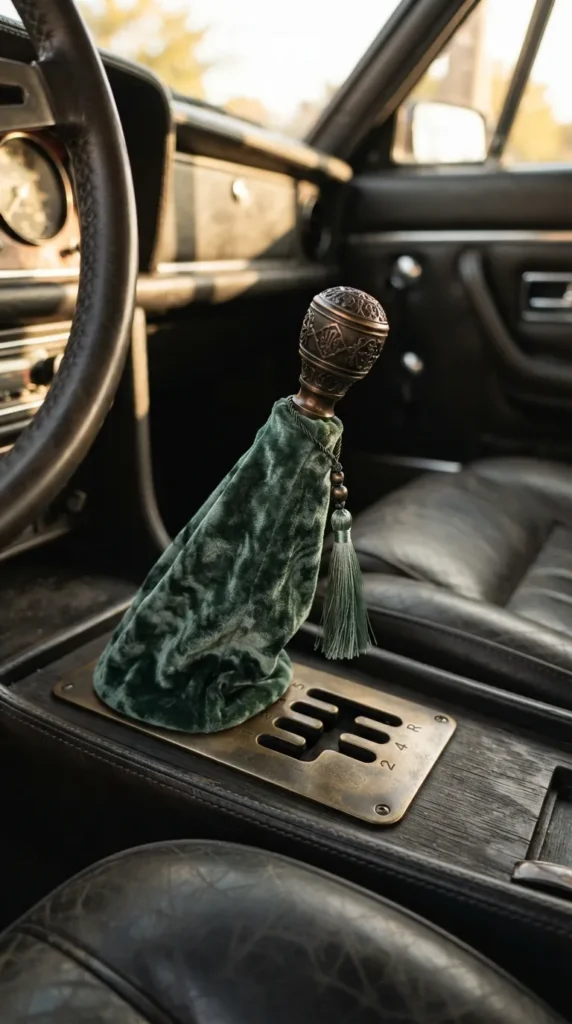
12. Soft Velvet & Tassel Gear Shift Boot Sleeve
Introduction
Transforming the utilitarian rubber or faux leather around your center console gear shifter with a bespoke velvet boot and matching tassel adds vintage flair.
What This Idea Means
Replacing or covering the stock gear shift skirt with luxurious, tailored upholstery fabric such as crushed velvet, heavyweight corduroy, or heritage plaid.
How to Make It
- Materials Needed: 0.5 yard crushed velvet or durable jacquard upholstery fabric, elastic cord, heavy-duty sewing thread, mini decorative tassel charm.
- Step 1: Carefully unclip the stock gear shift trim collar according to your car model’s specifications.
- Step 2: Use the original boot shape as a pattern template, tracing four tapered triangular panels onto your chosen fabric.
- Step 3: Stitch the four side panels together inside out, pressing the seams flat for clean structure.
- Step 4: Hem the top neck opening with an elastic loop designed to hug the shifter shaft firmly.
- Step 5: Reinstall the bottom frame back into the center console base and loop a matching silk tassel around the shift knob base.
Tips & Variations
- Ensure the material has sufficient slack so the gear selector moves effortlessly through all gear gates.
- Opt for rich jewel tones like sapphire blue, forest green, or burgundy.
- Add contrast piping along the four corner seams for an artisanal tailoring look.
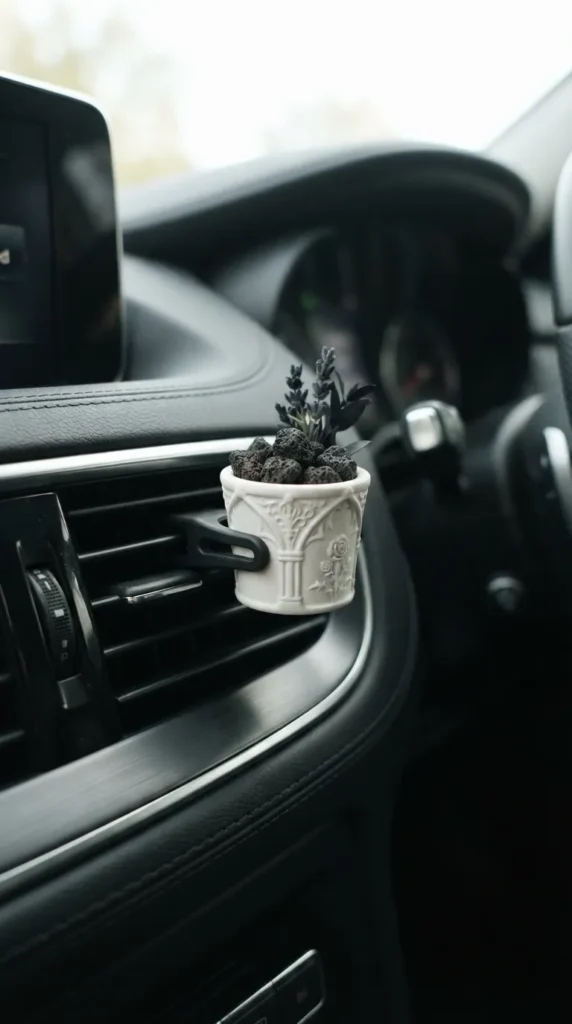
13. Aesthetic Pastel Ceramic Vent Fragrance Stone Pots
Introduction
Miniature unglazed ceramic plant pots mounted on your air conditioning vents offer a tactile, minimalist platform for custom essential oil scents.
What This Idea Means
Tiny, matte-glazed ceramic vessels containing porous volcanic lava stones or terracotta beads that clip to air louvers, gently circulating scent as air flows.
How to Make It
- Materials Needed: Mini lightweight ceramic dollhouse pots (1.5 inches tall), universal silicone-coated vent clips, black volcanic lava rock beads, epoxy adhesive, pure essential oils.
- Step 1: Lightly sand the flat rear exterior of the mini ceramic pot for optimal adhesive bonding.
- Step 2: Glue a silicone vent clip securely to the back of the pot using two-part epoxy; allow 24 hours to cure fully.
- Step 3: Place 3-4 small porous volcanic lava stones inside the miniature ceramic vessel.
- Step 4: Add 3 drops of your chosen essential oil blend (such as vanilla, cedarwood, or bergamot) onto the porous rocks.
- Step 5: Slide the clip gently onto your dashboard air vent slats.
Tips & Variations
- Switch out scent profiles easily by washing the lava beads in warm water and drying.
- Paint the mini ceramic pot exterior with abstract minimalist geometric patterns.
- Keeps vents visually neat compared to bulky branded commercial fresheners.
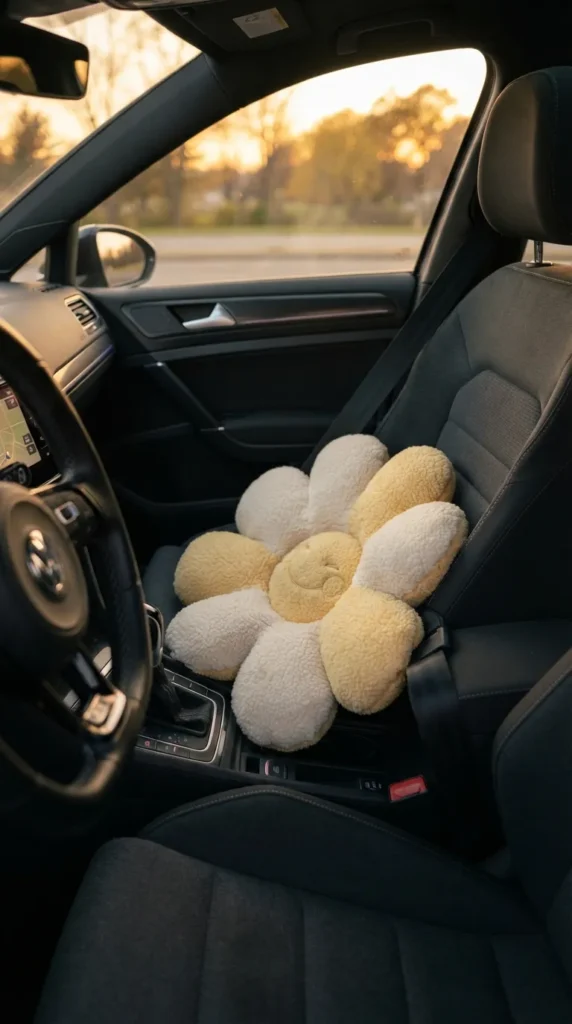
14. Plush Daisy & Cloud Lumbar Support Pillows
Introduction
Long commutes cause lower back strain; styling your back seats with custom plush daisy or cloud-shaped velvet lumbar cushions combines ergonomics with whimsical cuteness.
What This Idea Means
Ergonomically proportioned accent cushions sewn in playful floral or cloud silhouettes, filled with supportive shredded memory foam to support your spine while driving.
How to Make It
- Materials Needed: 1 yard butter-yellow and ivory sherpa or short-pile minky fabric, hypoallergenic memory foam filling, fabric scissors, sewing machine.
- Step 1: Draw a symmetrical five-petal daisy or billowy cloud template (approximately 14×14 inches) on paper.
- Step 2: Trace and cut two matching fabric pieces, pinning right sides facing inward.
- Step 3: Sew along the perimeter leaving a 3-inch gap on one edge for filling.
- Step 4: Turn the cushion right-side out and firmly stuff with shredded memory foam until ergonomically supportive.
- Step 5: Hand-stitch the opening closed using an invisible ladder stitch, then place centered against the seat lumbar curve.
Tips & Variations
- Install a discrete rear elastic strap to keep the cushion anchored securely to the seat back.
- Mix pastel petal colors like dusty rose, lavender, butter yellow, and mint.
- Use removable zippered covers to make machine washing effortless.
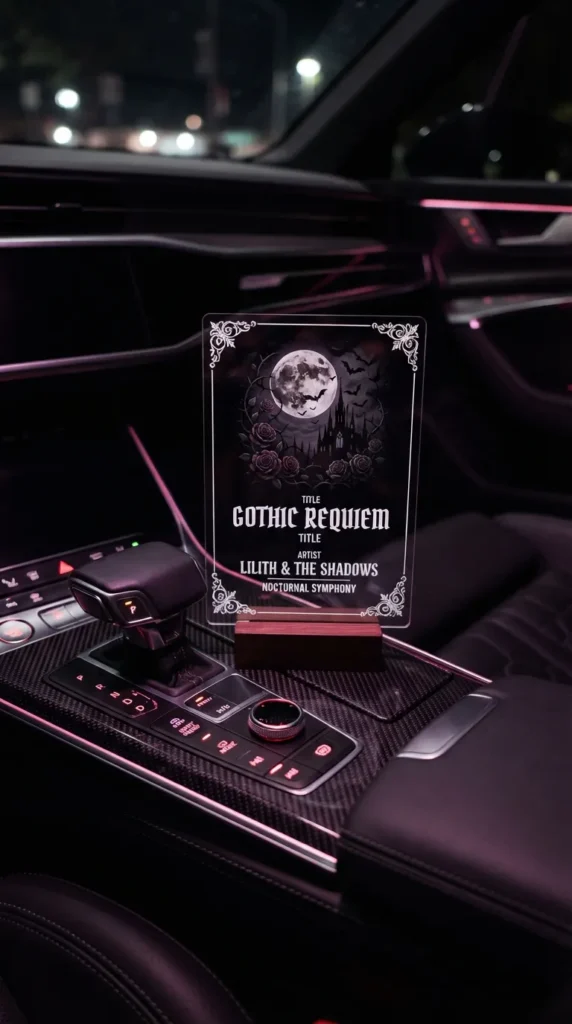
15. Custom Acrylic Song Plaque & Aesthetic Dashboard Display
Introduction
A personalized clear acrylic plaque featuring your favorite road-trip anthem, album art, and scannable code brings contemporary music culture directly onto your console.
What This Idea Means
A sleek, transparent acrylic stand laser-engraved or UV-printed with musical notation, album cover art, and custom timestamps, mounted cleanly with non-marking gel pads.
How to Make It
- Materials Needed: 4×6 inch clear 3mm acrylic sheet, printable transparent decal film, scannable song code graphic, clear silicone automotive mounting tape, acrylic edge polish.
- Step 1: Design your artwork featuring chosen album cover imagery, song title, artist, and scannable Spotify-style sound wave code.
- Step 2: Print the high-contrast graphic onto transparent decal film, smoothing it seamlessly onto the rear face of the acrylic sheet.
- Step 3: Buff the acrylic perimeter edges with a polishing cloth to create crystal-clear light refraction.
- Step 4: Place small, invisible clear nano-gel adhesive pads on the bottom mounting edge.
- Step 5: Affix the plaque securely to a flat, non-airbag area of your center lower console.
Tips & Variations
- Never place acrylic plaques near steering wheel hubs or dashboard zones containing deployable airbags.
- Pick songs that evoke unforgettable memories, epic summer road trips, or calming vibes.
- Add tiny battery-powered warm micro-LED base lighting for nighttime glow.
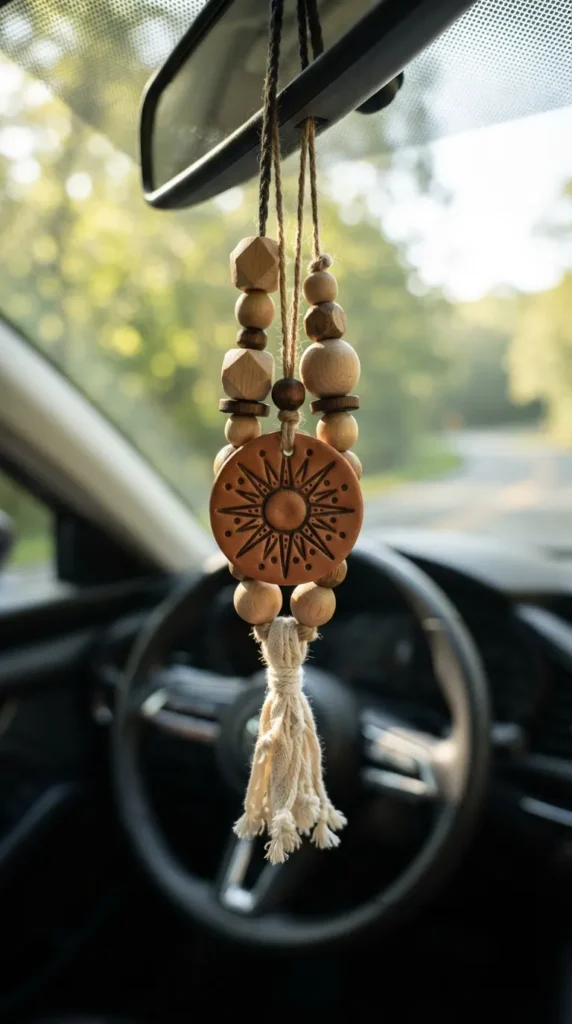
16. Natural Wood Bead & Clay Diffuser Rear-View Charms
Introduction
Raw turned wood beads paired with hand-sculpted terracotta clay charms provide a grounded, organic earthy aesthetic while acting as passive natural scent diffusers.
What This Idea Means
A handcrafted minimalist pendant combining raw beechwood geometry, natural air-dry terracotta discs, and soft linen tassels that absorb essential oils and hang neatly.
How to Make It
- Materials Needed: Assorted raw unvarnished beechwood beads (geometric and round), terracotta air-dry clay, stamp tools, waxed linen cord, sandalwood essential oil.
- Step 1: Roll out terracotta clay to 0.25-inch thickness, cut out a clean 2-inch circular medallion, stamp with a minimalist sunburst, and poke a top hole.
- Step 2: Allow clay to cure completely for 48 hours until hardened and porous.
- Step 3: String the wooden beads and clay medallion in an aesthetic balanced sequence onto waxed linen cord.
- Step 4: Finish the bottom end with a compact 1-inch raw cotton tassel.
- Step 5: Knot the cord tightly at a short length around your mirror neck, dabbing two drops of sandalwood oil onto the terracotta surface.
Tips & Variations
- Keep beads unvarnished so the wood and clay retain full scent-absorbing capacity.
- Alternate between geometric hexagons and smooth spheres for visual intrigue.
- Reapply seasonal essential oils whenever the natural scent begins to fade.
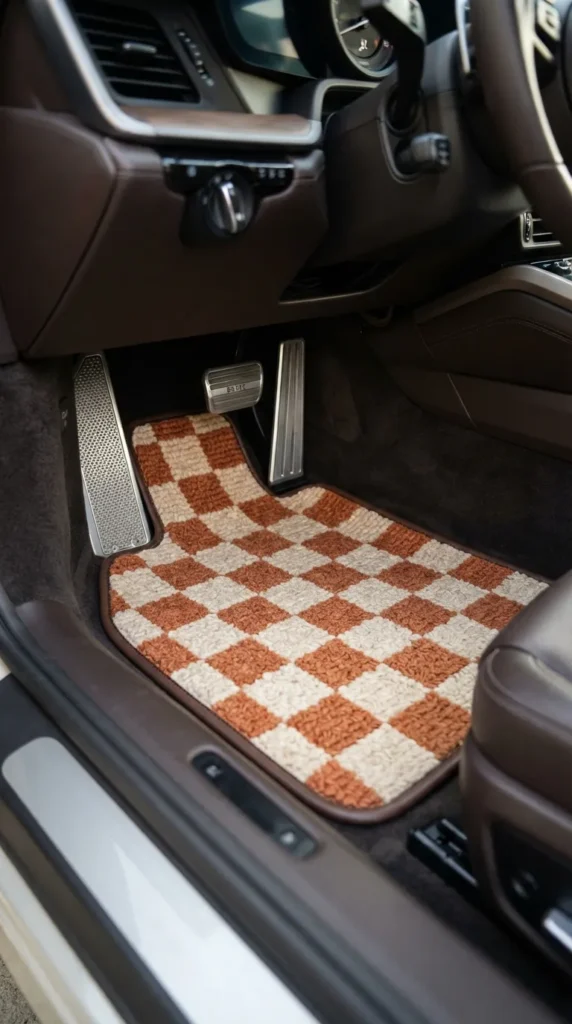
17. Handwoven Checkerboard Floor Mat Overlays
Introduction
Standard black rubber or carpet floor mats feel industrial; layering them with heavy-duty woven cotton checkerboard runners elevates your footwells into curated style statements.
What This Idea Means
Custom-cut, non-slip backed woven textile mats in retro checkerboard, Aztec, or Scandinavian patterns laid over existing mats for easy cleaning and instant warmth.
How to Make It
- Materials Needed: Heavyweight woven cotton jacquard or canvas rug runner (checkerboard weave), non-slip rubber rug underlay, heavy-duty fabric edge binding tape, industrial scissors.
- Step 1: Remove your stock car floor mats and trace their exact contours onto the back of your woven runner.
- Step 2: Cut the runner 0.5 inches smaller than the factory mat perimeter to ensure pedals and seat rails remain unobstructed.
- Step 3: Sew or heat-bond heavy-duty edge binding tape along all cut borders to prevent fraying.
- Step 4: Adhere the non-slip rubber grip layer across the entire bottom surface using high-tack fabric adhesive.
- Step 5: Lay the custom mats into driver and passenger footwells, confirming zero interference with brake, clutch, or gas pedals.
Tips & Variations
- Safety first: Always ensure the driver-side mat is anchored firmly and cannot slide toward foot pedals.
- Choose earth-toned palettes like cream/sage or beige/terracotta to hide minor daily dust.
- Spot-clean with mild carpet foam or toss passenger mats in the washing machine on gentle cycle.
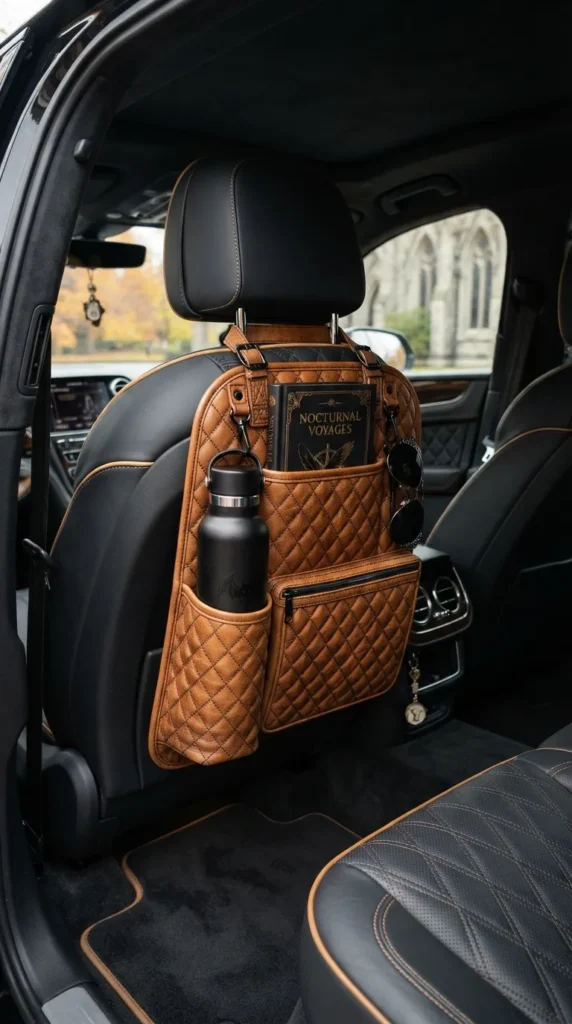
18. Quilted Vegan Leather Backseat Organizing Caddies
Introduction
Turn chaotic backseat clutter into an organized, boutique display using tailored, diamond-quilted vegan leather storage pockets for books, tablets, and water bottles.
What This Idea Means
A sleek backseat hanging caddy that matches luxury automotive interiors, constructed with structured compartments, brass hardware, and quilted pockets.
How to Make It
- Materials Needed: 1 yard diamond-quilted PU leather fabric, matching edge binding ribbon, elastic webbing, heavy-duty brass snaps, quick-release headrest clips.
- Step 1: Cut a main backing panel (16×22 inches) with rounded lower corners to match the contour of front seat backs.
- Step 2: Cut and construct multi-tiered utility pockets for specific items: tablet sleeve, drink insulated cylinder, umbrella loop, and sunglasses pocket.
- Step 3: Stitch pockets onto the main backing panel using strong nylon upholstery thread and clean topstitching.
- Step 4: Install top adjustable straps with quick-release buckles to loop around headrest posts.
- Step 5: Attach bottom elastic anchor hooks to slip under the lower seat frame, holding the organizer taut and flush.
Tips & Variations
- Line the dedicated drink pocket with thermal foil insulation to keep beverages cool.
- Use colors that complement your upholstery—tan cognac, espresso brown, or off-white.
- Keep emergency charging cables and notebooks neatly tucked inside for functional road trips.
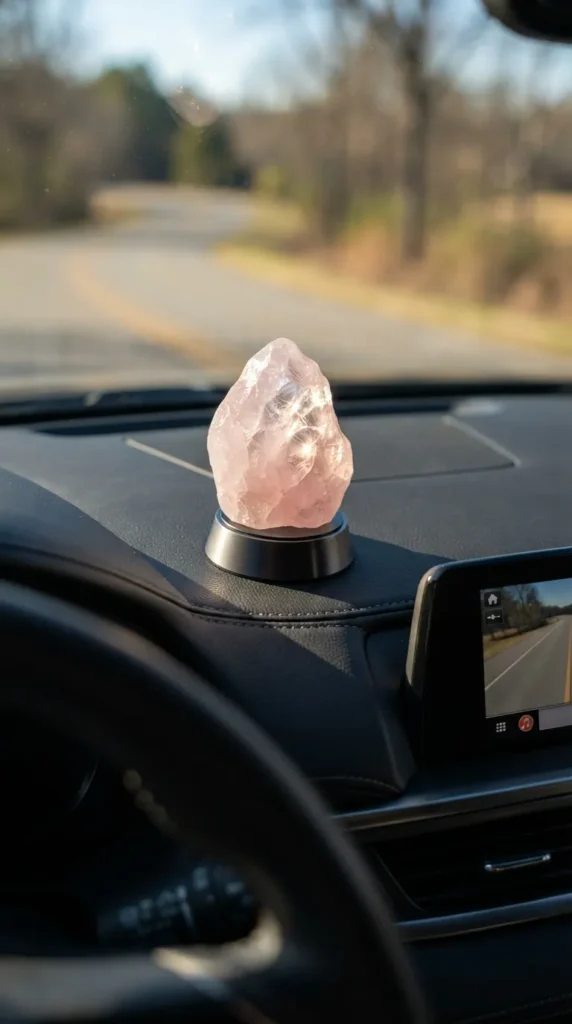
19. Magnetic Dashboard Crystal & Mineral Specimens
Introduction
Bring the grounding energy and natural brilliance of raw minerals into your car by mounting smooth amethyst clusters, rose quartz, or raw jade on magnetic mounts.
What This Idea Means
Small, smooth natural crystal specimens attached securely to your dashboard using discreet magnetic baseplates, allowing safe removal for cleaning.
How to Make It
- Materials Needed: Flat-bottomed raw or polished crystals (rose quartz, green aventurine, or clear quartz under 2 inches), neodymium disc magnets, two-part metal-to-stone epoxy, magnetic dashboard dash discs.
- Step 1: Select crystals with smooth, stable flat bases and inspect for no sharp, loose crystal fragments.
- Step 2: Mix two-part structural epoxy and adhere a small, strong neodymium disc magnet to the bottom of the crystal.
- Step 3: Allow adhesive to cure undisturbed for a full 24 hours.
- Step 4: Adhere a thin, non-damaging steel mounting disc onto a flat, non-functional dashboard area using automotive 3M tape.
- Step 5: Place the magnetized crystal firmly onto the steel base plate.
Tips & Variations
- Keep specimens small and positioned low, out of windshield sightlines and clear of airbag zones.
- Choose soothing stones: Rose Quartz for warmth, Green Aventurine for optimism, Fluorite for focus.
- Easily pull the crystal off the magnetic mount to dust or clean your dashboard.
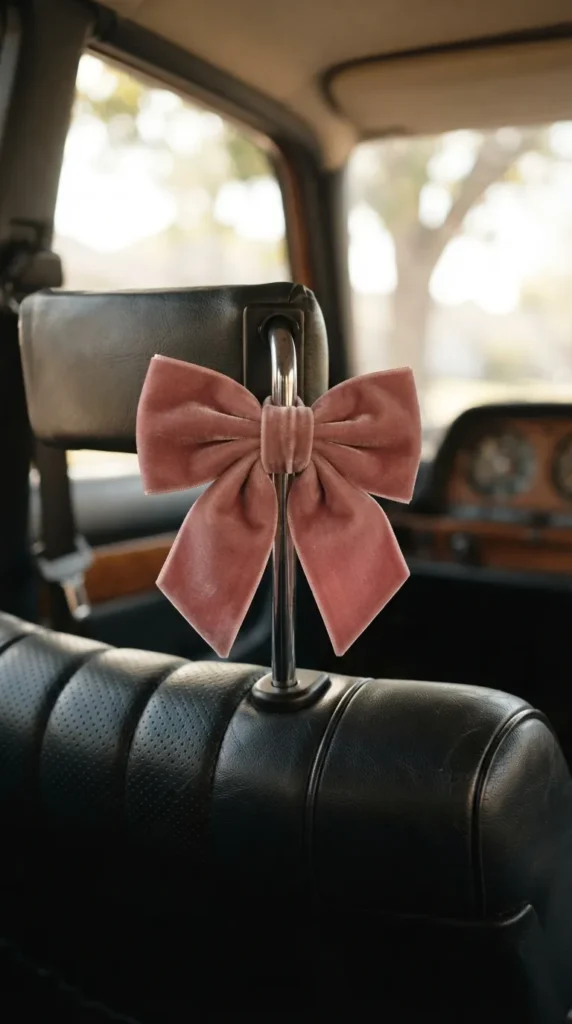
20. Tailored Velvet Seat Belt Bow & Charm Accents
Introduction
Adding tailored velvet bows or mini fabric rosette clips to upper seat belt anchorage points softens the interior look with cute, vintage-inspired personality.
What This Idea Means
Charming, clip-on accessories made of plush double-faced velvet ribbon and antique metal charms that sit near the upper seat pillar without hindering belt retraction.
How to Make It
- Materials Needed: 1.5-inch wide premium double-faced velvet ribbon, soft snap-button backing strips, vintage brass charms (such as stars or blossoms), needle and thread.
- Step 1: Cut velvet ribbon into a 10-inch length and fold into a structured classic bow silhouette.
- Step 2: Stitch the center knot tightly, securing a miniature brass charm dangling just beneath the central fold.
- Step 3: Sew a soft fabric strap with flat snaps to the back of the bow.
- Step 4: Snap the bow gently around the upper fixed seat belt shoulder guide (never around the active sliding belt web).
- Step 5: Adjust angle to sit flush against the pillar trim.
Tips & Variations
- Fasten only to static pillar anchors or headrest bars to ensure smooth, unhindered seat belt safety function.
- Swap bow shades to celebrate seasons: deep burgundy for winter, dusty rose for spring, golden mustard for autumn.
- Pair with matching velvet scrunchies wrapped around gear handles or glove compartment latches.