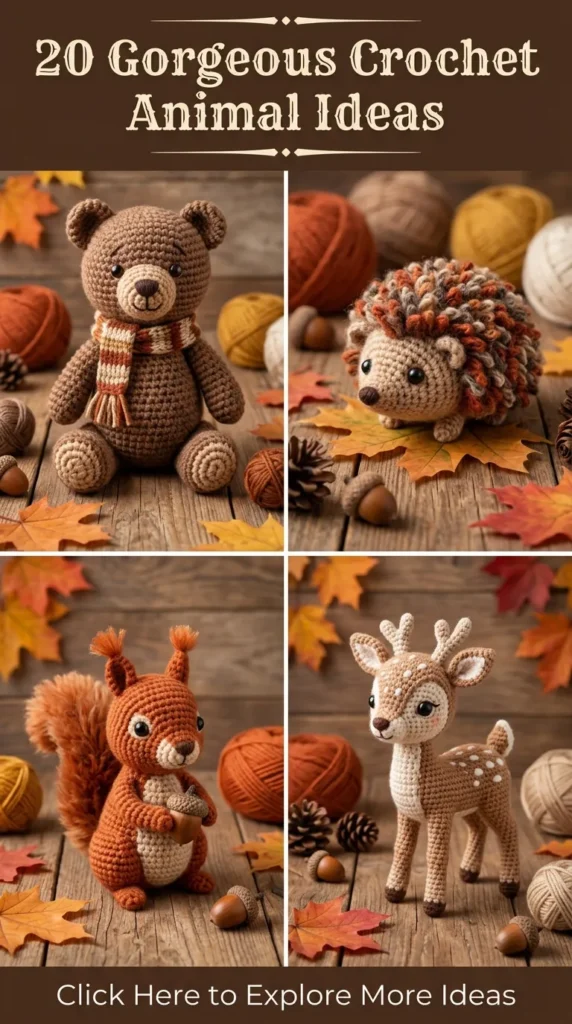
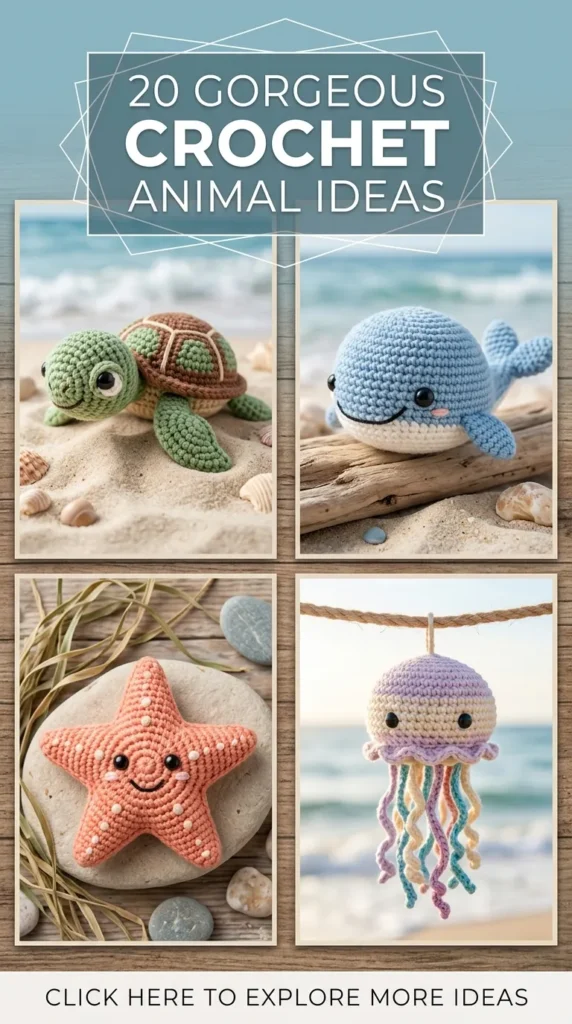
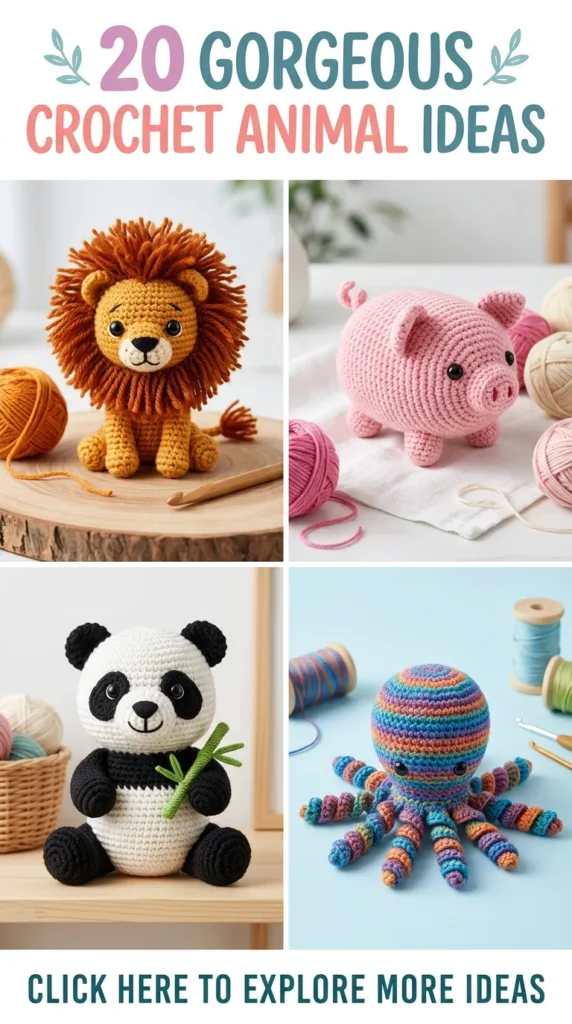
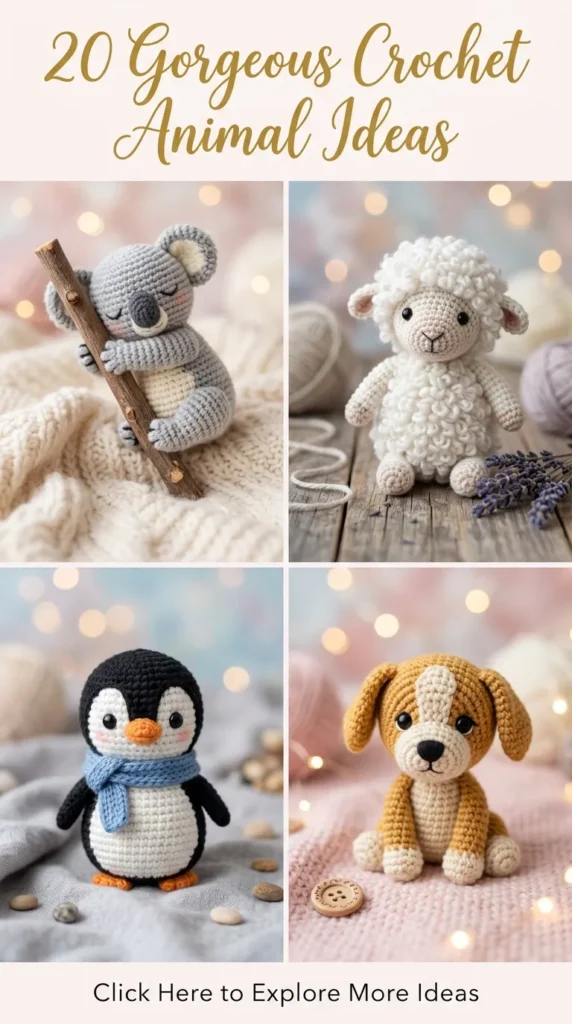
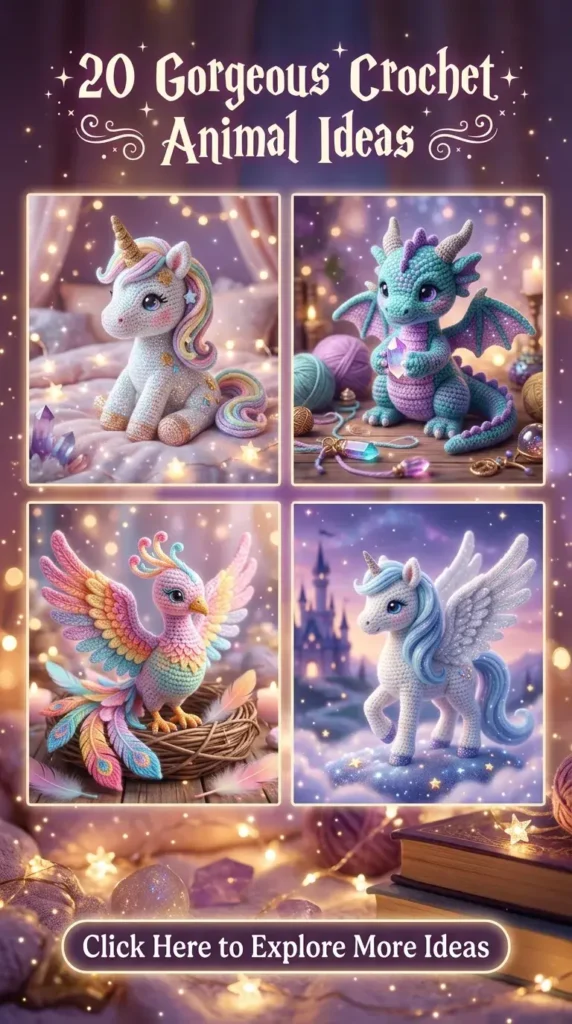
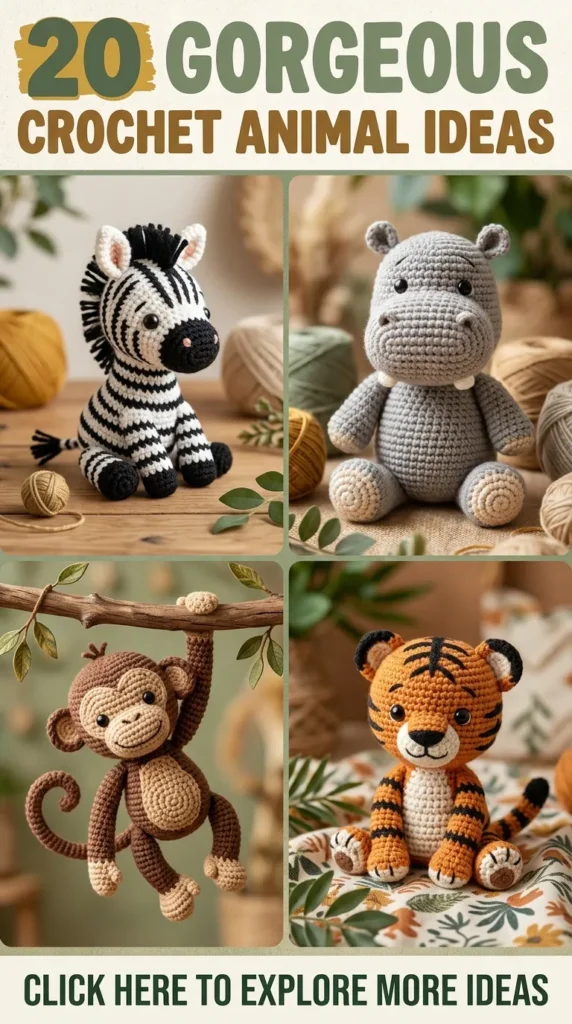
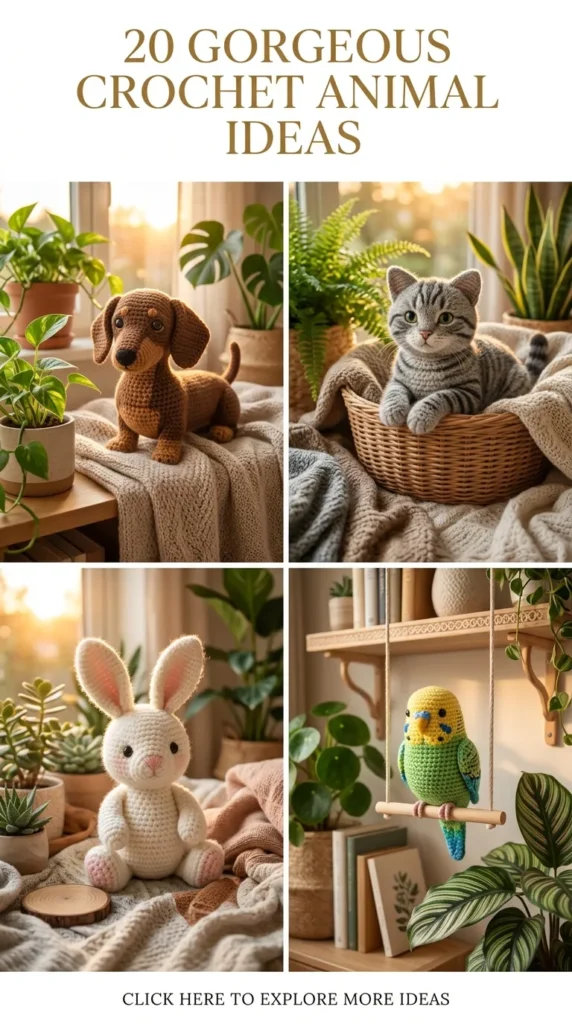
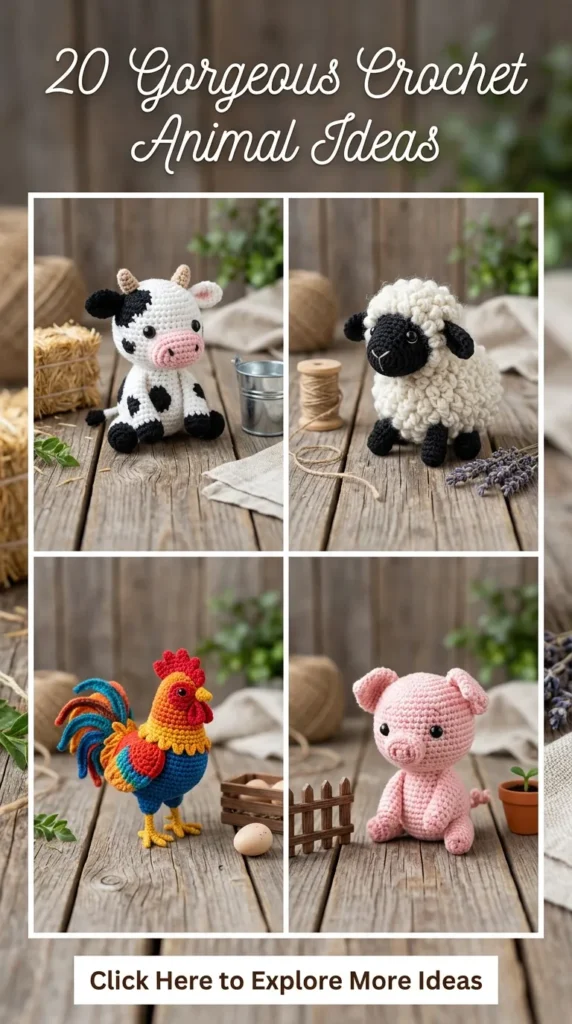
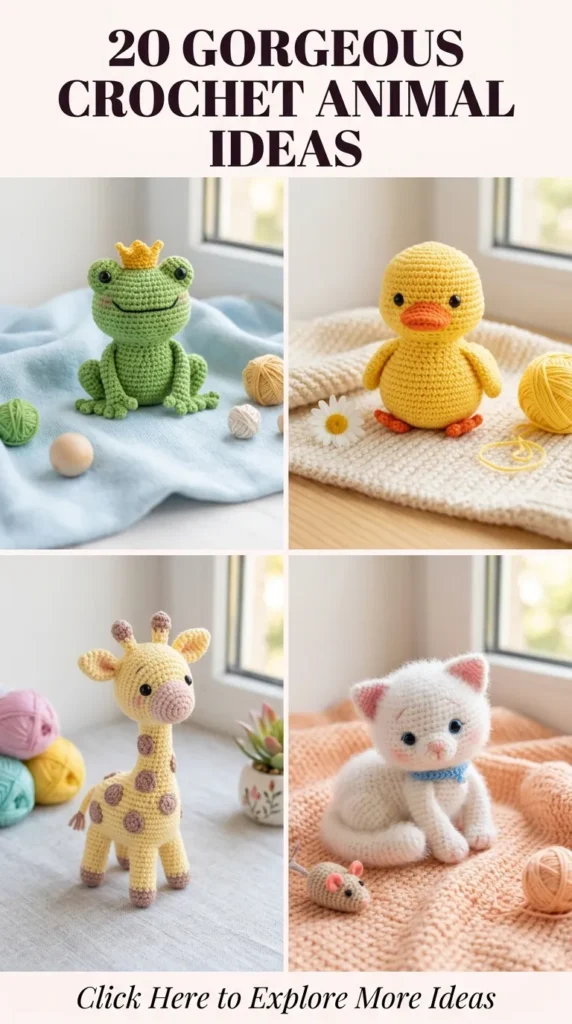
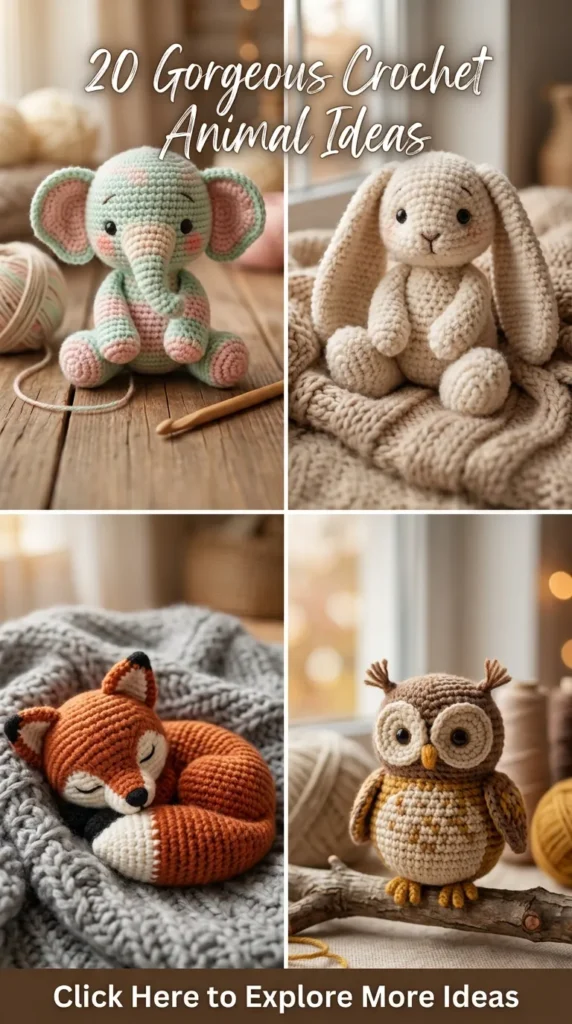
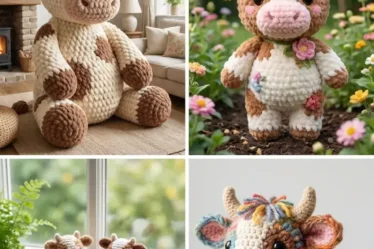
Crochet has evolved far beyond basic stuffed toys and novelty trinkets. Contemporary fiber artists are embracing refined palettes, luxury natural fibers, and sculptural techniques to turn classic amigurumi into museum-worthy heirloom pieces. Whether you are decorating a minimalist nursery, staging a cottagecore-inspired shelf display, or seeking a deeply rewarding mindful craft project, elegant crochet animals offer an extraordinary blend of tactile warmth and artistic sophistication.
This comprehensive guide explores 20 curated crochet animal projects designed specifically for the aesthetic maker. Each concept focuses on premium textures, elevated color stories, delicate finishes, and modern interior styling.
1. Vintage Cottagecore Heirloom Bunny
        (\__/)
        (•ㅅ•)  ~ Soft linen stitches & lace pinafores
       /   づ
Introduction
A nod to classic European storybook illustrations, the vintage heirloom bunny combines muted earthy tones with delicate linen textures. Rather than using bright acrylics, this piece relies on washed oatmeal, flax, and unbleached cotton yarns to create a timeless, comforting treasure.
What This Idea Means
This concept represents slow living and nostalgia. It is an artful keepsake meant to be passed down through generations or displayed on an antique wooden bookshelf alongside pressed botanical frames and linen-bound books.
How to Make It
- Head and Body: Work in continuous spirals using single crochet ($sc$) with a smaller hook than recommended for the yarn to ensure tight, seamless stitches where stuffing cannot peek through.
- Shaping the Muzzle: Incorporate subtle short rows or concentrated increases ($inc$) on the lower half of the facial sphere to create gently rounded cheeks.
- Elongated Ears: Crochet long, slender oval ears that drop naturally. Work an inner row of reverse single crochet (crab stitch) along the outer edge for crisp structure.
- Facial Sculpting: Before fastening off, use a long tapestry needle with matching embroidery floss to pull through from the base of the neck to the inner eye corners, indenting the eye sockets slightly before placing matte dark glass or embroidered eyes.
- Lace Pinafore: Switch to a 2.00 mm hook and fine ecru crochet thread. Create a simple empire-waist apron using double crochet clusters and picot edging, tying it at the back with silk habotai ribbon.
Tips and Variations
- Weighting: Insert a small muslin pouch filled with clean glass poly-pellets into the lower torso to give the bunny a comforting, weighted drape when seated.
- Color Palette: Experiment with dusty rose, French blue, or sage green pinafores against a warm beige or taupe base.
- Ear Lining: Sew washed vintage floral Liberty cotton fabric onto the underside of the ears before attaching them to the head.
Materials Needed
- 100g organic sport-weight cotton-linen blend yarn in Sand or Oatmeal
- 25g lace-weight cotton thread in Ecru
- 2.50 mm (US C/2) and 2.00 mm crochet hooks
- 6 mm matte black glass safety eyes or black stranded cotton embroidery floss
- Natural wool roving or hypoallergenic silicone fiberfill
- Glass weighting beads and scrap cotton bag
- 7 mm antique mother-of-pearl miniature button
2. Minimalist Nordic Wool Reindeer
Introduction
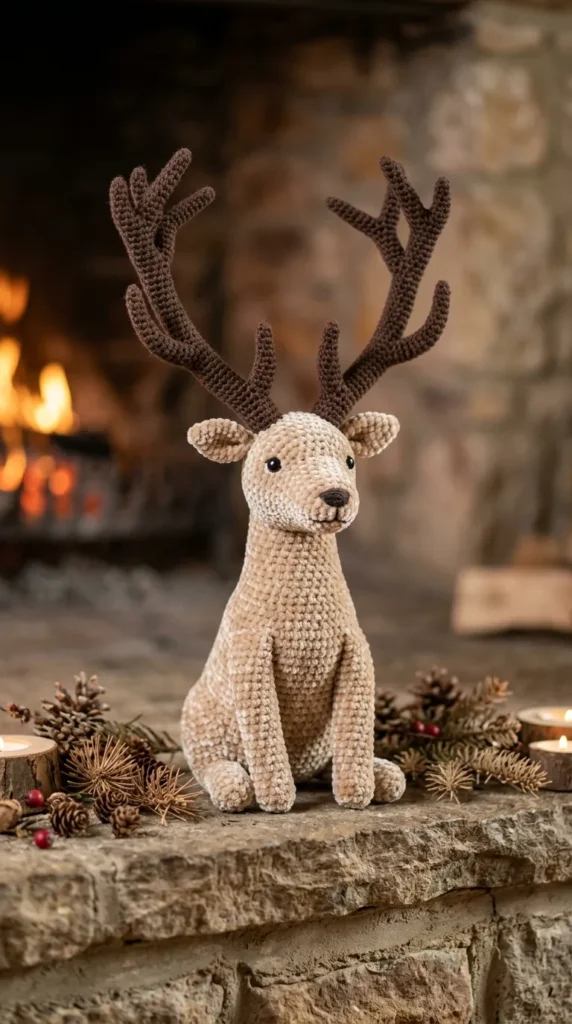
Clean Scandinavian design meets the rustic charm of the Arctic tundra. The Nordic wool reindeer features long, graceful limbs, a streamlined silhouette, and raw, unspun woolen antlers that celebrate organic geometry and negative space.
What This Idea Means
This design captures the quiet stillness of winter landscapes. It emphasizes form over ornament, relying on raw fleece textures, natural heathered wools, and minimalist structural lines.
How to Make It
- Slender Legs: Work narrow tubular rounds ($6 \text{ to } 8\ sc$ per round). Insert aluminum craft wire wrapped in floral tape inside each leg before attaching them to the torso for poseability.
- Sculpted Neck and Head: Transition smoothly from the body into an arched, elongated neck using subtle front-loop-only ($FLO$) increases to create an upright, alert posture.
- Structured Antlers: Use multi-branched wire armatures. Crochet tight cord sleeves (i-cords or $4\ sc$ tubes) in deep slate grey or bark brown, slip them over the wire structure, and secure them firmly into the crown of the head.
- Surface Detailing: Keep the face completely unstitched or use a single horizontal split stitch in pale taupe for a serene, closed-eye expression.
Tips and Variations
- Yarn Selection: Choose 100% untreated Icelandic or Shetland wool with visible guard hairs for genuine Arctic authenticity.
- Winter Collar: Crochet a miniature cowl using a single-row alpine stitch in cream alpaca to wrap snugly around the neck.
- Display Idea: Mount the finished reindeer on an untreated oak slice or position it inside an open glass cloche surrounded by miniature dried pinecones.
Materials Needed
- 100g DK-weight Icelandic Lopi wool in Heather Grey
- 30g sport-weight wool in Charcoal or Espresso
- 3.00 mm (US D/3) crochet hook
- 16-gauge aluminum floral crafting wire and wire cutters
- High-density wool stuffing
- Bent-tip tapestry needle
3. Silk-Mohair Whimsical Swans with Gold Detailing
Introduction
Floating on a cloud of brushed silk-mohair, these graceful swans showcase feathery textures and metallic touches. The body looks nearly weightless, offset by an antique gold beak and crown embroidery.
       ___
     < (..) )   ~ Whispering silk-mohair plumage
      (  vv )
What This Idea Means
This project channels high-end boutique elegance and classical ballet aesthetics (reminiscent of Swan Lake). It elevates amigurumi from craft to sculpture through the interplay of brushed halo yarns and metallic threads.
How to Make It
- Holding Yarns Double: Hold one strand of lace-weight silk-mohair together with one strand of fine fingering-weight merino wool in pure white or alabaster.
- Graceful S-Neck: Work tightly in continuous spirals. Insert a flexible pipe cleaner or coated wire into the neck core, bending it into an elegant “S” curve as you stuff lightly.
- Tiered Feather Wings: Instead of flat wings, work three overlapping scale-shaped panels using crocodile stitch or layered shell stitches ($5\ dc$ shells with picot centers). Lightly brush the finished wings with a wire pet slicker brush to raise the mohair cloud halo.
- Beak & Crown: Use metallic gold embroidery thread held with fine peach yarn. Work the beak with sharp decreases ($sc3tog$) to achieve a needle-point finish.
Tips and Variations
- Black Swan Variation: Create a dramatic contrasting pair by crafting a second swan using jet black silk-mohair, charcoal merino, and antique copper metallic accents.
- Plumage Highlighting: Dust the wing tips lightly with soft pastel pink or pearl mica powder using a soft makeup brush for a luminous finish.
Materials Needed
- 50g lace-weight Silk Mohair (70% Mohair / 30% Silk) in Pearl White
- 50g fingering-weight Extra Fine Merino in Natural White
- 1 spool metallic gold embroidery braid
- 2.25 mm (US B/1) crochet hook
- White pipe cleaners or insulated floral wire
- Micro glass beads for stuffing base
- Wire slicker brush (optional, for fluffing)
4. Botanical Mossy Woodland Turtle
Introduction
A miniature walking ecosystem, the botanical mossy turtle transforms a classic shell into an intricate garden of micro-succulents, crochet lichen, and French knot moss patches.
What This Idea Means
Inspired by forest floors and biophilic design, this turtle represents longevity and symbiosis. It is a stunning conversation piece for plant lovers, botanical shelves, and green indoor spaces.
How to Make It
- Carapace (Shell): Crochet a dome using rich olive or forest green wool. Work in back loops only ($BLO$) on select rounds to leave distinct ridges for surface stitching.
- Textured Moss Base: Work surface slip stitches and bouillon knots randomly across the shell using variegated chartreuse, moss green, and lichen grey embroidery yarns.
- Micro-Succulents: Separately crochet 3 to 5 tiny rosettes using simple petal strips (e.g., [ch 3, 2 dc, ch 3, sl st in next] repeated), roll them into spirals, and sew them securely across the top of the shell dome.
- Flippers and Head: Use a muted sage-green cotton yarn in standard single crochet, tucking them snugly under the wide shell brim.
Tips and Variations
- Bead Accents: Scatter micro bronze or olive glass seed beads between the mossy stitches to mimic dewdrops on foliage.
- Shell Shape: Add an irregular, scalloped edge to the carapace by working a final border of [sc, hdc, dc, hdc, sc] along the rim.
Materials Needed
- 50g worsted-weight wool in Olive Drab
- 30g fingering-weight cotton in Sage Green
- Assorted scrap skeins of tapestry wool in Chartreuse, Forest Green, Sand, and Rust
- 2.75 mm (US C/2) and 1.75 mm micro crochet hooks
- 4 mm bronze safety eyes
- Recycled polyester fiberfill
- Tapestry embroidery needle
5. Soft Bouclé Sleeping Baby Lamb
Introduction
Nothing rivals the immediate tactile comfort of bouclé or sherpa yarn. This baby lamb is crafted in a perpetual curled-up sleeping posture, radiating calm and innocence through its cloud-like, looped texture.
What This Idea Means
This project emphasizes sensory warmth and hygge. Its gentle presence softens minimalist modern interiors, nursery gliders, or linen bedding arrangements.
How to Make It
- Managing Textured Yarn: Bouclé yarn can obscure individual stitches. Work with a slightly larger hook than usual, feeling for the stitch openings with your fingers rather than relying solely on sight. Use locking stitch markers every 5 stitches.
- Smooth Face Contrast: To balance the fluffy coat, craft the face, inner ears, and hooves in an ultra-smooth matte combed cotton in warm biscuit or fawn.
- Curled Torso Assembly: Shape the body into a gentle bean or kidney curve by concentrating decreases on one side of the lower abdomen.
- Embroidered Sleep Lines: Embroider gentle, curved crescent eyes using dark espresso embroidery floss using a delicate backstitch. Add a tiny ‘Y’-shaped nose in pale blush pink.
       __  🐑 zzz
     ((  ))_
     ( 'ㅅ' )~
Tips and Variations
- Guiding Thread: If bouclé yarn snaps easily, hold it alongside a matching strand of durable 2-ply lace cotton to add tensile strength and stitch stability.
- Aromatherapy Addition: Tuck a small sachet of dried organic French lavender blossoms inside the center of the lamb’s belly along with the stuffing.
Materials Needed
- 100g chunky textured bouclé/sherpa alpaca blend yarn in Off-White
- 30g sport-weight combed cotton in Warm Fawn
- 4.00 mm (US G/6) and 2.50 mm (US C/2) crochet hooks
- 6 locking stitch markers
- Hypoallergenic bamboo fiberfill
- Dried lavender sachet (optional)
- Stranded embroidery floss in Espresso and Soft Rose

6. Regal Velvet Royal Stag
Introduction
Refined and majestic, this stag brings woodland royalty indoors. Made using high-density micro-velvet chenille yarn in rich champagne or taupe, it is finished with sweeping branched antlers that hold their shape with hidden wire armature.
What This Idea Means
The stag represents nobility, grace, and quiet strength. The use of micro-velvet replaces traditional rustic finishes with a sleek, lustrous shine suited to sophisticated mantels and modern rustic decor.
How to Make It
- Torso & Hindquarters: Create powerful, athletic hind legs with sculpted calf decreases. Build a broad chest that tapers down toward a lean flank.
- Antler Architecture: Build an internal wire skeleton from 14-gauge brass wire. Wrap the wire in thin strips of quilt batting before working tight single-crochet sleeves over each prong in a rich chocolate brown cotton yarn.
- Head Attachment: Angle the head slightly upward and tilted to one side to give the stag a dignified, watchful stance.
- Chest Ruff: Work a small decorative bib of extended loop stitches around the front base of the neck, carefully splitting the loops with scissors for a lush fur ruff.
Tips and Variations
- Holiday Variation: Drape a removable micro-garland of crochet holly leaves and tiny red wooden beads over the shoulders during winter months.
- Yarn Hack: When working with velvet yarn, keep yarn tension strictly uniform to prevent “worming” (loose loops popping out of the fabric).

Materials Needed
- 150g fine micro-velvet chenille yarn in Champagne or Muted Fawn
- 40g fingering-weight mercerized cotton in Espresso (for antlers)
- 3.25 mm (US D/3) and 2.00 mm hooks
- 14-gauge craft wire and electrical or floral tape
- 8 mm deep amber safety eyes
- Dense premium polyester fiberfill
7. Moody Victorian Raven with Shimmer Feathers
Introduction
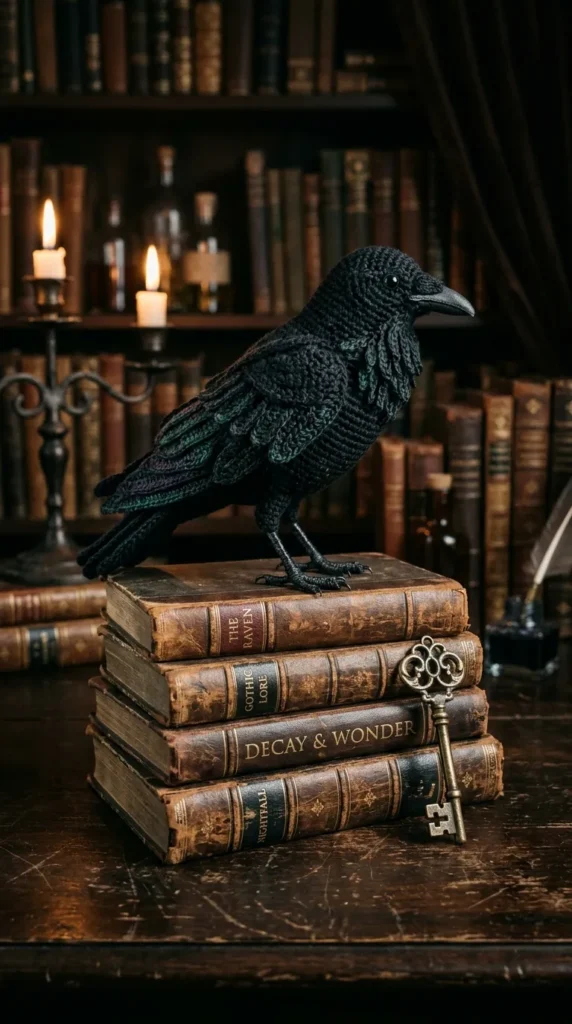
A dramatic and literary creation, this Victorian raven features sleek contours, textured wing feathers, and subtle hints of peacock blue, iridescent green, and violet woven through midnight-black yarn.
What This Idea Means
This piece caters to dark academia, antique library collections, and gothic aesthetics. It symbolizes mystery, intelligence, and classical literature.
How to Make It
- Layered Wing Construction: Crochet individual layered flight feathers using Tunisian crochet or graduated basic stitches ($sc \to hdc \to dc \to tr \to dtr$), then sew them in overlapping tiers along a firm teardrop base.
- Color Accents: Interweave single strands of metallic peacock-hued threads or jewel-toned mohair every third round in the wing coverts and tail.
- Curved Beak: Use black mercerized cotton worked around a dense core. Taper the tip into a natural downward arc using asymmetric slip-stitch short rows on the underside.
- Talons & Perch: Wrap black floral wire with crochet yarn to form slender, articulated claws that can grip a dried manzanita branch or vintage hardbound book spine.
       \ \
       (o> )  ~ Midnight feathers & vintage lore
      \\_//)
       \_/_)
Tips and Variations
- Eye Detail: Use 6 mm dark violet or crimson cabochon eyes instead of standard black safety eyes for a striking, mysterious gaze.
- Accessory: Add a tiny crochet brass key or antique watch gear suspended from a fine chain in the raven’s beak.
Materials Needed
- 100g DK-weight pure wool in Midnight Black
- Assorted scrap fine silk/metallic threads in Emerald, Indigo, and Violet
- 2.50 mm (US C/2) crochet hook
- 18-gauge black florist wire
- 6 mm glass cabochon craft eyes
- Wool roving for firm stuffing
8. Coastal Sea Glass Sea Turtle
Introduction
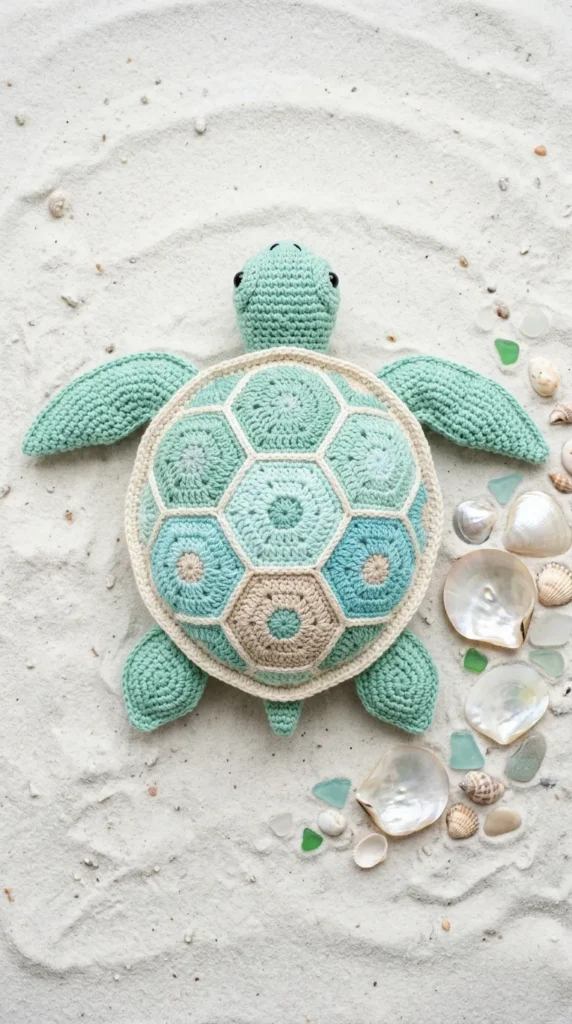
Drawing inspiration from frosted sea glass found along coastal shores, this sea turtle combines muted aquamarine, dusty seafoam, pale mint, and raw sandy beige into an ombré mosaic pattern.
What This Idea Means
This design brings a calming coastal element into the home without feeling overly touristy. It celebrates oceanic tranquility, marine life conservation, and soothing pastel gradients.
How to Make It
- Hexagonal Shell Medallions: Crochet an array of 7 flat hexagonal motifs (African flower or classic granny hexagon modified with solid single crochet) in varied pastel sea-glass tones.
- Joining the Shell: Join the motifs using a raised flat slip-stitch seam in a contrasting sand-beige cotton yarn to emulate the mortar or connective tissue of a sea turtle’s shell.
- Hydrodynamic Flippers: Create long, flat, curved front flippers using continuous increases along one edge and steep decreases on the opposite edge to establish natural hydrodynamic sweep.
- Underbelly (Plastron): Work a flat disc in clean unbleached ecru, joining it to the carapace with a sturdy crab-stitch perimeter.
Tips and Variations
- Yarn Choice: Use recycled sea-plastic cotton yarn blends to tie the environmental concept directly into the material choices.
- Shell Border: Add an edging of brushed white boucle around the shell margin to mimic sea foam breaking over the shell.
Materials Needed
- 25g each of sport-weight cotton in Mint, Aquamarine, Seafoam, Powder Blue, and Sand
- 50g sport-weight cotton in Ecru (Underbelly)
- 2.50 mm (US C/2) crochet hook
- 6 mm matte transparent blue or green glass eyes
- Premium polyfill stuffing
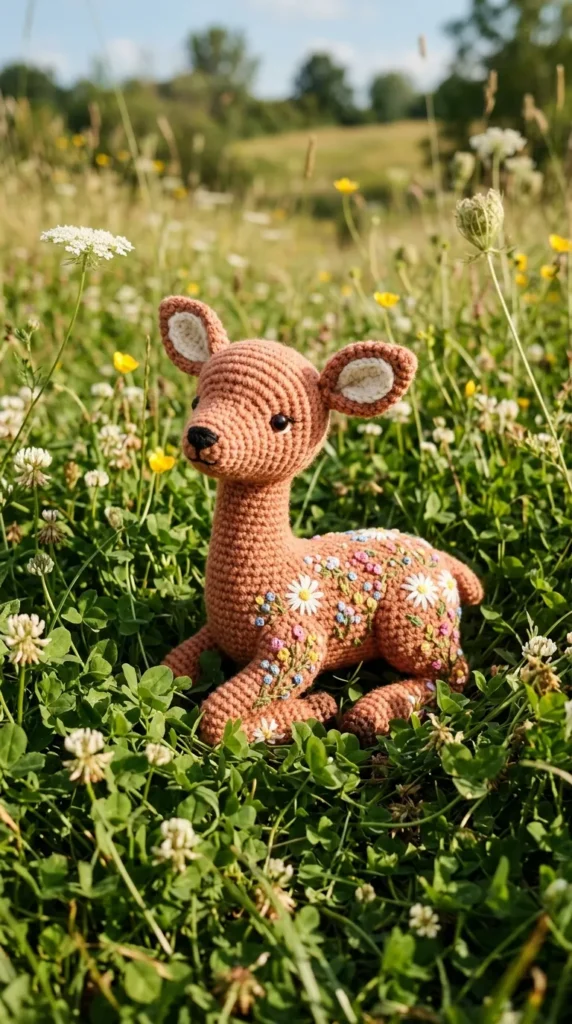
9. Enchanted Meadow Fawn with Embroidered Wildflowers
Introduction
A tender woodland fawn made from rich terracotta and fawn-colored wool, adorned not with simple white spots, but with a tapestry of miniature embroidered French knot wildflowers, daisies, and creeping vine stems along its flank.
        /)/)
       ( . .)  ~ Meadow blooms stitched upon sienna wool
       (  v )
What This Idea Means
This piece merges amigurumi with delicate floral embroidery. It represents spring renewal, innocence, and pastoral sweetness, making it a showpiece in garden-themed rooms or aesthetic nurseries.
How to Make It
- Slender Body & Neck: Build a seamless transition from the chest up into a long neck, keeping the stitches extremely firm so the head stays upright without sagging.
- Large Expressive Ears: Crochet two wide leaf-shaped ears with a deep fold pinched at the base before sewing them to the head at a downward, inquisitive angle.
- Surface Floral Embroidery: Once the body is stuffed and closed, take 6-strand embroidery floss in mustard, blush, cream, and olive. Work French knots for daisies, lazy daisy stitches for petals, and delicate stem stitches for trailing botanical vines directly across the fawn’s back and hips.
- Hooves: Work the first 4 rounds of each leg in deep charcoal grey before transitioning into warm terracotta.
Tips and Variations
- Seasonal Shifts: In autumn, swap wildflowers for tiny embroidered oak leaves, miniature acorns, and golden maple foliage.
- Nose Texture: Wet-felt a tiny puff of dark brown wool roving onto the tip of the snout with a felting needle for an ultra-soft, seamless nose.
Materials Needed
- 100g DK-weight Merino wool in Terracotta or Warm Chestnut
- 20g DK-weight wool in Cream (chest patch and tail underside)
- Stranded embroidery floss in Mustard, Olive Green, Blush Pink, and Cloud White
- 2.75 mm (US C/2) hook
- Embroidery crewel needle
- 7 mm black safety eyes
- Firm polyester stuffing
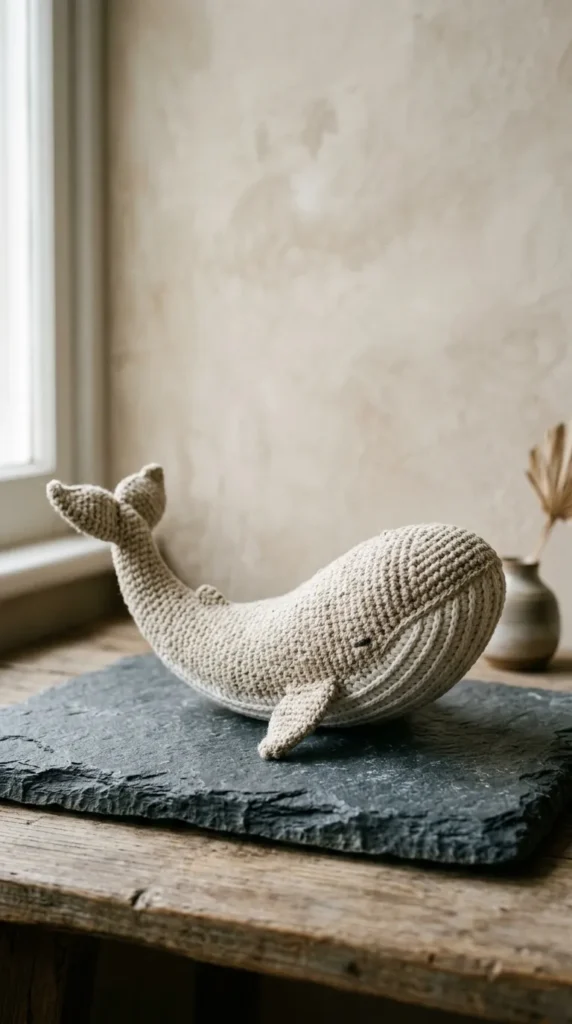
10. Wabi-Sabi Neutral Ceramic-Look Whale
Introduction
Inspired by Japanese minimalist pottery and the Wabi-Sabi philosophy of beauty in imperfection, this humpback whale is made from raw, unbleached linen yarn with visible slubs, a clean curved profile, and exposed topstitching.
What This Idea Means
This whale embodies quiet contemplation, marine grandeur, and organic minimalism. Its neutral aesthetic pairs with stone surfaces, raw wood shelving, and tranquil modern interiors.
How to Make It
- Smooth Arched Profile: Work the dorsal curve with sweeping increases along the spine and steep decreases at the tail peduncle to evoke the movement of a breaching whale.
- Textured Ventral Grooves: Crochet the white belly plate using back-loop-only ($BLO$) half-double crochet ribs running lengthwise from chin to midsection, creating realistic throat pleats.
- Tapered Pectoral Fins: Make long, wing-like flippers that taper gently. Wet-block the fins flat using stainless steel pins before attaching them to ensure crisp lines.
- Minimalist Tail Fluke: Work two symmetrical flukes, joining them in the center with a secure slip-stitch join that seamlessly merges into the tail stem.
Tips and Variations
- Linen Softening: Linen yarn softens dramatically with handling; steam-block the finished whale gently with an iron held 2 inches away to set the stitches without flattening the fiber.
- Two-Tone Colorway: Use unbleached grey linen for the upper body and chalk-white matte cotton for the lower belly grooves.
Materials Needed
- 100g 100% wet-spun unbleached linen yarn in Raw Sand
- 50g fingering-weight matte cotton in Chalk White
- 2.25 mm (US B/1) crochet hook
- Stainless steel blocking pins and foam blocking mat
- Recycled organic cotton stuffing
- 5 mm matte slate safety eyes
11. Ethereal Cloud-Soft Angora Kitty
Introduction
With a soft, cloudy aura of brushed angora yarn, this sleeping kitten curls into a perfect sphere. Its delicate whiskers, pink paw pads, and relaxed sleeping expression evoke quiet domestic contentment.
       |\---/|
       | o_o |  ~ A cloud of brushed angora peace
        \_^_/
What This Idea Means
This project emphasizes tactile indulgence and cozy homeliness. Angora’s soft halo creates a blurred, ethereal outline that looks painterly and gentle in any living space.
How to Make It
- Continuous Spherical Curves: Use short-row shaping to sculpt a kitten curled on its side, with the hind leg resting naturally over the tucked tail.
- Brushed Texture: Use an angora-wool blend. Once the body is completed, brush the fabric gently in circular motions with a soft bristle brush to raise the fibers into a cloud-like fuzz.
- Paws with Needle-Felted Pads: Crochet tiny rounded feet. Using a fine barbed felting needle, felt a small amount of pale rose wool roving directly onto the bottom of each foot to create realistic paw pads.
- Delicate Whiskers: Thread transparent nylon monofilament thread or bleached horsehair through the muzzle, knotting it securely inside.
Tips and Variations
- Fiber Ethics: Ensure your angora yarn is certified ethically sourced, or substitute it with an ultra-soft cruelty-free brushed alpaca-silk blend.
- Positioning: Design the kitten to rest atop a miniature crochet oval braided rug in soft charcoal to create a self-contained vignette.
Materials Needed
- 80g fine brushed Angora / Merino blend yarn in Cloud Grey or Cream
- 2.50 mm (US C/2) hook
- Small tuft of pastel pink wool roving and #38 felting needle
- Monofilament thread (for whiskers)
- 4 mm sleepy-eye embroidered stitches or glass eyes
- Premium micro-cluster fiberfill
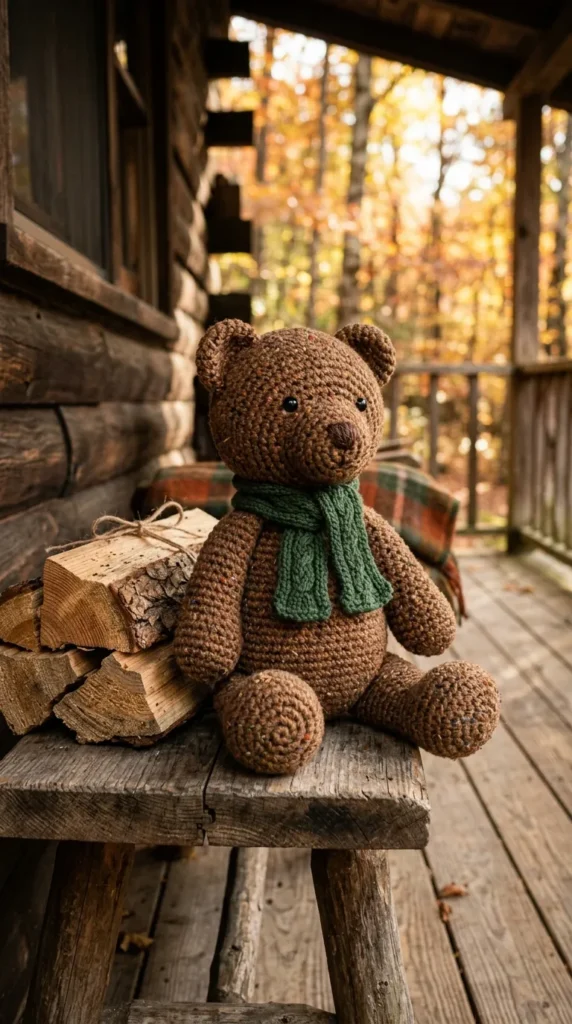
12. Rustic Mountain Brown Bear in Chunky Tweed
Introduction
A sturdy, comforting presence, this brown bear uses rich oatmeal and flecked acorn-tweed yarn. Its wide stance, rounded snout, and miniature cable-knit scarf project rugged mountain warmth.
What This Idea Means
This project channels the warmth of mountain cabins, forest hikes, and timeless fireside comfort. It serves as a grounded, rustic accent on a leather armchair, hearthside shelf, or cabin interior.
How to Make It
- Thick Sturdy Stitches: Work with aran-weight wool tweed yarn using the “yarn under, yarn over” ($YU/YO$) cross-stitch amigurumi method, which creates a grid-like texture and prevents stretching.
- Stout Muzzle Construction: Work a separate snout in a lighter oatmeal shade, sewing it onto the face with invisible ladder stitches before embroidering a bold triangular nose in thick matte black wool.
- Ears & Crown: Make two cup-shaped ears placed wide apart on the head, angled slightly forward to give the bear a curious and friendly expression.
- Accessory Scarf: Knit or crochet a miniature 12-inch scarf using a classic 2-stitch cable or post-stitch ribbing in deep forest green or cranberry red.
Tips and Variations
- Weighting for Display: Fill the bottom third of the bear with rounded river pebbles (wrapped in batting) so it functions as a functional and stylish decorative doorstop or bookend.
- Polar Bear Variation: Work the same pattern in pure unbleached sheep’s wool with a slate-grey nose for an Arctic polar bear look.
Materials Needed
- 150g Aran-weight wool tweed yarn (with flecks of rust and cream) in Bark Brown
- 30g Aran-weight wool yarn in Oatmeal
- 3.50 mm (US E/4) crochet hook
- 9 mm matte black safety eyes
- Dense wool filling
- Stranded black tapestry yarn for nose and claws
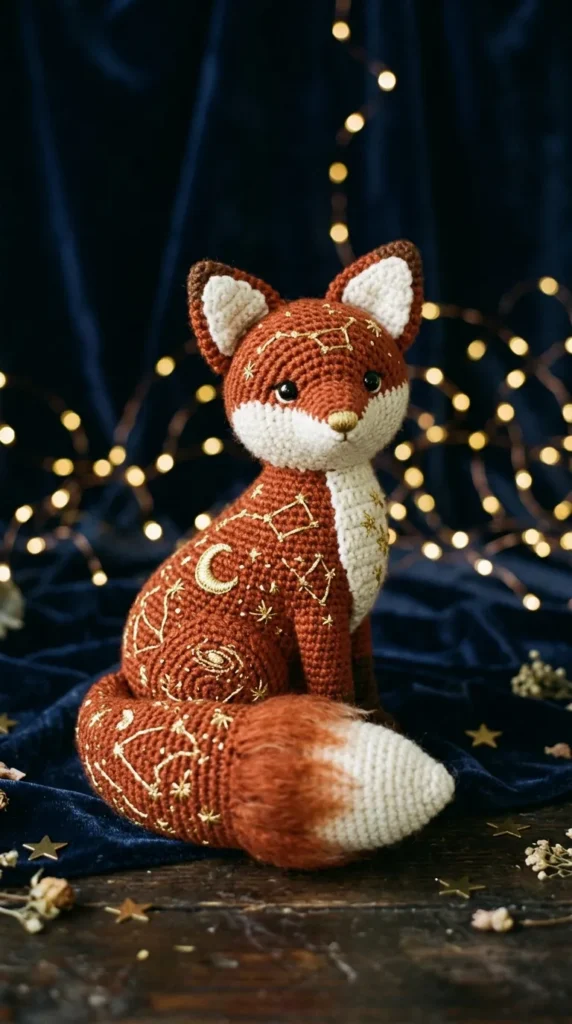
13. Celestial Stardust Fox
Introduction
The celestial stardust fox pairs the rich warmth of burnt sienna yarn with midnight indigo accents and metallic gold embroidery. Constellations, crescent moons, and micro-stars are stitched across its coat, turning a woodland favorite into a cosmic guardian.
       /\__/\
      /  * . \  ~ Constellations stitched on stardust fur
     (  =Y=   )
What This Idea Means
This concept merges nature and astronomy. It brings an imaginative, mystical quality to modern bedrooms, reading corners, and creative studio desks.
How to Make It
- Classic Fox Silhouette: Crochet an elongated, angular head with a fine, pointed white muzzle and oversized pointed ears with black outer tips.
- Fluffy Bushy Tail: Work the tail with continuous increases up to a dramatic central width, then decrease sharply down to an ivory white tip.
- Gold Constellation Stitching: Using metallic embroidery thread, stitch recognizable constellations (like the Big Dipper, Cassiopeia, or Orion) across the fox’s flank and tail using backstitches and colonial knots.
- Crescent Moon Forehead: Embroider a miniature golden crescent moon centered between the ears using satin stitch.
Tips and Variations
- Sleepy Celestial Eyes: Instead of plastic safety eyes, embroider closed curved eyes with gold thread, adding delicate starbursts at the outer corners.
- Color Alternatives: Try a “Midnight Fox” variation using navy blue as the primary body color, cream accents, and silver metallic constellation thread.
Materials Needed
- 100g DK-weight superwash merino in Burnt Sienna
- 30g DK-weight merino in Soft Ivory
- 20g DK-weight merino in Charcoal Black
- 1 spool metallic gold embroidery thread
- 2.75 mm (US C/2) crochet hook
- 6 mm gold-rimmed safety eyes
- Polyester cluster stuffing
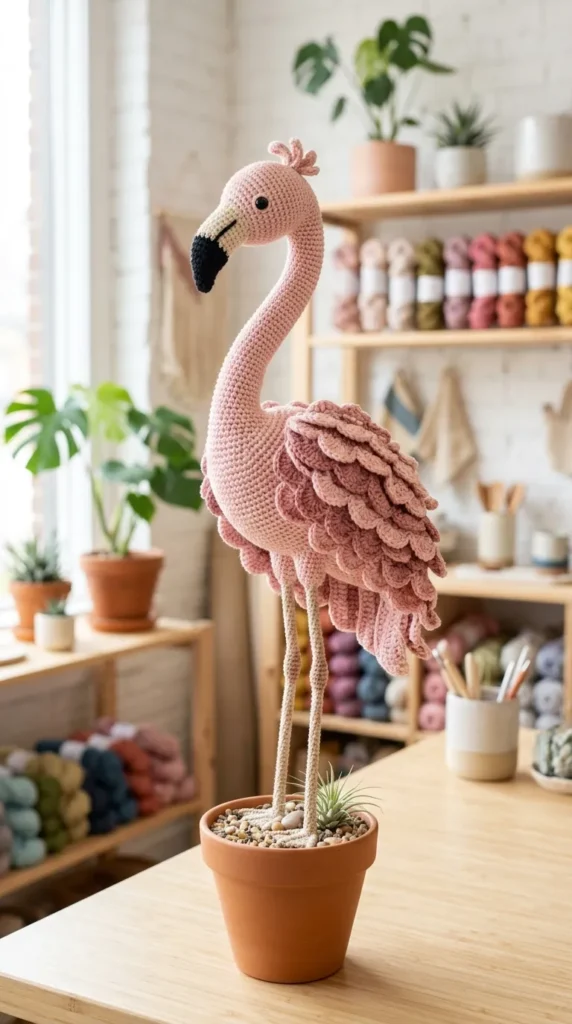
14. Soft Pastel Flamingo with Layered Ruffle Wings
Introduction
Slender, tall, and elegant, this pastel flamingo trades neon pink for sophisticated blush, dusty rose, and ballet slipper tones. The standout feature is its wings, which cascade in delicate ruffles down the sides of the body.
What This Idea Means
This design brings a soft tropical touch to modern decor. It offers a refined, romantic take on flamingo motifs, well-suited for sunrooms, vanity tables, or boutique nursery styling.

How to Make It
- Wire Armature Legs: Create exceptionally long, slender legs by crocheting around 16-gauge wire wrapped in pale grey or dusty rose yarn. Add a tiny rounded bead halfway down each leg to represent the knee joint.
- Graceful S-Curve Neck: Taper the neck gradually from the chest to the head, inserting a flexible pipe cleaner to support its upright posture.
- Ruffle Wings: Crochet a teardrop wing base. On the surface loops, work successive rounds of [sc in next st, 5 dc in next st] in 3 progressive shades of pink, creating layered ruffles that move when touched.
- Graduated Beak: Craft the beak with an ivory base, soft grey midsection, and a curved black tip.
Tips and Variations
- Standing Base: Anchor the wire feet into a painted wooden block or small woven basket filled with preserved moss to allow the flamingo to stand securely.
- Ombré Body: Work the neck in pale blush and gradually transition to deeper rose tones toward the tail feathers.
Materials Needed
- 50g fingering-weight cotton in Ballet Slipper Pink
- 25g each in Dusty Rose and Pale Peach
- Scraps of cotton in Charcoal and Cream (for the beak)
- 2.00 mm (US A/0) crochet hook
- 16-gauge floral wire and needle-nose pliers
- 5 mm black glass safety eyes
- Lightweight polyfill
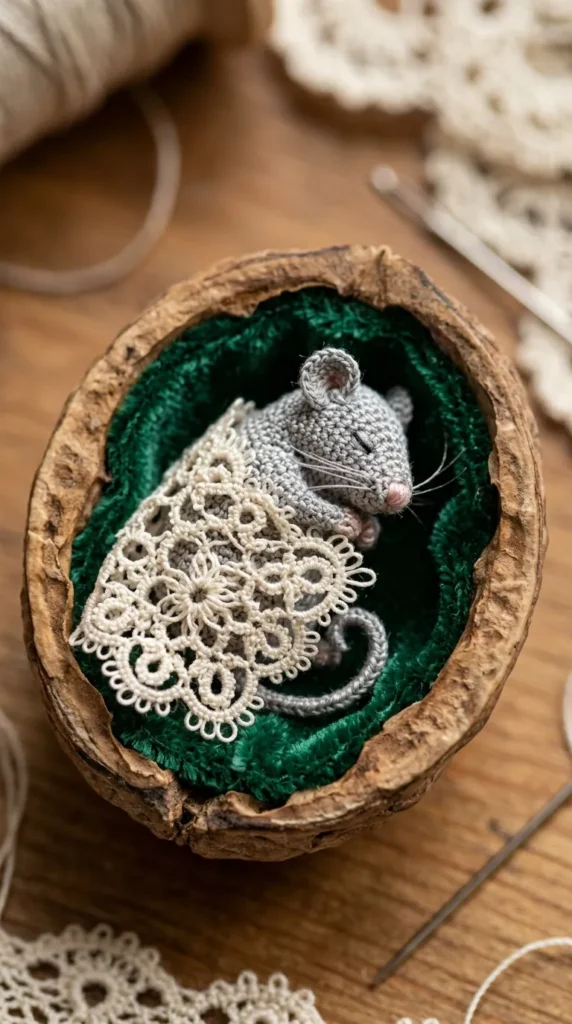
15. Victorian Heirloom Pocket Mouse in Walnut Shell
Introduction
A treasure of miniature craftsmanship, this tiny pocket mouse is barely two inches long. Designed to nestle inside a velvet-lined real English walnut shell, it comes complete with a micro-crochet lace blanket and a tiny pillow.
       (\_/)
       ( •.•)  ~ A miniature world inside a walnut shell
      o_(")(")
What This Idea Means
This project celebrates miniature art and storybook nostalgia (reminiscent of Beatrix Potter and Brambly Hedge). It makes an intimate, memorable gift or collectible display piece.
How to Make It
- Micro-Crochet Technique: Use a 0.75 mm to 1.25 mm micro-crochet hook and single strands of fine sewing thread or split embroidery floss. Work under good lighting with magnification if needed.
- Simple Mouse Form: Work a tiny pear-shaped body in light silver-grey thread. Add two circular disc ears and a long surface-slipped thread tail.
- Facial Detail: Embroider eyes using single French knots made from one strand of black silk sewing thread. Add a micro-stitch in pale pink for the nose.
- The Walnut Bed: Clean and sand the rim of half an English walnut shell. Glue a piece of gathered emerald-green or dusty rose silk velvet inside, and crochet a miniature 1.5-inch lace coverlet using white tatting thread.
Tips and Variations
- Hinged Shell: Use miniature brass dollhouse hinges glued with epoxy to join both walnut shell halves, allowing the bed to open and close.
- Nightcap Accessory: Crochet a tiny pointed sleeping cap in red thread with a micro-bead pompom for the mouse.
Materials Needed
- 1 skein DMC stranded cotton embroidery floss in Silver Grey (mouse)
- 1 spool size 80 tatting or micro-crochet thread in White (blanket)
- 1.00 mm and 0.75 mm micro crochet hooks
- 1 clean, halved English walnut shell
- Velvet fabric scraps and craft epoxy glue
- Tweezers and fine-tipped embroidery scissors
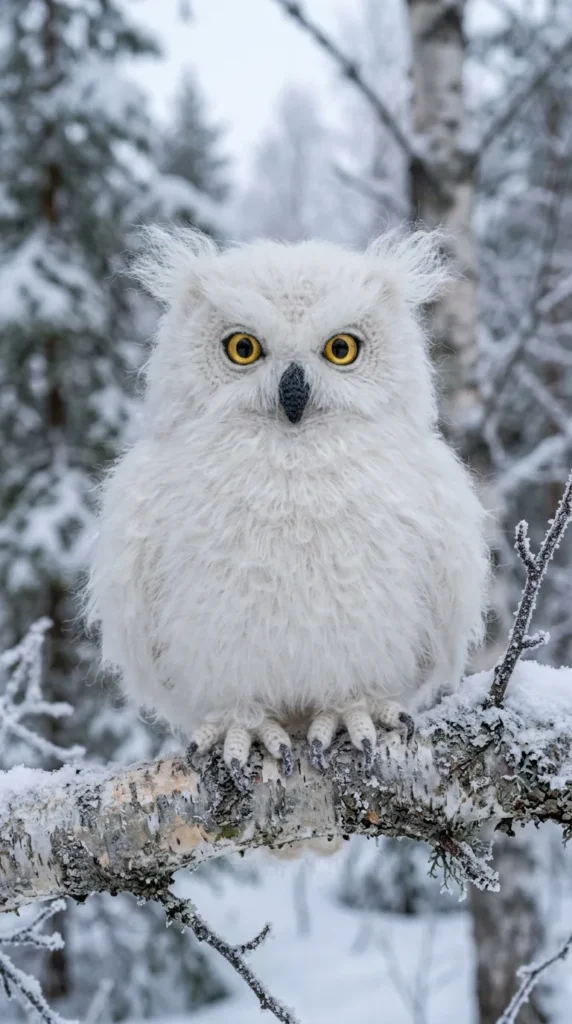
16. Majestic Arctic Owl with Brushed Mohair Feathers
Introduction
Capturing the quiet majesty of the winter tundra, this Arctic horned owl features a rounded silhouette, striking golden glass eyes, and hand-brushed plumage that looks like authentic down feathers.
What This Idea Means
This owl brings wisdom, quiet elegance, and wintry textures into the home. It fits naturally alongside natural wood, stone fireplace mantels, and minimalist winter displays.
How to Make It
- Loop Stitch Body: Work alternating rounds of regular single crochet and loop stitch ($lp\ st$) across the chest and flanks using a soft unbleached mohair blend.
- Brushing the Loops: Cut the center of the loops with sharp scissors and brush them out vigorously with a wire carding brush to create an authentic down-feather texture.
- Facial Disc Construction: Crochet two flat round discs in white cotton for the eyes, rimmed with a single row of charcoal split stitches to give the eyes their iconic depth.
- Feather Tufts (Horns): Attach small tassels of mohair to the top corners of the head, steam them straight, and trim them into sharp triangular tufts.
Tips and Variations
- Speckled Plumage: Incorporate small flecks of charcoal or slate grey embroidery floss randomly across the back to mimic the markings of a female snowy owl.
- Beak Alignment: Place a tiny curved black beak deeply between the eye discs to give the owl its characteristic flat-faced, focused stare.
Materials Needed
- 100g brushed Mohair/Wool blend in Pure White
- 30g sport-weight cotton in Chalk White and Charcoal Grey
- 3.00 mm (US D/3) and 2.25 mm hooks
- 10 mm intense gold or amber cabochon glass eyes
- Wire carding brush or pet slicker brush
- Polyfill stuffing mixed with a handful of weighting beads
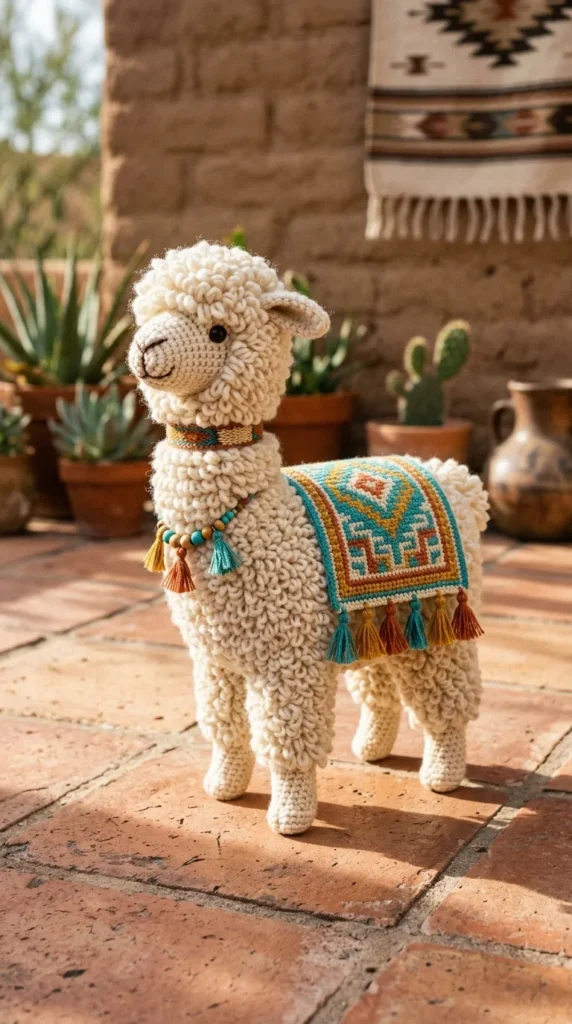
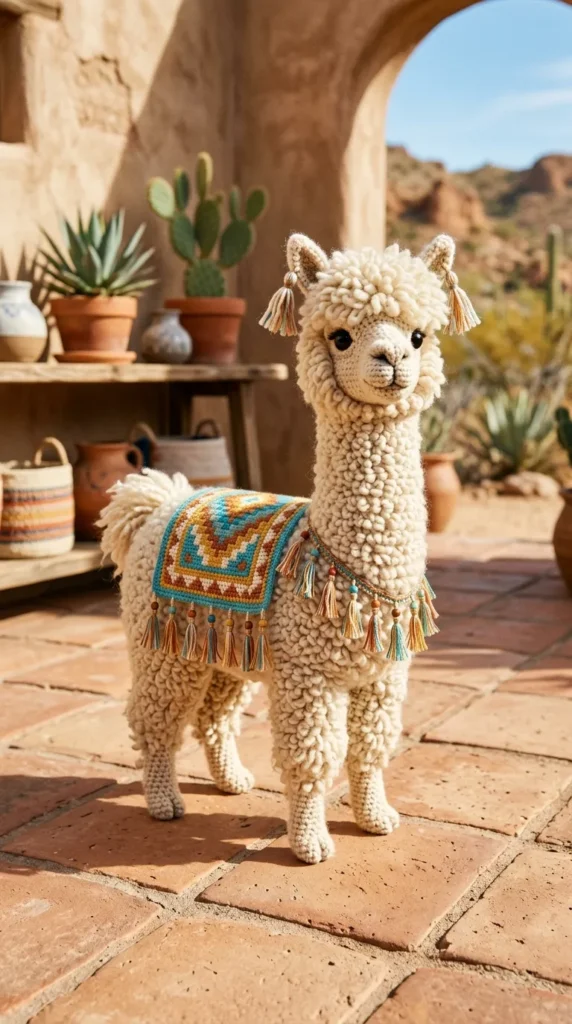
17. Bohemian Desert Alpaca with Handwoven Saddle Blanket
Introduction
A joyful celebration of natural textures, this desert alpaca combines un-dyed cream wool loop stitches with a miniature, brightly colored geometric woven saddle blanket and tiny yarn tassels.
         /\_/\
       (  . . )  ~ Looped wool fleece & woven saddle blankets
       /  ---  \
      / |     | \
What This Idea Means
This project blends amigurumi with traditional textile techniques. It captures the warmth and craftsmanship of Andean and Southwestern folk art, making it a lively, cheerful addition to modern bohemian spaces.
How to Make It
- All-Over Loop Stitch: Work the entire torso, neck, and crown in loop stitch ($lp\ st$). Keep loops uniform at approximately 0.5 inches in length, leaving the face and lower legs smooth.
- Ears with Character: Crochet long, leaf-shaped upright ears that poke proudly out of the fluffy crown wool.
- Saddle Blanket (Peruvian Chumpi style): Crochet a tiny 2×3-inch flat tapestry crochet rectangle using terracotta, mustard, turquoise, and cream yarns, working complex geometric diamonds.
- Fringed Tassels: Attach miniature multi-colored fringe along the edges of the blanket and add a tiny halter made from twisted embroidery cords around the muzzle.
Tips and Variations
- Fleece Variation: Leave the loops uncut for a curly fleece look, or snip and brush them for a fluffy, cloud-like texture.
- Pack Basket: Instead of a blanket, attach two tiny woven straw or crochet baskets to the alpaca’s sides filled with dried baby’s breath flowers.
Materials Needed
- 100g bulky natural wool yarn in Unbleached Natural Cream
- 30g sport-weight wool in Warm Sand (for face and legs)
- Scrap fingering cotton in Turquoise, Terracotta, Mustard, and White
- 3.50 mm (US E/4) and 2.00 mm hooks
- 6 mm black safety eyes
- Dense stuffing
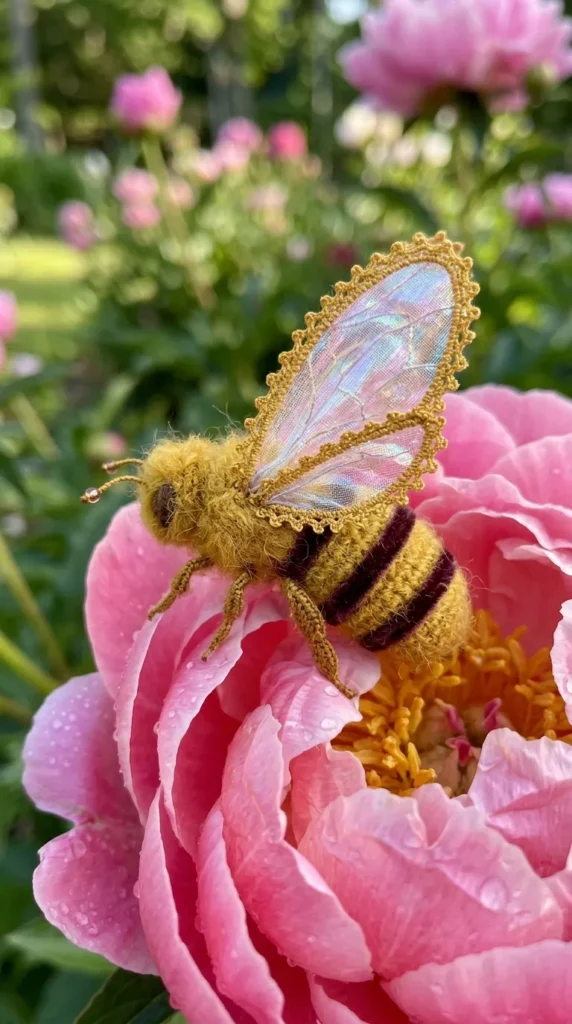
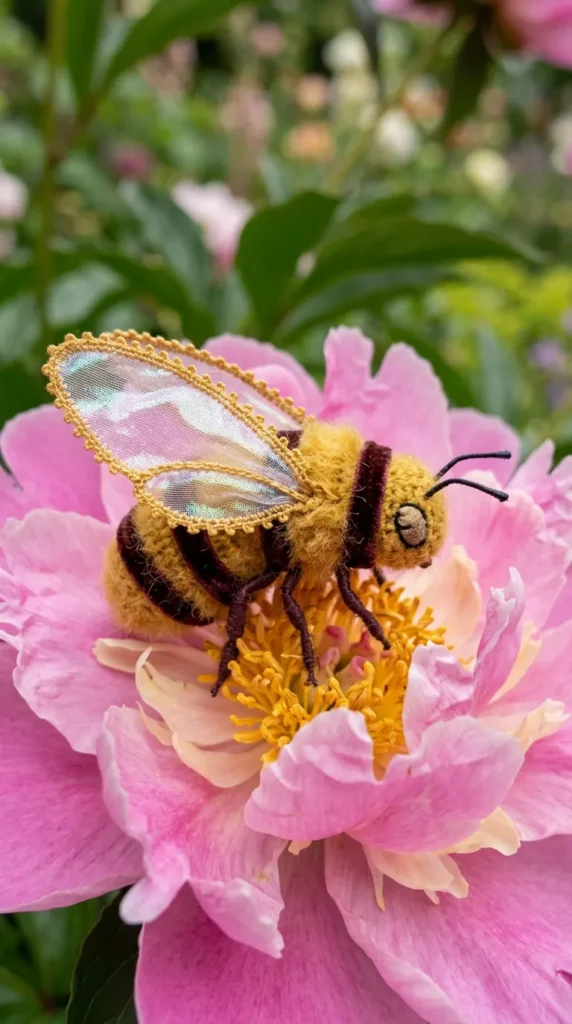
18. Delicate Golden Bee with Organza/Crochet Hybrid Wings
Introduction
A jewel-like study in textures, this golden honeybee features rich brushed mustard mohair stripes, velvet espresso bands, and sheer, wire-edged wings made from iridescent organza fabric edged with micro-crochet slip stitches.
What This Idea Means
This bee symbolizes industriousness, nature’s harmony, and garden life. Its delicate, high-end materials elevate it into an elegant hanging suncatcher, holiday tree jewel, or framed shadowbox centerpiece.
How to Make It
- Striped Abdomen: Alternate rounds between rich goldenrod mohair and chocolate velvet chenille yarn, keeping transitions crisp with seamless color changes.
- Needle-Felted Pollen Baskets: Add small patches of fluffy bright yellow wool roving onto the hind legs using a felting needle to mimic full pollen baskets.
- Translucent Wings: Cut four wing shapes from stiff iridescent organza fabric. Using a sharp 0.6 mm hook, punch directly through the fabric edge, working a delicate border of micro-crochet slip stitches and picots in silver-grey thread.
- Thread Antennae: Use stiffened black waxed cotton thread with tiny French knots on the tips for fine antennae.
Tips and Variations
- Hanging Mobile: Suspend three or five bees at varying heights using clear monofilament line from a natural drift-wood branch for a botanical mobile.
- Stinger Detail: End the abdomen with a crisp 3-stitch chain and slip-stitch point worked in jet-black mercerized thread.
Materials Needed
- 30g sport-weight brushed mohair in Mustard/Goldenrod
- 20g fine velvet yarn in Espresso Brown
- Sheer iridescent organza fabric scrap
- 0.60 mm micro hook and 2.25 mm crochet hook
- Size 80 silver-grey crochet thread
- Waxed black thread (for antennae)
- 4 mm black glass eyes
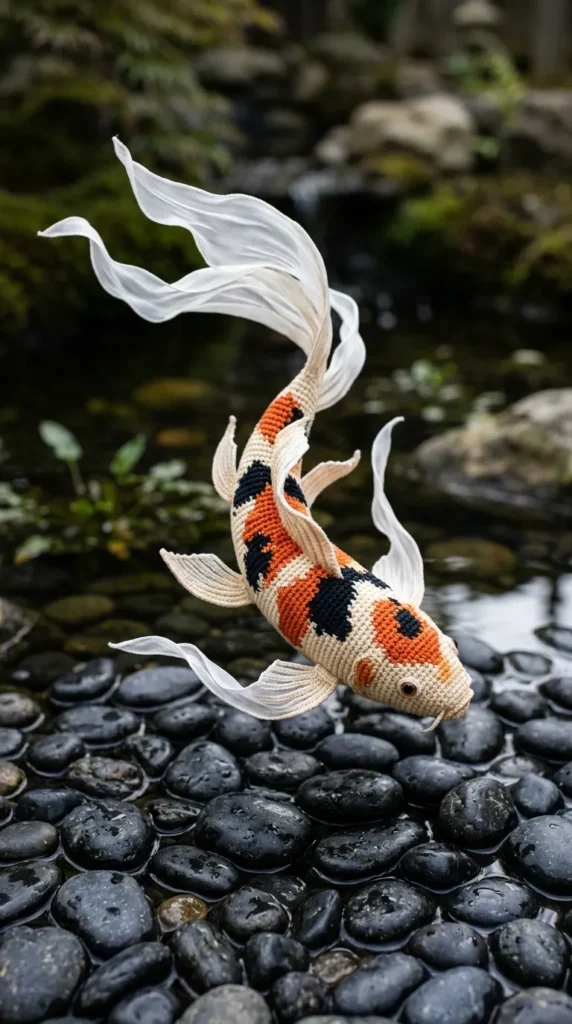
19. Japanese Botanical Garden Koi Fish
Introduction
With flowing, translucent fins and graceful curves, this calico koi looks as though it is swimming through water. Made with smooth mercerized cotton and fine silk ribbon, it brings movement and tranquility into fiber form.
       >===('>  ~ Calico silk ribbons dancing in water
         \ \
What This Idea Means
In Japanese culture, the koi fish represents perseverance, good fortune, and calm contemplation. Its fluid silhouette brings peaceful energy to feng shui arrangements, Zen-inspired corners, and minimalist interiors.
How to Make It
- Tapestry Colorwork: Use the tapestry crochet technique to carry cream, bright persimmon orange, and deep ink-black yarns simultaneously, creating organic, asymmetric calico patches across the back.
- Curved Swimming Posture: Use strategic increases on the left side of the mid-body paired with matching decreases on the right side to freeze the fish into a permanent graceful S-curve.
- Flowing Ribbon Fins: Work the large pectoral and tail fins using a larger hook and fine silk ribbon or mercerized thread in extended treble stitches ($dtr$, $tr$), creating a wavy, translucent finish that flutters with movement.
- Mouth Barbels: Attach two tiny thread barbels at the corners of the rounded open mouth.
Tips and Variations
- Metallic Highlights: Interweave a strand of metallic copper thread into the orange calico patches to mimic sun reflecting off wet scales.
- Mounting: Mount the koi on a thin brass rod anchored into a white marble base to showcase its three-dimensional swimming pose.
Materials Needed
- 50g fingering-weight mercerized cotton in Chalk White
- 20g each in Persimmon Orange and Sumi Black
- 1 spool 4 mm silk ribbon in White/Translucent
- 2.00 mm (US A/0) and 3.00 mm hooks
- 5 mm custom black glass cabochon eyes
- Soft polyfill
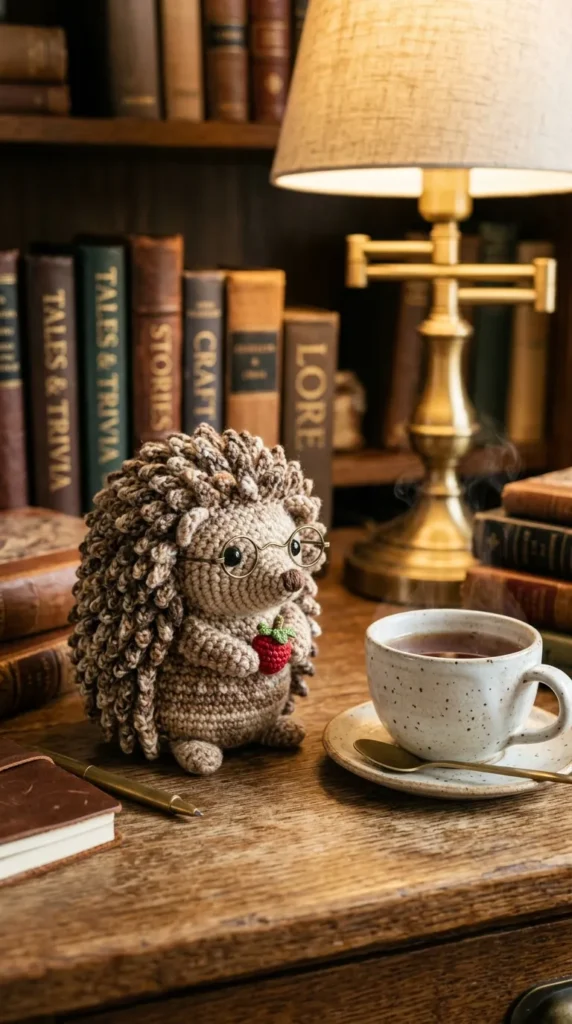
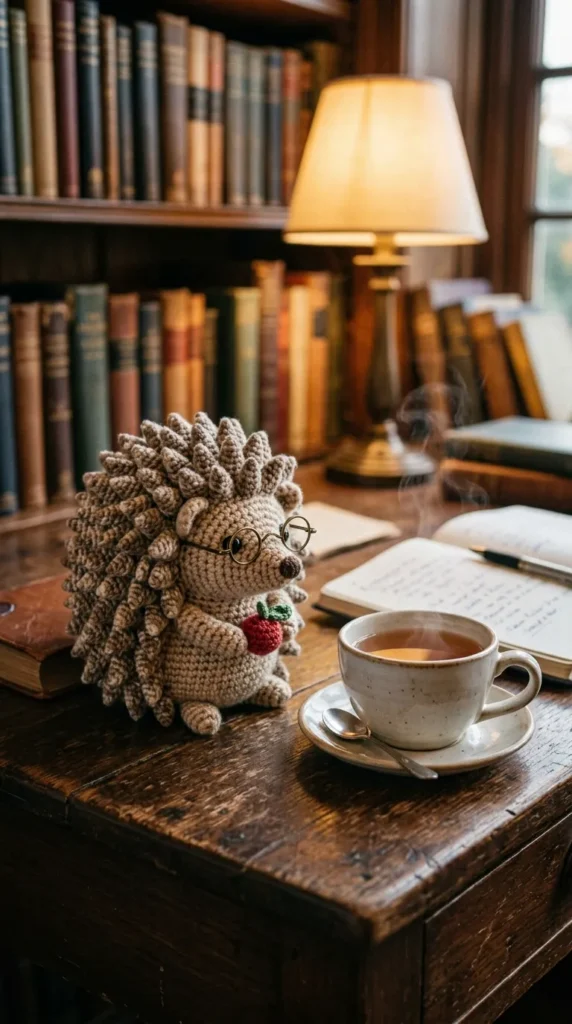
20. Cozy Library Hedgehog with Textured Berry Quills
Introduction
A literary companion, this little hedgehog features deeply textured spike-stitch “quills” in rich mottled heather yarns, a smooth velvet muzzle, and tiny crochet glasses perched on its nose.
What This Idea Means
This piece celebrates reading, autumn warmth, and cozy study spaces. It makes a charming addition to reading nooks, personal libraries, and writing desks.
How to Make It
- Spike Stitch Quills: Create the spiky coat using alternating spike stitches ($drop\ sc$ worked into 1 and 2 rounds below) using a variegated wool yarn with tones of chocolate, bark, and cream.
- Smooth Tapered Face: Switch to a smooth fingering-weight cotton in soft fawn for the snout and underbelly, ensuring clear contrast between the hedgehog’s fur and prickly quills.
- Wire Spectacles: Form a pair of miniature round spectacles using 20-gauge antique brass jewelry wire wrapped around a pencil, resting them gently over the snout.
- Autumn Accessory: Crochet a tiny crimson winterberry with two miniature emerald green leaves and sew it onto the hedgehog’s back quills.
Tips and Variations
- Quill Texture Hack: Alternatively, work the back in loop stitches, cut them, and coat them lightly with matte textile medium to create distinct, slightly stiff quills.
- Weighted Base: Add steel shot pellets to the belly to turn the hedgehog into a functional desk paperweight.
Materials Needed
- 60g variegated worsted-weight wool in Bark/Mottled Chestnut
- 30g sport-weight cotton in Warm Fawn
- Scraps of red and green embroidery floss
- 2.75 mm (US C/2) and 1.75 mm hooks
- 20-gauge antique bronze craft wire and round-nose pliers
- 4 mm black safety eyes
- Dense stuffing and weighting pellets
Comparison of Key Features
| Project Idea | Primary Fiber | Skill Level | Defining Feature | Aesthetic Style |
| 1. Vintage Heirloom Bunny | Cotton-Linen Blend | Intermediate | Removable Lace Pinafore | Vintage Cottagecore |
| 2. Nordic Wool Reindeer | Untreated Icelandic Lopi | Intermediate | Internal Wire Armature | Scandinavian Minimalist |
| 3. Whimsical Silk-Mohair Swan | Silk-Mohair + Merino | Advanced | Brushed Feather Shells | Classical Ballet / Ethereal |
| 4. Mossy Woodland Turtle | Worsted Wool & Cotton | Advanced | Micro-Succulent Carapace | Biophilic Botanical |
| 5. Bouclé Sleeping Baby Lamb | Alpaca Bouclé / Sherpa | Beginner-Intermediate | Tactile Looped Coat | Cozy Hygge |
| 6. Velvet Royal Stag | Micro-Velvet Chenille | Advanced | Sculpted Wire Antlers | Regal Modern Rustic |
| 7. Moody Victorian Raven | Pure Wool + Metallic Thread | Advanced | Articulated Claws & Beak | Dark Academia / Gothic |
| 8. Sea Glass Sea Turtle | Recycled Ocean Cotton | Intermediate | Hexagonal Ombré Carapace | Coastal Tranquility |
| 9. Enchanted Meadow Fawn | Merino Wool | Intermediate | Hand-Embroidered Wildflowers | Pastoral Storybook |
| 10. Ceramic-Look Whale | Raw Wet-Spun Linen | Intermediate | Ribbed Ventral Pleats | Japanese Wabi-Sabi |
| 11. Cloud-Soft Angora Kitty | Brushed Angora Blend | Intermediate | Needle-Felted Paw Pads | Gentle Ethereal |
| 12. Mountain Brown Bear | Flecked Wool Tweed | Beginner | Cross-Stitch Tight Gauge | Rustic Mountain Cabin |
| 13. Celestial Stardust Fox | Superwash Merino | Intermediate | Gold Constellation Stitching | Mystical Celestial |
| 14. Pastel Flamingo | Fine Combed Cotton | Advanced | Cascading Ruffle Wings | Soft Modern Romantic |
| 15. Pocket Mouse in Walnut | Micro Tatting Thread | Expert | Miniature 2-inch Scale | Vintage Miniature Art |
| 16. Arctic Horned Owl | Brushed Mohair Blend | Advanced | Fluffed Down Plumage | Arctic Wilderness |
| 17. Bohemian Desert Alpaca | Bulky Looped Wool | Intermediate | Woven Geometric Saddle | Bohemian Artisanal |
| 18. Delicate Golden Bee | Mohair & Silk Organza | Advanced | Organza Wire Wings | Botanical Jewel |
| 19. Japanese Garden Koi | Mercerized Cotton | Advanced | Translucent Silk Ribbon Fins | Zen Movement |
| 20. Cozy Library Hedgehog | Variegated Wool | Intermediate | Spike Stitch Quills & Glasses | Literary Warmth |
Essential Techniques for Elevated Crochet Animals
To give your crochet animals a polished, designer finish, use these core amigurumi techniques:
1. The “Yarn Under” Technique ($YU/YO$)
Instead of yarning over your hook for single crochet stitches, pull the yarn through by placing your hook over the strand (yarn under). This creates tight, stacked ‘X’-shaped stitches rather than ‘V’ shapes, preventing gaps and eliminating uneven stretch.
2. The Invisible Decrease ($invdec$)
Never use standard $sc2tog$ on display pieces, as it leaves noticeable bumps. Insert your hook into the front loops only of the two stitches to be joined, yarn over, pull through both loops, yarn over, and finish the single crochet. The seam will be virtually invisible.
       Front Loop 1    Front Loop 2
          \              /
           \____________/  <-- Invisible Decrease Path (invdec)
3. Facial Sculpting
Before sealing and fastening off the head, thread a long needle with matching yarn through the base of the neck up to the inner corner of one eye, across to the other eye, and back down to the neck. Pull gently to draw the eyes slightly inward and create realistic eye sockets, natural cheeks, and dimensional brow lines.
4. Thoughtful Weighting
While polyester fiberfill provides shape, it lacks weight. Combine high-grade stuffing with small cotton bags filled with clean glass beads, ceramic pellets, or washed pea gravel placed in the lower third of the body. This gives your pieces a weighted, satisfying feel when held.