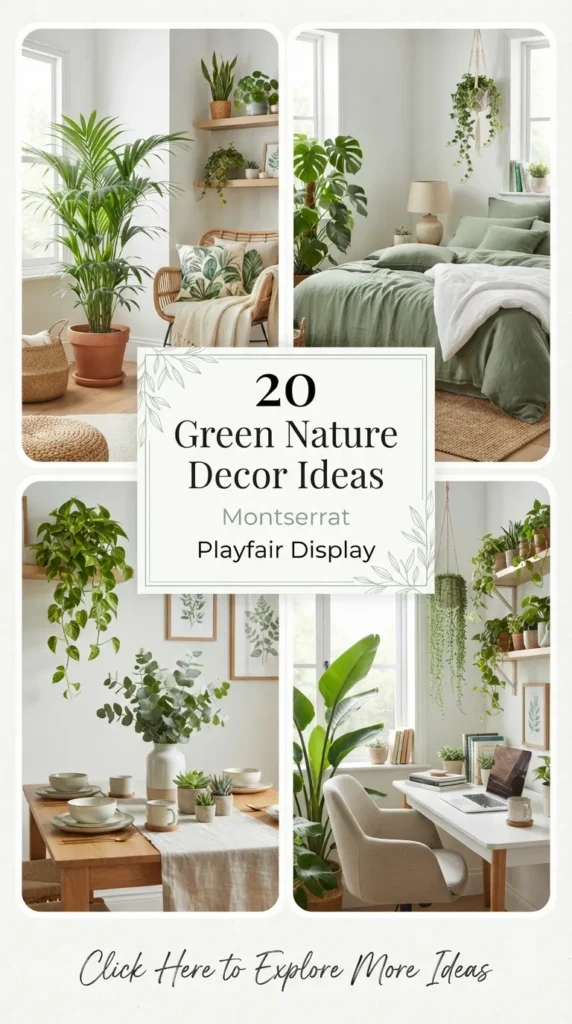
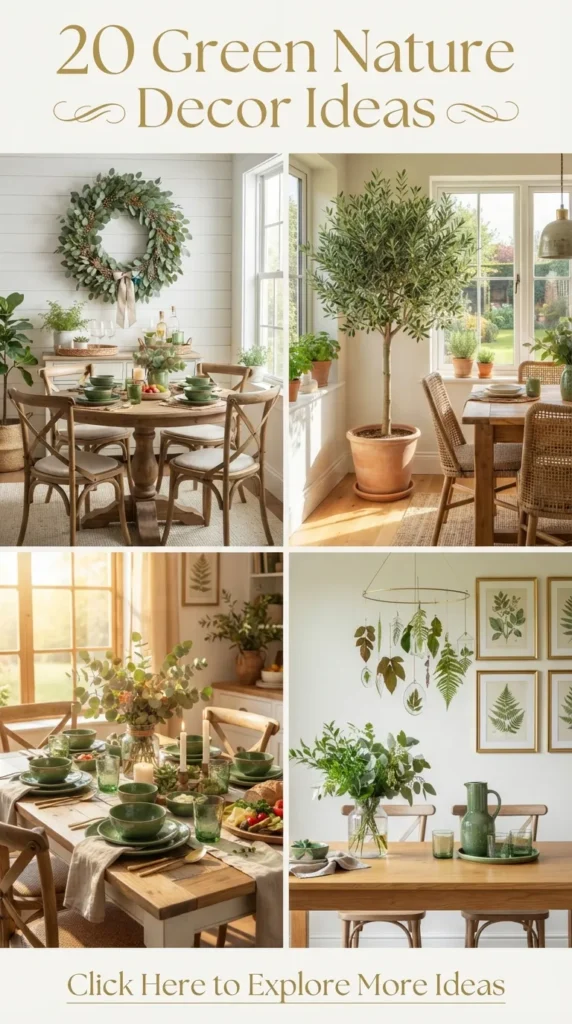
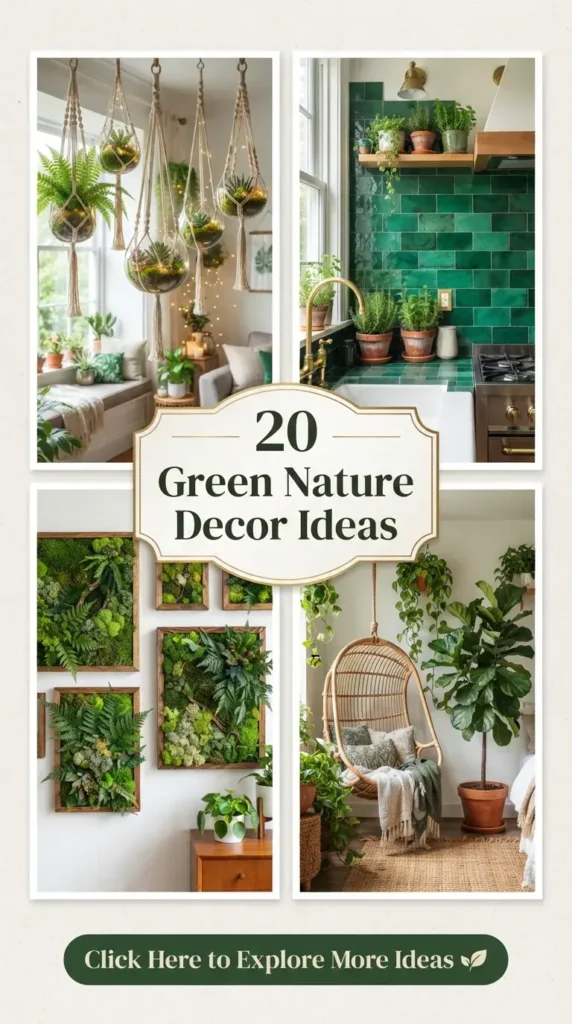
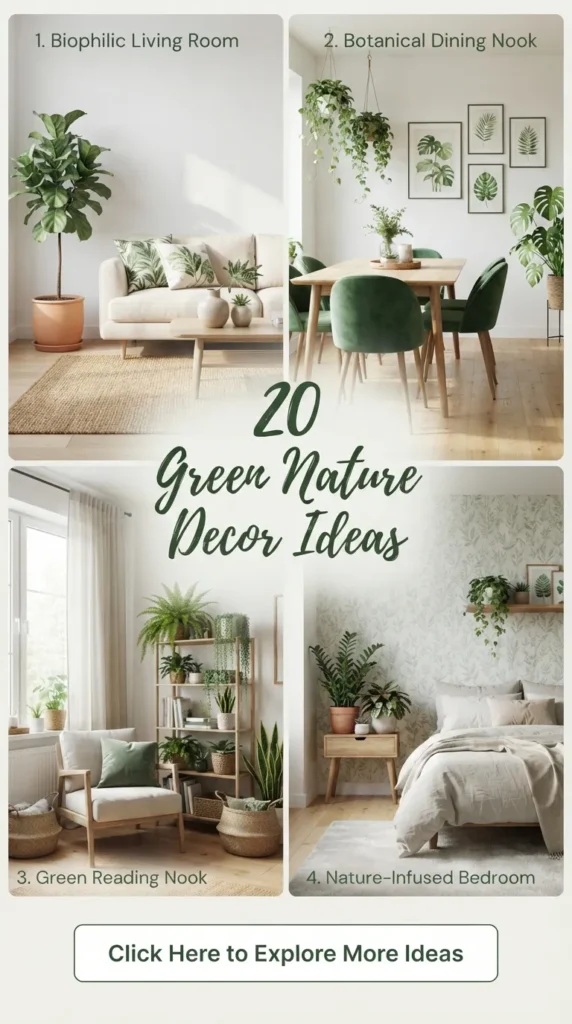
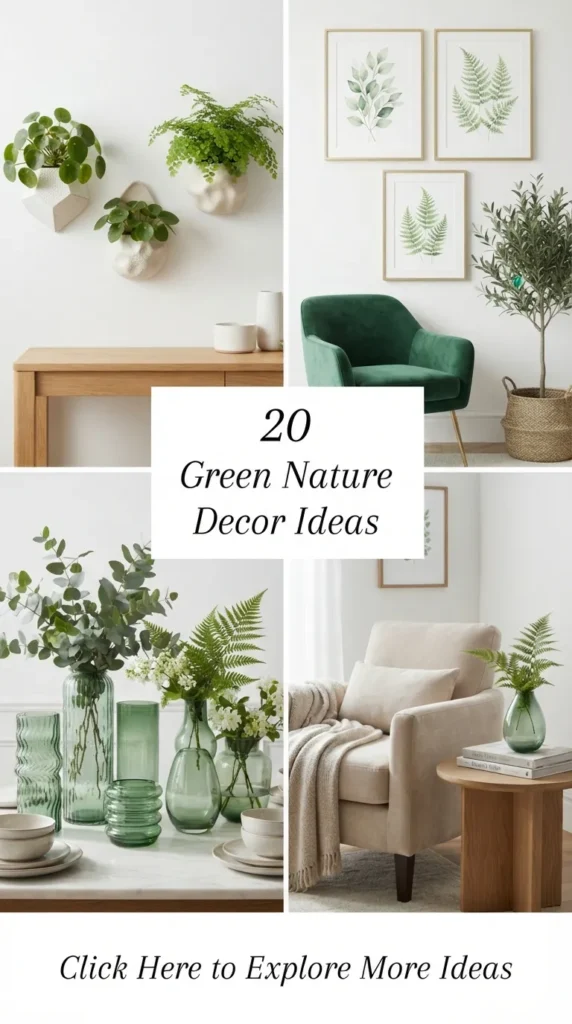
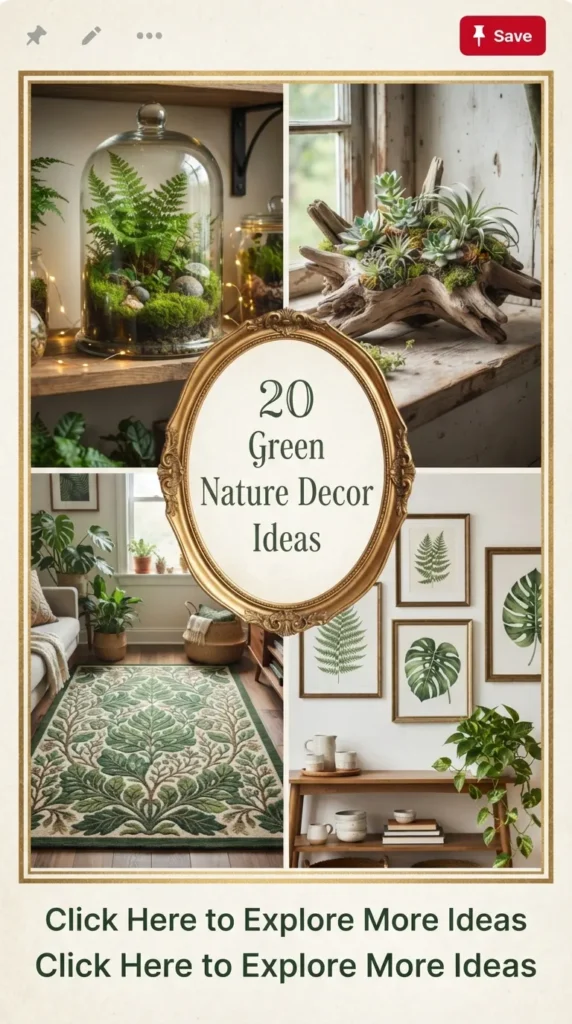
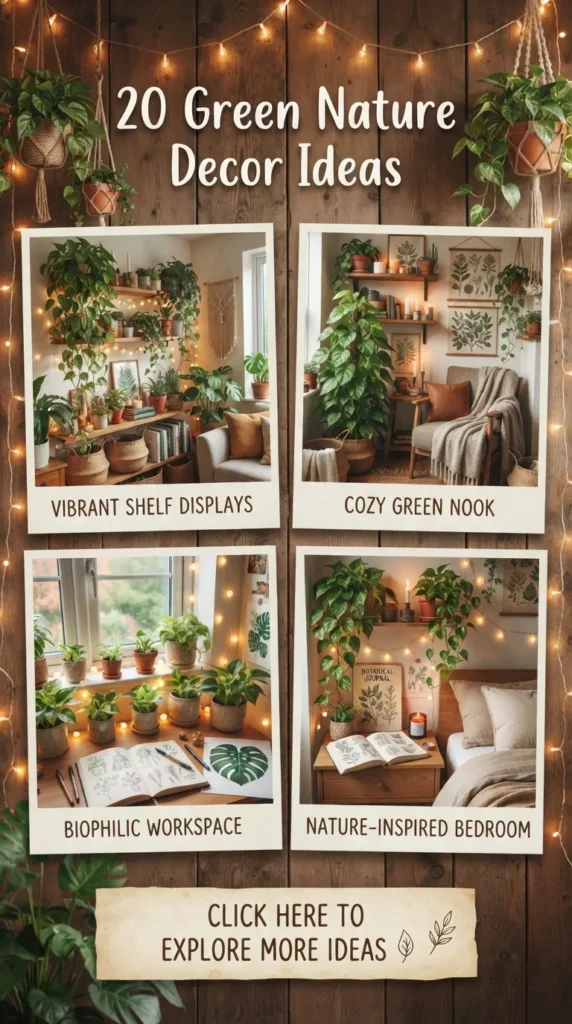
Bringing the serene, revitalizing essence of nature indoors has transformed from a fleeting interior design trend into a foundational lifestyle movement. Biophilic design—the practice of connecting human spaces with natural elements—nurtures wellness, reduces stress, and transforms sterile living areas into tranquil, organic sanctuaries. Green nature decor blends lush foliage, mossy textures, deep botanical hues, and natural woods to craft a home that feels grounded, airy, and effortlessly sophisticated.
Whether you are seeking to refresh a sunlit reading nook, elevate a minimalist living room, or transform your entryway into a welcoming botanical gallery, these 20 elegant, aesthetic, and realistic green nature decor ideas offer rich inspiration. Each concept is broken down with a complete explanation, step-by-step creation guides, and curated tips to help you bring these timeless natural aesthetics into your daily living space.
1. Preserved Moss Wall Art
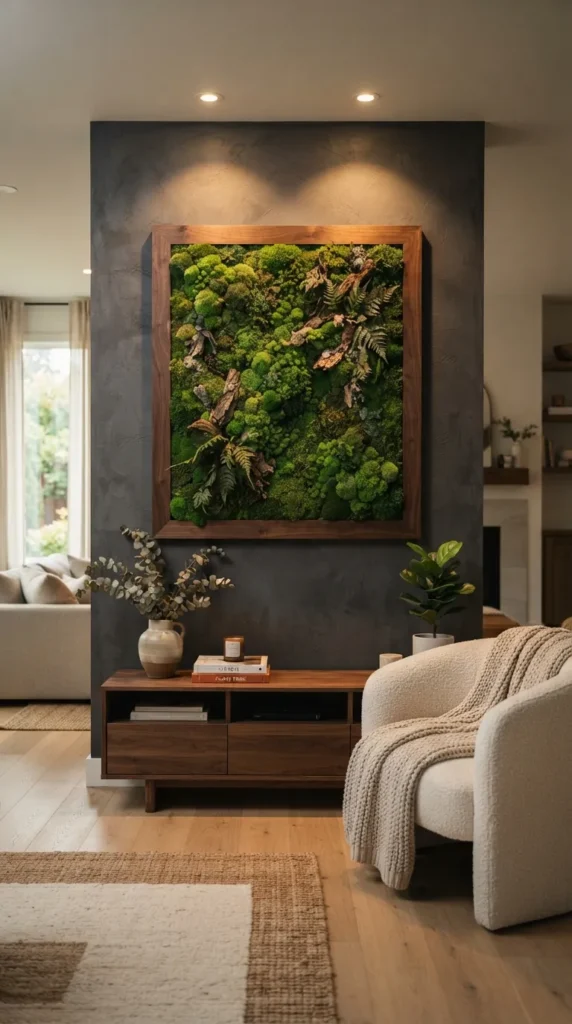
Preserved moss wall art brings the velvety texture and calming energy of an ancient forest floor directly onto your vertical surfaces. Unlike living plant walls that require complex irrigation systems and specific lighting, preserved moss art utilizes natural reindeer, sheet, and mood mosses treated with non-toxic plant glycerins. This maintains their vibrant emerald color and soft tactile feeling for years with zero watering required.
What This Idea Means
This decor concept replaces conventional canvas paintings with a tactile, three-dimensional botanical sculpture. It bridges modern architectural lines with wild, unscripted organic form, creating a focal point that calms the eyes and softens room acoustics.
How to Make It
- Prepare the Frame: Select a deep wooden shadow box frame or a reclaimed barn-wood tray with an open face. Reinforce the back panel with a sturdy piece of plywood painted in a dark forest green or charcoal hue.
- Sort Your Mosses: Gather a diverse assortment of preserved moss types—such as light green reindeer moss, rich sheet moss, and rounded cushion moss—along with pieces of dried bark, preserved ferns, and lichen.
- Map the Composition: Lay out your natural materials inside the frame before gluing. Create natural topographies by layering thicker cushion moss in clusters and letting sheet moss form smooth valleys between them.
- Secure with Adhesive: Using a heavy-duty, multi-temp hot glue gun or neutral silicone adhesive, apply generous amounts of glue to the backing board and press each moss segment firmly into place for 10–15 seconds.
- Add Focal Accents: Nestled within the moss, glue down small pieces of driftwood, preserved sprigs of eucalyptus, or dried seed pods to mimic an organic woodland floor.
- Mounting: Allow the piece to dry flat for 24 hours before hanging securely using heavy-duty wall anchors.
Tips and Variations
- Materials Needed: Deep wooden frame, backing board, preserved moss variety pack, hot glue gun with glue sticks, preserved fern fronds, natural bark bits.
- Lighting Tip: Install a soft, warm LED picture light directly above the frame to cast dramatic shadows across the moss textures.
- Variation: Construct a floating trio of small circular wooden hoops filled with moss for a balanced gallery grid.
2. Cascading Botanical Canopy Shelving
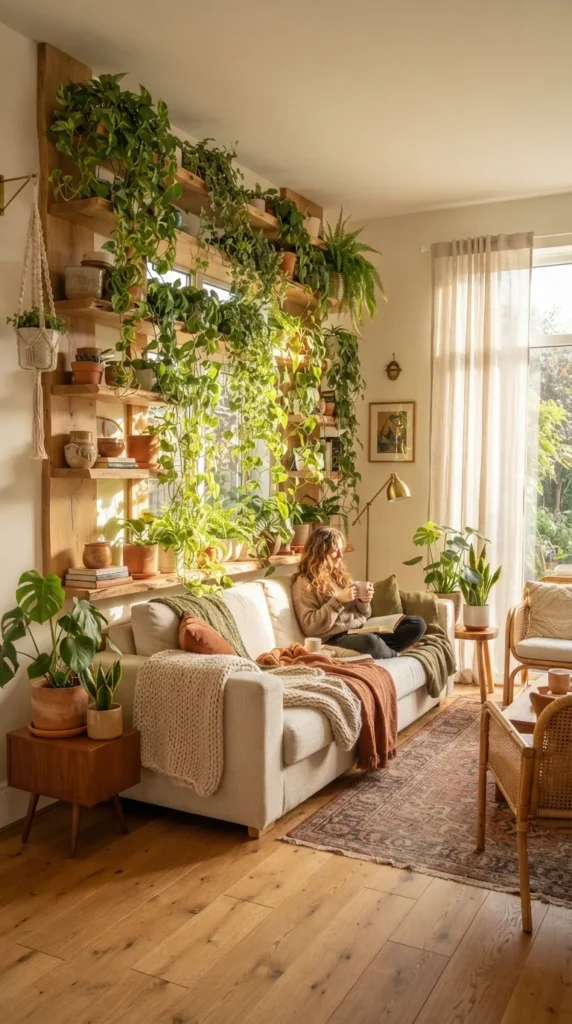
Cascading canopy shelving elevates houseplants into living architectural features. By mounting floating wooden shelves above head level and populating them with long, trailing vine species, you create an overhead curtain of emerald leaves that frames windows, reading nooks, or bed headboards.
What This Idea Means
This idea utilizes vertical room height to construct a living botanical arch. It draws the eye upward, giving the illusion of higher ceilings while immersing the inhabitant beneath a lush, protective canopy of fresh greenery.
How to Make It
- Select and Mount Shelves: Install two or three thick, live-edge wood or natural pine floating shelves at staggered heights near a well-lit window or high wall. Ensure the wall anchors are rated for heavy weight (plants and wet soil).
- Choose Trailing Plant Varieties: Select hardy, long-trailing houseplants such as Heartleaf Philodendron, Golden Pothos, Satin Pothos, English Ivy, and String of Hearts.
- Pottings and Vessel Placement: Plant your foliage in lightweight ceramic or terracotta pots equipped with fitted drip trays to prevent water damage to the wooden shelves.
- Train the Vines: Position the pots along the shelves and gently guide the longest vines to cascade down over the edges. Use small, clear sticky hooks on adjacent walls if you wish to train vines sideways.
- Style Secondary Objects: Interspersed between the potted plants, add small stacks of linen-bound books, raw quartz crystals, or brass candleholders to balance the greenery.
Tips and Variations
- Materials Needed: Floating wood shelves, heavy-duty wall anchors, trailing houseplants, ceramic pots with saucer trays, plant shears.
- Maintenance Tip: Use a long-spout watering can and keep a step stool nearby for routine care. Trim leggy vines regularly to promote fuller foliage growth near the top.
- Variation: Wrap subtle, warm micro-fairy lights along the vines to transform the canopy into a luminous starry glow during evening hours.
3. Glass Terrarium Tabletop Centerpieces
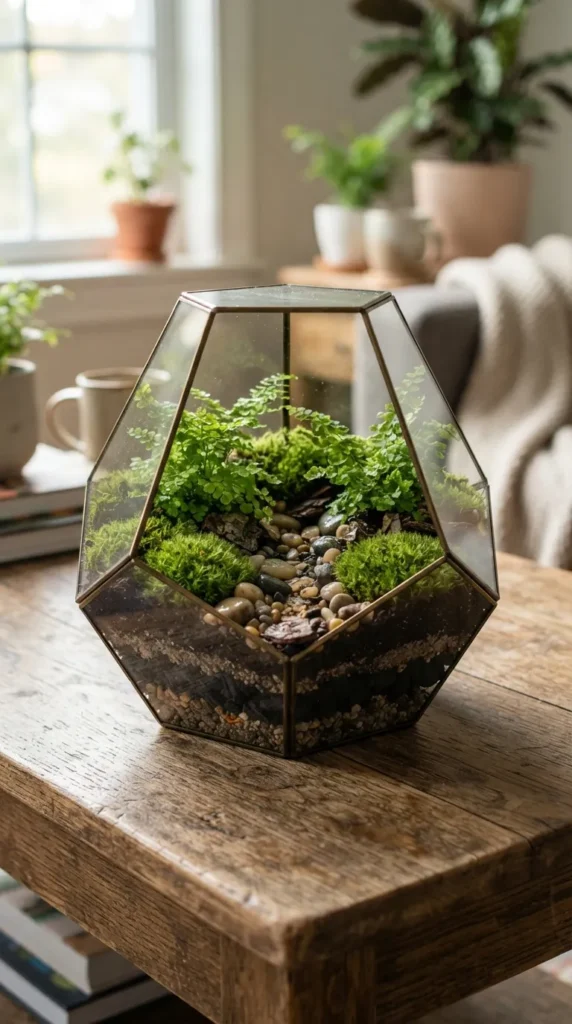
Terrariums are miniature encapsulated worlds where small, delicate plants thrive inside clear glass vessels. Functioning as living art pieces, tabletop terrariums showcase visible layers of soil, charcoal, pebbles, and vibrant mosses, making them captivating conversation starters for dining tables or coffee tables.
What This Idea Means
A glass terrarium brings high-end botanical micro-landscaping into compact spaces. It offers a detailed, close-up interaction with nature, accentuating the architectural beauty of glass transparency against wild green textures.
How to Make It
- Choose the Vessel: Select a geometric glass container, an antique apothecary jar, or a wide glass bowl. Thoroughly wash and dry the glass.
- Build the Drainage Layer: Pour a 1-inch base layer of polished pea gravel or small river stones into the bottom to collect excess water and protect plant roots.
- Add Activated Charcoal: Spread a thin layer of activated charcoal over the gravel. This absorbs odors and keeps the miniature ecosystem clean and free of mold.
- Soil Layer: Add 2–3 inches of lightweight, high-grade potting soil mixed with perlite. Create small slopes or mounds to give the landscape natural depth.
- Plant Selection and Placement: Plant small, moisture-loving varieties such as Fittonia (Nerve Plant), miniature ferns, baby’s tears, and dwarf pilea. Dig small holes, gently place roots, and firm the soil around each plant.
- Decorate the Surface: Cover open soil patches with small pieces of living sheet moss, polished mini river rocks, and tiny pieces of sea glass or miniature petrified wood.
- Hydrate: Lightly mist the terrarium with a spray bottle filled with distilled water.
Tips and Variations
- Materials Needed: Glass vessel, small gravel, activated charcoal, potting mix, miniature foliage plants, sheet moss, spray bottle, decorative stones.
- Care Tip: Place in bright, indirect light. Closed terrariums require very little watering (once every few months), while open terrariums need light misting every week.
- Variation: Create a dry desert mini-terrarium using coarse sand, small succulents, and miniature cacti inside a hanging teardrop glass globe.
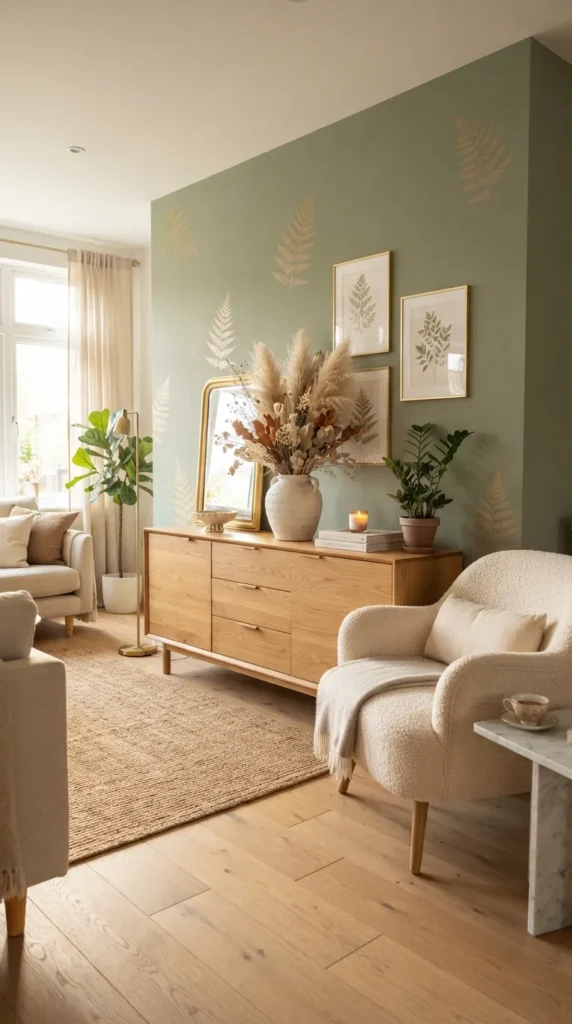
4. Sage Green Architectural Accent Wall with Botanical Stencils
An accent wall rendered in soft, muted sage or deep forest green instantly anchors a room in soothing organic tones. Taking this design further with delicate, subtle botanical stencils in matte metallic gold or creamy warm white adds architectural sophistication without cluttering physical space.
What This Idea Means
This approach uses color psychology and painterly texture to establish a permanent sense of nature within room walls. It creates a serene backdrop that harmonizes seamlessly with wooden furniture and woven natural textiles.
How to Make It
- Wall Preparation: Clean the chosen wall surface, patch any holes, and apply painters tape along trim, ceilings, and adjacent walls.
- Apply Base Paint: Paint the entire wall with two coats of high-quality, zero-VOC matte or eggshell paint in a refined sage green or deep eucalyptus shade. Allow to dry completely for 24 hours.
- Position the Stencil: Secure a large, reusable botanical stencil (featuring fern fronds, monstera outlines, or delicate olive branches) onto the wall using painter’s tape and a bubble level.
- Stenciling Process: Dappling paint onto the stencil using a dense foam roller or a stenciling brush dipped in a complementary color (such as soft warm ivory or muted satin gold). Offload excess paint onto a paper towel first to prevent bleed-through.
- Repeat Pattern: Carefully peel back the stencil, align it with the registration marks for the next section, and repeat until the desired accent pattern is complete.
Tips and Variations
- Materials Needed: Sage green wall paint, stencil, foam roller, stenciling brush, painter’s tape, level, secondary accent paint color.
- Design Tip: Keep stencil patterns sparse and flowing for a modern minimalist look, rather than a dense repetitive wallpaper style.
- Variation: Skip the stencil and create a color-blocked arched feature wall in deep moss green behind a bed or entry console table.
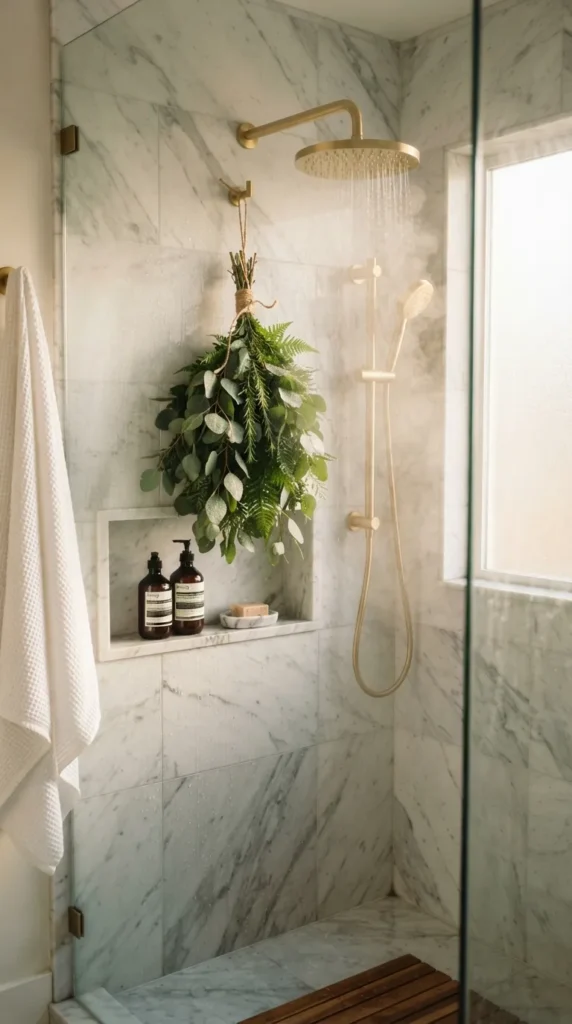
5. Eucalyptus & Fern Aromatherapy Shower Bundles
Elevate your daily bath routine by creating a fresh botanical shower bundle. Tying fresh stems of silver dollar eucalyptus, blue gum eucalyptus, and feathery fern branches together and hanging them behind your showerhead blends functional luxury with earthy greenery.
What This Idea Means
This idea marries natural home decor with sensory wellness. The heat and steam from the shower release natural essential oils from the foliage, creating an invigorating, therapeutic home spa experience.
How to Make It
- Gather Fresh Botanical Stems: Purchase fresh eucalyptus branches, preserved or fresh sword ferns, and optionally a few sprigs of fresh lavender or rosemary.
- Prepare the Stems: Strip the bottom 3–4 inches of leaves from all stems using floral shears or sharp scissors.
- Flatten the Leaves: Gently roll over the eucalyptus leaves with a wooden rolling pin on a flat surface to bruise the leaves slightly, releasing their natural aromatic oils.
- Assemble the Bundle: Arrange the stems into an attractive bouquet with longer fern fronds in the back and silver dollar eucalyptus in the front.
- Bind Securely: Wrap natural jute twine tightly around the stripped stem bases several times and knot securely. Leave a 12-inch tail of twine to hang the bundle.
- Hang in Shower: Tie the bundle securely to the pipe behind your showerhead, ensuring it hangs away from the direct stream of hot water so it receives steam without being washed away instantly.
Tips and Variations
- Materials Needed: Fresh eucalyptus branches, fern sprigs, jute twine, floral shears, wooden rolling pin.
- Longevity Tip: Replace your fresh bundle every 3 to 4 weeks, or when the aromatic scents begin to fade.
- Variation: Tie a small quartz crystal or a dried slice of orange into the bundle center for added visual texture and aroma.
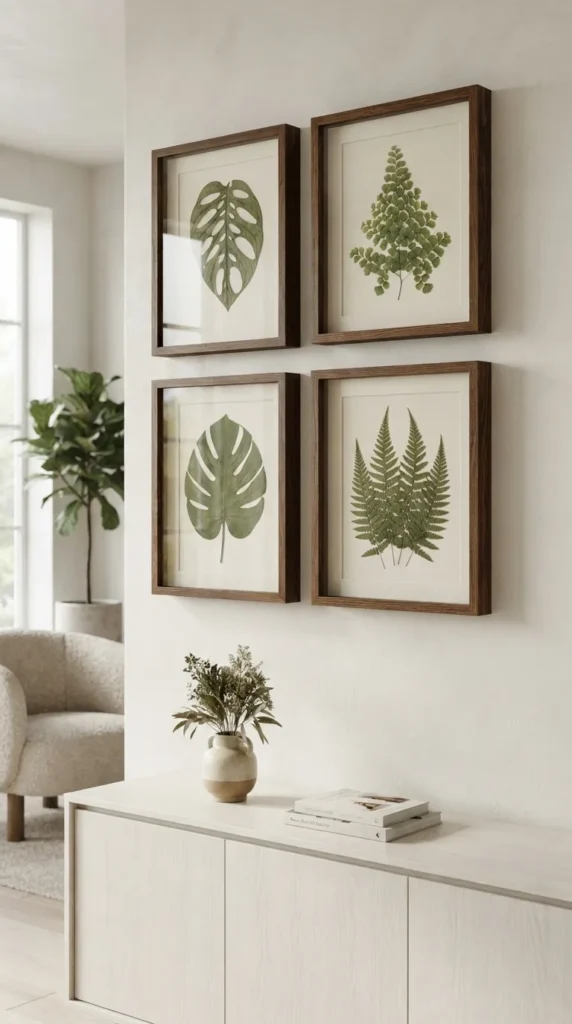
6. Dried Botanical Shadow Boxes
Dried botanical shadow boxes allow you to frame pressings of oversized leaves—such as monstera, fan palm, ginkgo, and staghorn ferns—as clean, modern museum-style exhibits. The deep shadow box structure highlights the intricate silhouette, venation, and dry architectural forms of plants.
What This Idea Means
This method preserves nature’s structural patterns into timeless, high-end gallery wall art. It offers a sophisticated, minimalist alternative to traditional colorful floral prints.
How to Make It
- Collect and Press Leaves: Gather large, clean leaves with distinct silhouettes. Place them between sheets of parchment paper inside a heavy book or a wooden botanical press for 2 to 3 weeks until completely dry and flat.
- Prepare Shadow Boxes: Open deep shadow box frames (8×10 or 16×20 inches) with natural oak or black walnut wood finishes. Insert a backing board covered in textured neutral linen or heavy cream watercolor paper.
- Mount the Foliage: Place a tiny dot of neutral pH archival liquid adhesive or double-sided mounting foam tape onto the back center of each pressed leaf. Press firmly onto the linen backing, allowing the outer leaf edges to float slightly off the paper for depth.
- Reassemble Frame: Clean the glass on both sides, assemble the shadow box, and seal the backing.
- Hang as a Set: Hang three to four shadow boxes in a horizontal row or a clean grid layout over a sofa or along a hallway.
Tips and Variations
- Materials Needed: Pressed leaves, wooden shadow box frames, linen backing paper, archival glue/mounting foam, botanical press.
- Styling Tip: Mix different leaf geometries—such as combining a feathery fern frond next to a heart-shaped monstera leaf—for visual contrast.
- Variation: Spray pressed leaves with a thin coat of matte metallic gold or deep copper paint before mounting for a luxurious finish.
7. Indoor Living Herb Ladder Display
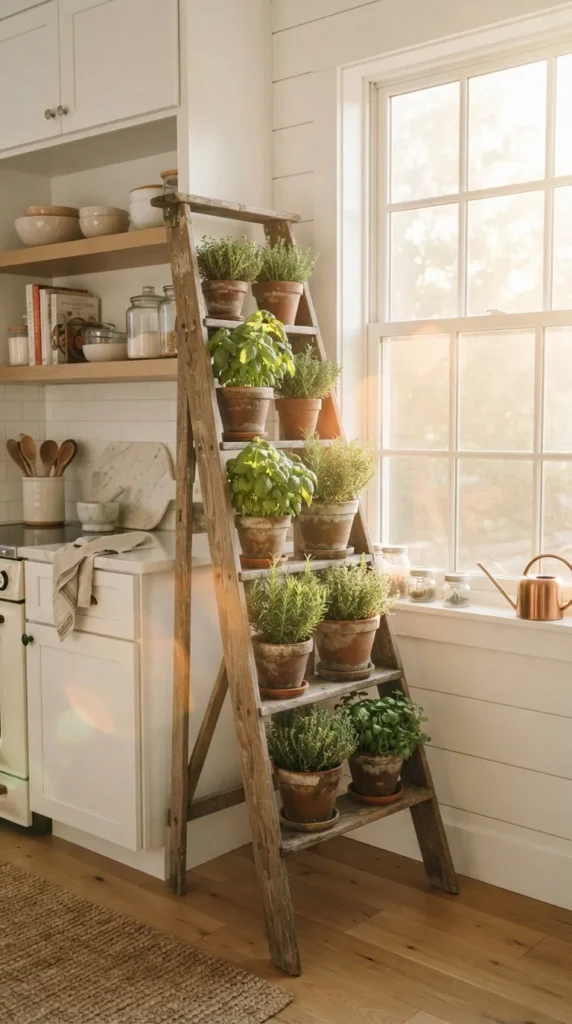
An indoor living herb ladder display combines rustic charm with practical everyday culinary convenience. By repurposing a lean-to wooden step ladder or blanket ladder, you can create a multi-tiered vertical garden holding terracotta pots filled with fragrant green herbs right in your kitchen or dining nook.
What This Idea Means
This concept brings functional greenery into the heart of the home, proving that nature decor can be both aesthetically pleasing and utility-focused.
How to Make It
- Source or Build a Ladder: Choose an untreated or stained wooden leaning ladder with wide flat rungs. Secure the base with non-slip rubber pads.
- Prepare Pot Holders: Attach heavy-duty metal plant ring clamps or leather strap loops onto the ladder rungs using brass screws.
- Plant Culinary Herbs: Pot fresh herb plants such as sweet basil, mint, rosemary, thyme, parsley, and sage into classic warm terracotta pots with drainage holes and attached saucers.
- Mount Pots onto Ladder: Slip the potted herbs into the ring clamps or leather straps, ensuring they sit firmly in place.
- Position for Growth: Lean the completed ladder against a kitchen wall near a sunny south- or west-facing window.
Tips and Variations
- Materials Needed: Leaning wood ladder, terracotta pots, pot mounting ring clamps, potting mix, fresh herb plants, screws, drill.
- Care Tip: If natural sunlight is limited in your kitchen, mount sleek, full-spectrum LED grow light strips beneath each ladder rung to keep herbs thriving.
- Variation: Label each terracotta pot using white chalk paint markers with elegant calligraphic herb names.
8. Potted Monstera in Fluted Brass & Ceramic Stand
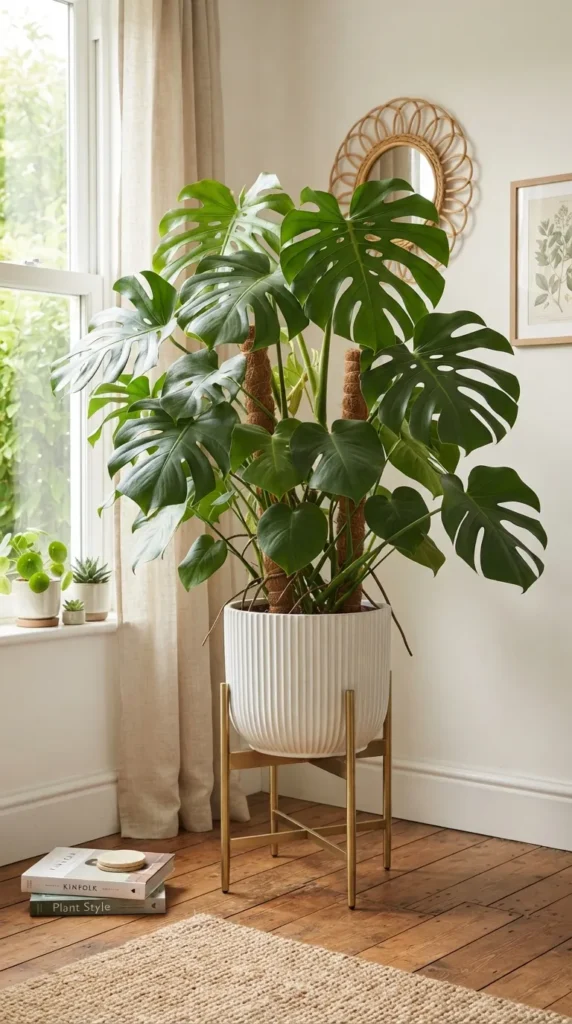
The Monstera Deliciosa, with its iconic natural leaf cutouts (fenestrations), serves as an architectural centerpiece when paired with a elevated fluted ceramic pot sitting atop a warm brushed-brass plant stand.
What This Idea Means
Elevating a bold statement tropical plant turns a simple indoor pot into a mid-century modern sculptural element, adding dramatic leaf forms and warm metallic accents to room corners.
How to Make It
- Select Plant and Pot: Choose a healthy, full Monstera Deliciosa plant. Select a heavy, high-fired ceramic planter with a subtle ribbed or fluted exterior texture in matte white or soft cream.
- Repotting: Pot the Monstera into the ceramic planter using a rich, well-draining soil blend made of potting soil, orchid bark, and perlite. Insert a sturdy natural coco-coir moss pole near the central stem to support climbing growth.
- Assemble Stand: Select an adjustable brushed-brass or solid walnut plant stand that cradles the planter base 8–12 inches off the floor.
- Positioning: Place the assembled display in a room corner receiving bright, indirect natural sunlight.
Tips and Variations
- Materials Needed: Monstera plant, fluted ceramic pot, coco-coir moss pole, aerated soil mix, brass or walnut plant stand.
- Leaf Care: Wipe the large leaves monthly with a soft micro-fiber cloth dampened with distilled water and a drop of neem oil to keep them glossy and dust-free.
- Variation: Replace the Monstera with a tall Ficus Lyrata (Fiddle Leaf Fig) or Strelitzia (Bird of Paradise) for vertical leaf shapes.
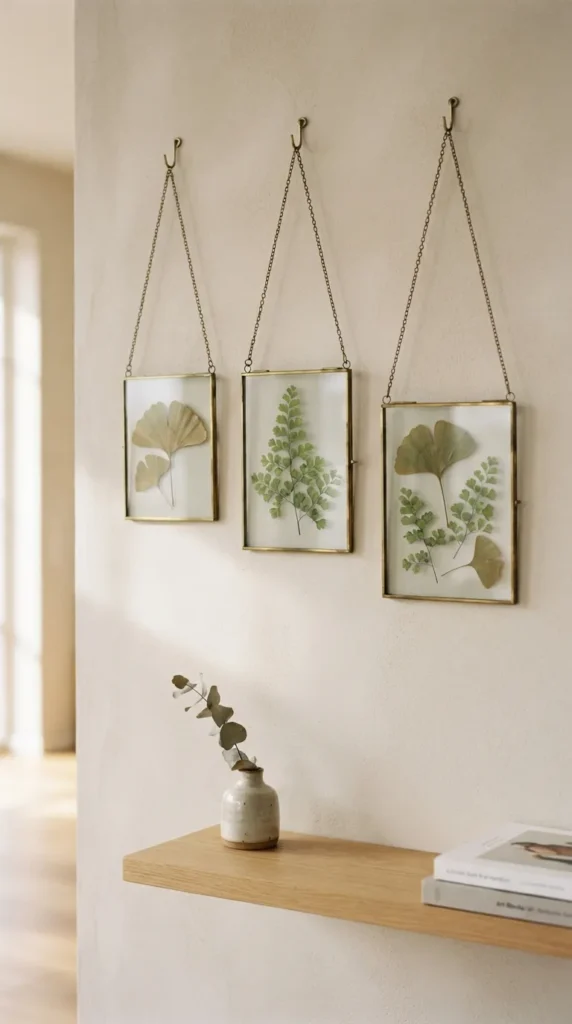
9. Floating Pressed Leaf Glass Frames
Floating pressed leaf frames suspend delicate botanicals between two sheets of clear glass held by slim metallic borders. When hung against a clean wall, light passes through the glass, highlighting every subtle leaf vein and stem structure in stunning detail.
What This Idea Means
This idea relies on airiness, transparency, and negative space, bringing a delicate, floating quality to botanical display art.
How to Make It
- Press Fresh Leaves: Collect leaves with distinct shapes, such as Ginkgo Biloba, Japanese Maple, or Maidenhair Fern. Press flat between thick parchment paper sheets for two weeks.
- Prepare Double-Glass Frames: Acquire brass, black metal, or copper double-glass hanging frames featuring a top latch.
- Position Foliage: Open the glass panels. Place a single pressed leaf or a symmetrical arrangement of small leaves in the center of the bottom glass pane. Use a tiny speck of clear craft gel adhesive to keep leaves from sliding.
- Close and Seal: Carefully lay the top glass pane down and secure the frame latch tightly.
- Hang with Ribbon: Thread a soft velvet ribbon, thin leather cord, or brass chain through the top hanging loop and suspend from a decorative wall peg.
Tips and Variations
- Materials Needed: Double-pane glass frames, pressed foliage, clear gel dots, hanging ribbon/brass chain, wall pegs.
- Gallery Style: Hang a collection of 5 to 7 varying frame sizes at asymmetrical heights to form an airy botanical wall installation.
- Variation: Add small strips of handwritten calligraphy or dried pressed field flowers alongside the leaves for a vintage botanical collector aesthetic.
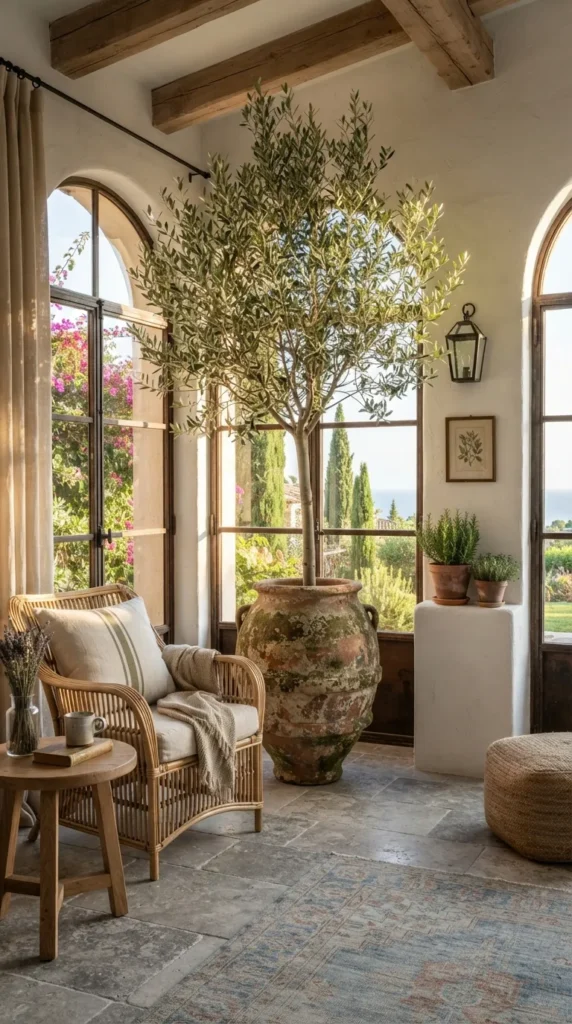
10. Olive Tree Corner Oasis in Oversized Terracotta Pot
Bringing a dwarf Mediterranean olive tree (Olea europaea) indoors introduces silvery green-grey leaves and delicate woody branches into sunny modern interiors. Set inside a large, aged terracotta urn, it anchors bright spaces with Mediterranean warmth.
What This Idea Means
This concept introduces organic textures and airy leaf density, softening modern interior angles with coastal European warmth.
How to Make It
- Choose Olive Variety: Select a dwarf indoor-friendly olive tree variety, such as ‘Arbequina’ or ‘Little Ollie’, standing 4 to 6 feet tall.
- Select Vessel: Choose an oversized, rustic aged-terracotta pot or concrete urn with a weathered patina and drainage holes.
- Potting Process: Fill the bottom third with lava rocks for fast drainage. Plant the olive tree using a gritty, well-draining cactus/succulent soil mix blended with coarse builder’s sand.
- Top Dressing: Cover the exposed surface soil with smooth grey beach pebbles or coarse pea gravel for a neat finish.
- Placement: Position the tree directly beside a south-facing window receiving 6 or more hours of direct natural sunlight daily.
Tips and Variations
- Materials Needed: Indoor dwarf olive tree, aged terracotta urn, succulent/sand potting mix, lava rocks, beach pebbles.
- Sunlight Support: If direct sunlight is insufficient, set up an overhead architectural floor lamp equipped with a high-output LED grow bulb.
- Variation: If live tree maintenance feels challenging, use a high-end, hyper-realistic faux olive tree set in genuine dried soil inside an antique pot.
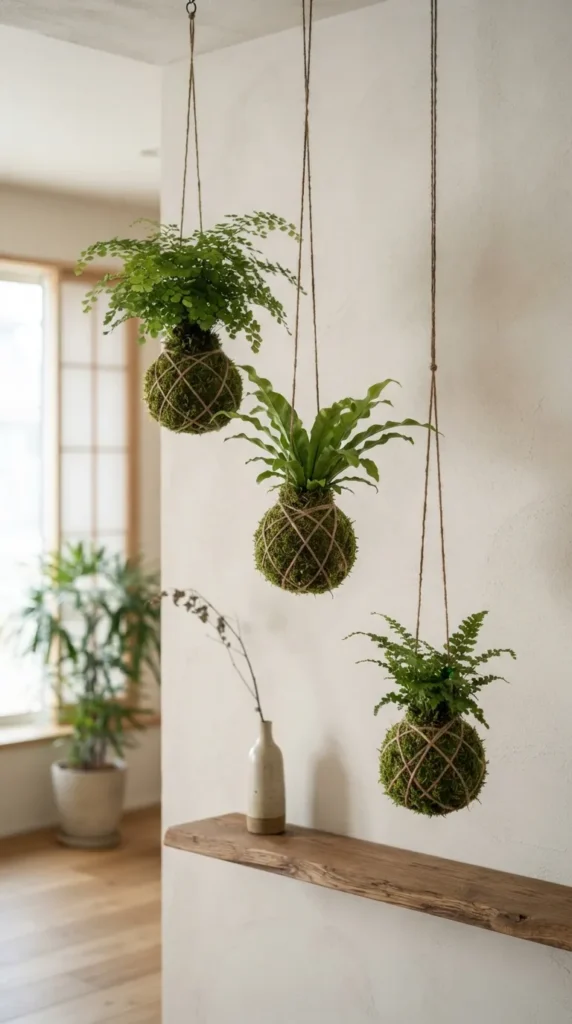
11. Japanese Kokedama Hanging Moss Balls
Kokedama is a traditional Japanese bonsai art form where a plant’s root ball is encased in a ball of special soil, wrapped tightly in vibrant green moss, and bound with natural string or twine. Suspended at different heights, Kokedama plants form floating green sculptures.
What This Idea Means
Kokedama frees plants from conventional plastic or ceramic pots, creating a gravity-defying display of raw organic beauty that embodies the Japanese principle of Wabi-Sabi (finding beauty in imperfection).
How to Make It
- Prepare the Plant: Select a small, moisture-tolerant plant such as a Staghorn Fern, Boston Fern, Pothos, or Parlor Palm. Gently slide the plant out of its pot and brush away 70% of the nursery soil from the roots.
- Mix Kokedama Soil: Combine 70% peat moss or Akadama soil with 30% bonsai soil and add water slowly until a sticky, clay-like soil ball can be molded around the plant roots.
- Form Soil Ball: Encase the plant’s root system inside a 4-to-5-inch sphere of the prepared soil mix, pressing gently to compact.
- Wrap in Moss: Cover the entire soil sphere with sheets of fresh or soaked sheet moss, pressing it firmly into the soil base.
- Bind with String: Wrap natural jute twine, waxed cord, or clear fishing line tightly around the moss sphere in multi-directional crisscross patterns until the ball is firm and secure. Tie off with a strong knot.
- Suspend: Attach a long strand of twine and suspend from ceiling hooks near bright light.
Tips and Variations
- Materials Needed: Small houseplants, peat moss/Akadama soil, bonsai soil, fresh sheet moss, jute twine, ceiling hooks.
- Watering Method: To water, unhook the moss ball once a week and submerge the bottom two-thirds in a bowl of room-temperature water for 10–15 minutes. Drain before re-hanging.
- Variation: Display the Kokedama sitting atop a flat handmade ceramic saucer or raw wooden slice on a coffee table instead of hanging.
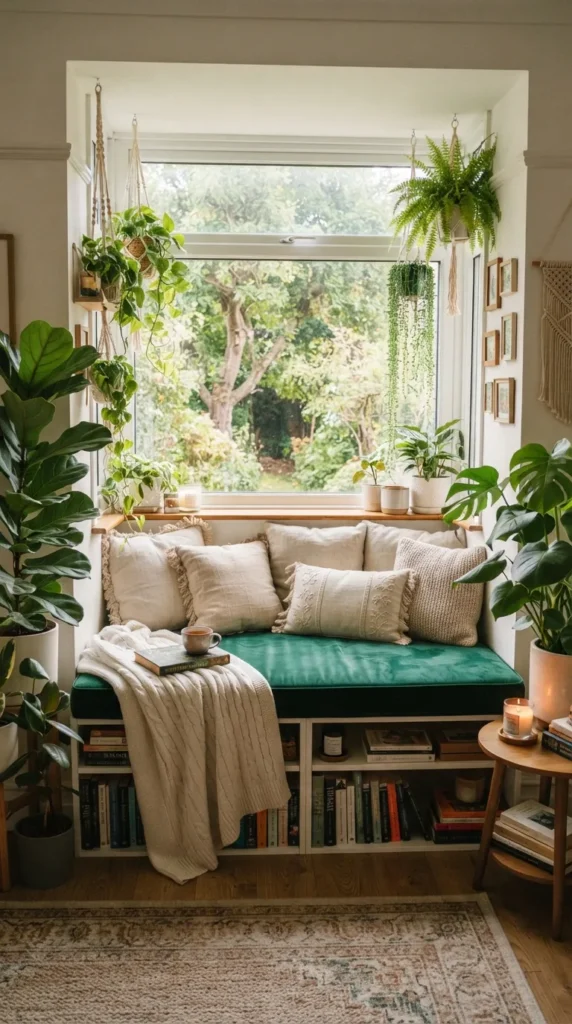
12. Emerald Velvet & Organic Linen Window Nook
Transform a sunny window sill or built-in bench into a botanical relaxation zone by combining plush emerald green velvet seat cushions with natural beige linen accent pillows, all framed by surrounding potted houseplants.
What This Idea Means
This idea translates green nature decor into textiles. It pairs soft fabrics with live plant foliage, establishing a soothing tactile connection between interior comfort and natural views.
How to Make It
- Design Bench Cushion: Measure your window bench seat. Order or craft a custom dense foam bench cushion covered in durable, soft forest or emerald green velvet fabric.
- Layer Accent Textiles: Add throw pillows in washed neutral linen, oat tones, and subtle woven moss green textures. Fold a chunky cream wool throw blanket across one side.
- Flank with Greenery: Place tall floor plants (such as a Cast Iron Plant or Snake Plant) on either side of the window bench.
- Style the Windowsill: Arrange a row of small potted succulents or trailing String of Pearls along the window ledge behind the seating cushions.
Tips and Variations
- Materials Needed: Emerald velvet bench cushion, neutral linen throw pillows, wool throw blanket, floor planters, small window ledge pots.
- Color Palette Tip: Keep surrounding wall colors neutral (pale warm grey, creamy ivory) to make the emerald green velvet pop dynamically.
- Variation: Add built-in wooden storage drawers beneath the bench seat to house books, gardening tools, or extra throw blankets.
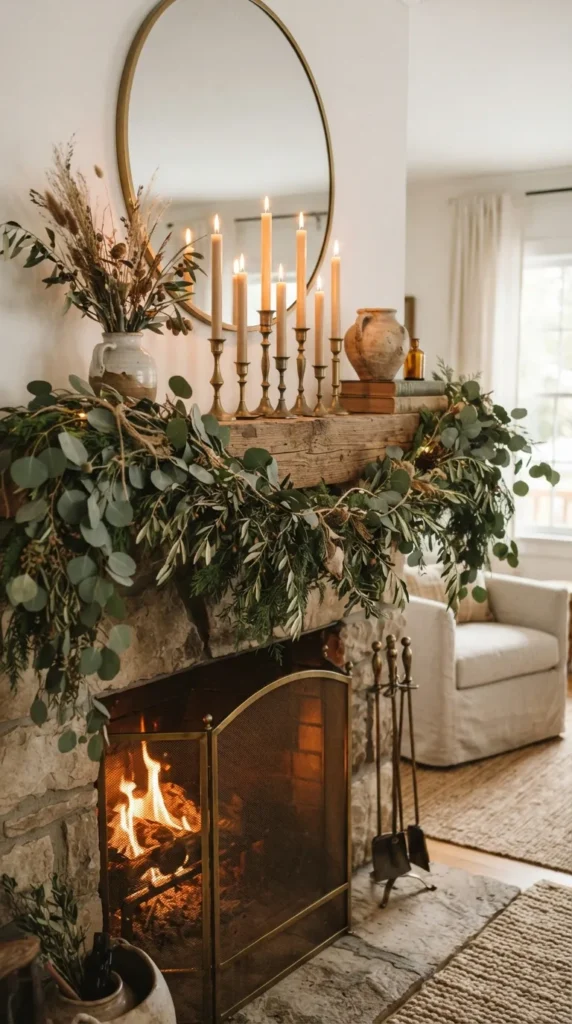
13. Earthy Greenery Garlands for Mantels and Entryways
Lush greenery garlands constructed from fresh or realistic preserved eucalyptus, salal leaves, olive branches, and cedar sprigs soften rigid fireplace mantels, staircase banisters, and entryway archways.
What This Idea Means
Garlands provide continuous lines of rich texture that frame key architectural focal points in the home. They transition seamlessly across seasons, maintaining an earthy botanical ambience year-round.
How to Make It
- Build a Base: Take a thick length of natural jute rope cut to the length of your mantel plus 2 feet for cascading side tails.
- Prepare Botanical Bundles: Group 3–4 small branches of preserved seeded eucalyptus, silver dollar eucalyptus, and dried olive stems together using dark green floral wire.
- Attach Bundles to Rope: Lay the first bundle along the rope base and wrap floral wire tightly around stems and rope. Lay the second bundle overlapping the stems of the first, securing with wire.
- Continue Layering: Repeat the layering process along the full length of the rope, working from both outer ends inward to the center so leaf tips point outward gracefully.
- Anchor and Style: Secure the garland across your mantel using clear removable hooks. Weave mini LED fairy light strands through the leaves and arrange vintage brass candleholders behind the foliage.
Tips and Variations
- Materials Needed: Preserved eucalyptus varieties, olive branches, floral wire, jute rope, scissors, wire cutters, brass candleholders.
- Longevity Tip: Spritz preserved foliage lightly with a water-glycerin mix once every few months to maintain leaf pliability and prevent brittle shedding.
- Variation: Weave in dried citrus slices, cinnamon sticks, or pinecones during winter months for seasonal warmth.
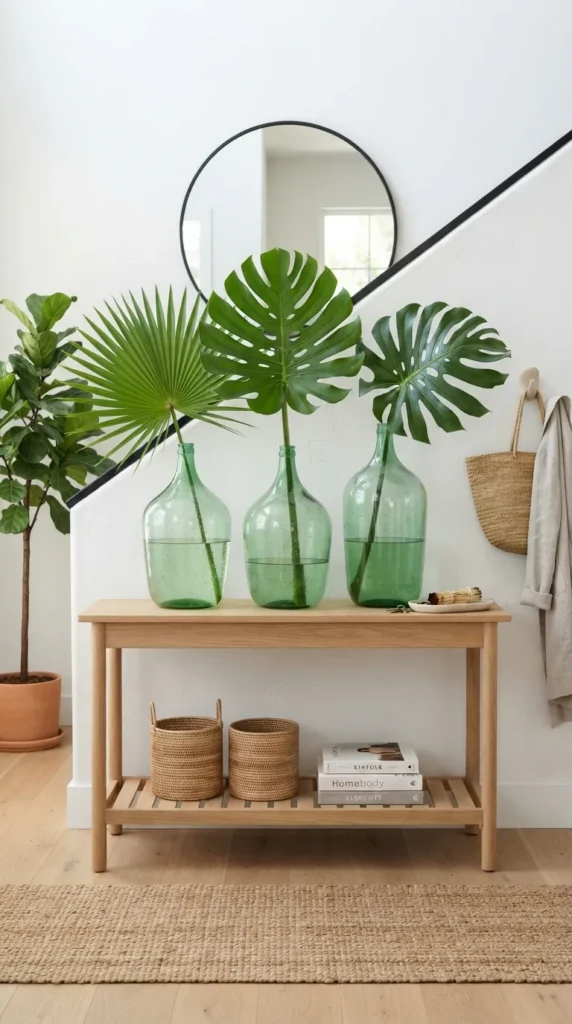
14. Recycled Glass Vessels with Single Oversized Botanical Stems
An exercise in dramatic simplicity: filling heavy, recycled glass bottles, amber demijohns, or clear floor vases with pure distilled water and placing single, oversized fresh green stems (such as Monstera leaves, Palm fronds, or Monstera Deliciosa leaves) inside them.
What This Idea Means
This minimalist approach highlights pure form, clarity, and architectural leaf geometry. It offers a clean, ultra-modern botanical aesthetic that requires minimal maintenance.
How to Make It
- Select Glass Vessels: Collect oversized recycled glass bottles, tinted green antique demijohn jars, or tall clear cylindrical floor vases.
- Fill with Water: Fill each glass vessel two-thirds full with fresh distilled or filtered water. Add a single drop of liquid plant nutrient to maintain stem freshness.
- Trim Stems: Select robust, large green leaves (Monstera, Fan Palm, Paradise leaf). Trim the stem bases at a clean 45-degree angle under water using sharp floral shears.
- Arrange Vessels: Place one tall stem into each vessel. Group two to three glass vessels of varying heights together on an entryway console table or living room floor corner.
Tips and Variations
- Materials Needed: Recycled glass vessels/demijohns, distilled water, large cut leaf stems (Monstera, Palm), floral shears.
- Water Maintenance: Replace the water every 7 to 10 days to maintain crystal-clear transparency and prevent algae growth. Cut leaf stems can survive in pure water for up to two months.
- Variation: Place small LED waterproof puck lights underneath clear glass vessels to illuminate the water and stems from below at night.
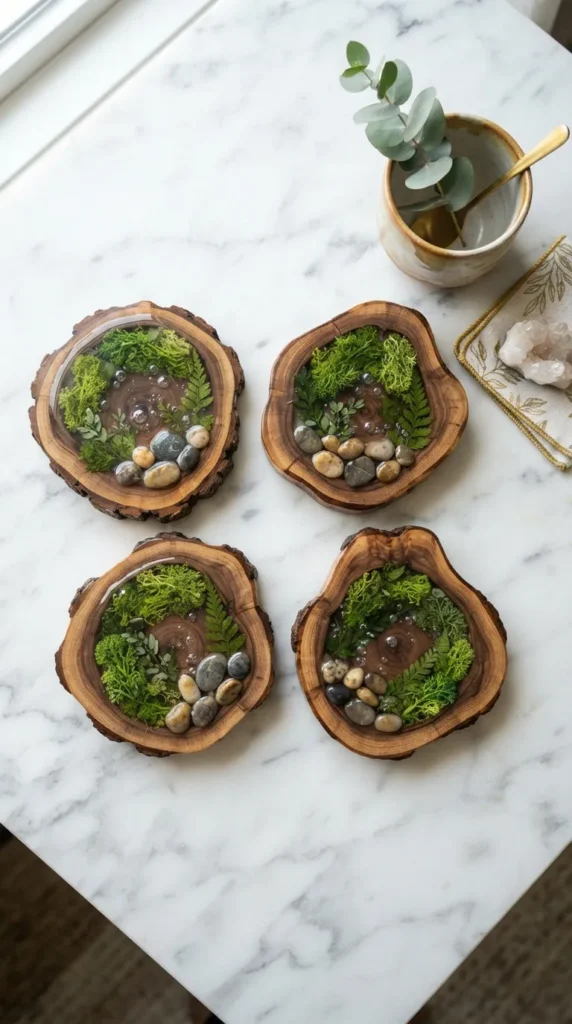
15. DIY Live-Edge Wood & Preserved Moss River Coasters
Combining natural live-edge hardwood slices with rich preserved forest moss embedded under a crystal-clear layer of epoxy resin creates unique, tactile coasters that serve as functional art pieces for coffee tables.
What This Idea Means
This craft integrates tactile organic materials into everyday household objects, bringing rustic wood grains and deep moss hues directly into daily lifestyle rituals.
How to Make It
- Prepare Wood Frames: Source round silicone coaster molds or hollow live-edge wood slices with hollowed-out centers.
- Arrange Moss and Accents: Place small bits of preserved mood moss, dried lichen, and tiny flat river pebbles inside the hollow center of the wood slice or mold.
- Mix Resin: Mix equal parts clear two-part casting epoxy resin and hardener according to manufacturer instructions. Stir slowly for 3 minutes to avoid creating air bubbles.
- Pour Resin: Slowly pour the clear resin over the arranged moss until the cavity is completely filled level with the wood edges.
- Remove Bubbles: Lightly pass a heat gun or butane micro-torch 6 inches above the resin surface for a few seconds to pop any rising air bubbles.
- Cure and Sand: Allow the resin to cure undisturbed for 24–48 hours. Lightly sand any sharp edges and attach cork backing pads to the bottom of each coaster.
Tips and Variations
- Materials Needed: Live-edge wood slice frames or silicone molds, preserved moss, clear 2-part epoxy resin, heat gun, cork backing pads.
- Finish Tip: Apply a coat of natural beeswax or mineral oil to the exposed wooden borders to enrich the natural grain warmth.
- Variation: Add small flecks of gold leaf foil amid the moss before pouring resin for an elevated luxurious contrast.
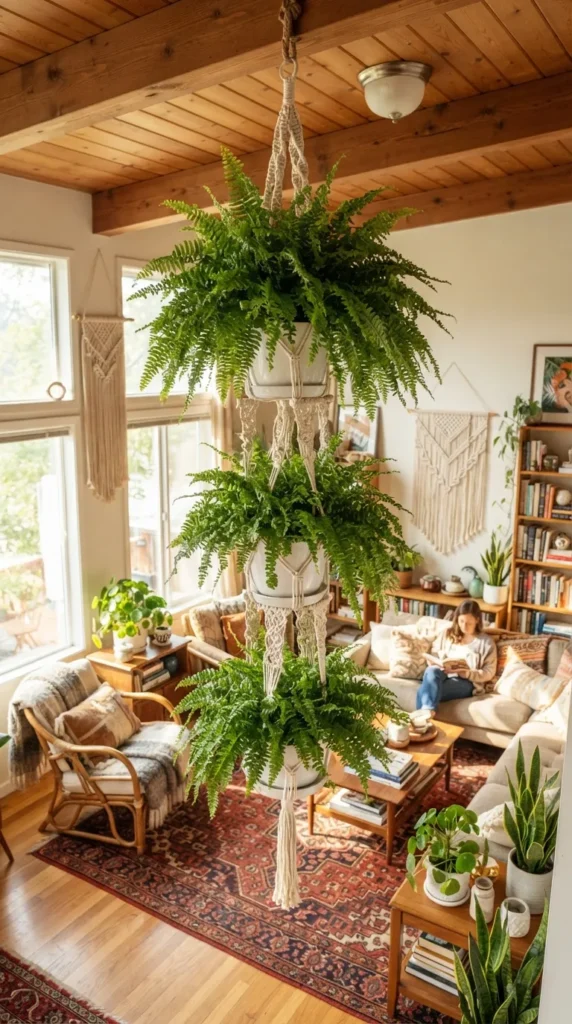
16. Hanging Macramé Fern Chandeliers
Suspending fluffy, full Boston Ferns or Kimberly Queen Ferns in handcrafted cream cotton macramé plant hangers suspended from a central ceiling medallion creates a floating “chandelier” of soft, feathery foliage.
What This Idea Means
This layout draws visual interest upward, filling empty ceiling volumes with cascading green textures while bringing boho-chic warmth into spaces.
How to Make It
- Select or Craft Macramé Hangers: Gather 3 to 4 macramé plant hangers woven from natural 4mm unbleached cotton cord, varying in length from 30 to 48 inches.
- Select Ferns and Pots: Choose full, healthy Boston Ferns or Maidenhair Ferns potted in lightweight white terracotta or clay planters with built-in drip saucers.
- Assemble Units: Slip potted ferns securely into the basket knots of each macramé hanger.
- Install Ceiling Hooks: Drill heavy-duty ceiling hooks into ceiling joists above a dining table, bath tub, or living room corner. Space hooks 10–12 inches apart in a circular cluster.
- Suspend at Tiered Heights: Hang the macramé hangers so the bottom pots sit at different, staggered heights, forming a lush, multi-tiered botanical chandelier.
Tips and Variations
- Materials Needed: Macramé plant hangers, full potted ferns, heavy-duty ceiling swag hooks, drill, measuring tape.
- Humidity Tip: Ferns love humidity. Mist the hanging chandelier every morning with a fine misting bottle or place a room humidifier nearby.
- Variation: Intertwine a battery-operated copper wire string light set through the macramé cords to illuminate the foliage at night.
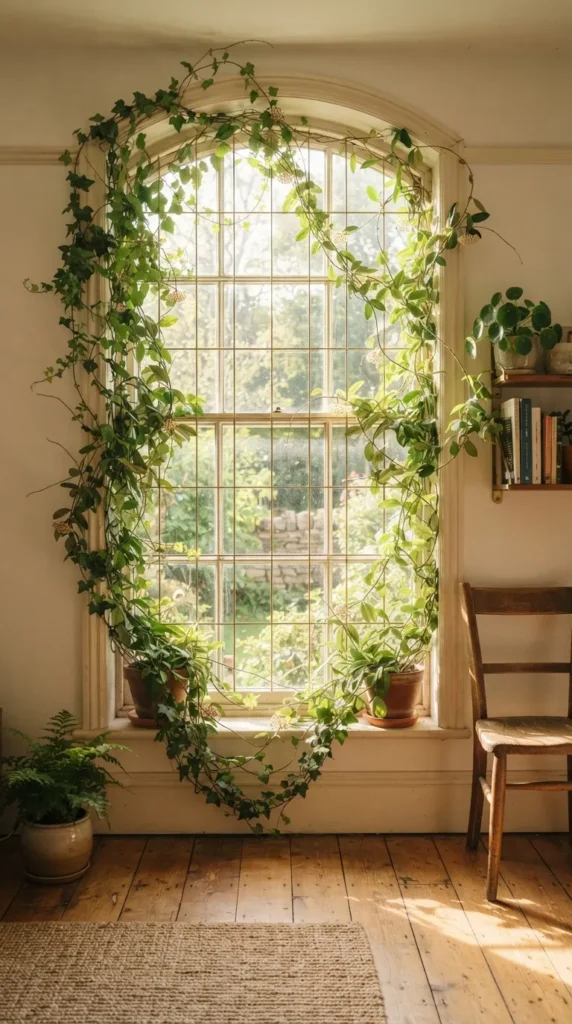
17. Terracotta & Vine Window Trellis
Creating a sleek wire trellis or bamboo framework along the inside frame of a sunny window allows climbing plants—such as English Ivy, Wax Plant (Hoya carnosa), or Swiss Cheese Vine—to outline windows in living greenery.
What This Idea Means
This turns standard window frames into living architectural features. Sunlight filters through the climbing green leaves, casting dynamic leaf shadows across room floors throughout the day.
How to Make It
- Mount Window Grid: Install a minimalist brass wire mesh grid or stretch thin stainless steel cables vertically and horizontally across the inner frame of a well-lit window using small eye-hooks.
- Place Planters: Set long rectangular terracotta window planter boxes filled with climbing vine species along the windowsill base.
- Guide the Vines: Gently clip the main tendrils of climbing vines to the wire grid using small, clear plastic plant clips or natural soft twine.
- Train Growth: As the vines grow, continue guiding new shoots across the grid pattern to cover the entire window border over time.
Tips and Variations
- Materials Needed: Wire mesh grid/cables, eye-hooks, terracotta window planter boxes, climbing vine plants, plant clips.
- Pruning Care: Prune stray shoots monthly to keep growth contained neatly within the wire frame grid.
- Variation: Use geometric honeycomb-shaped wooden trellises mounted directly against the wall beside windows for an artistic look.
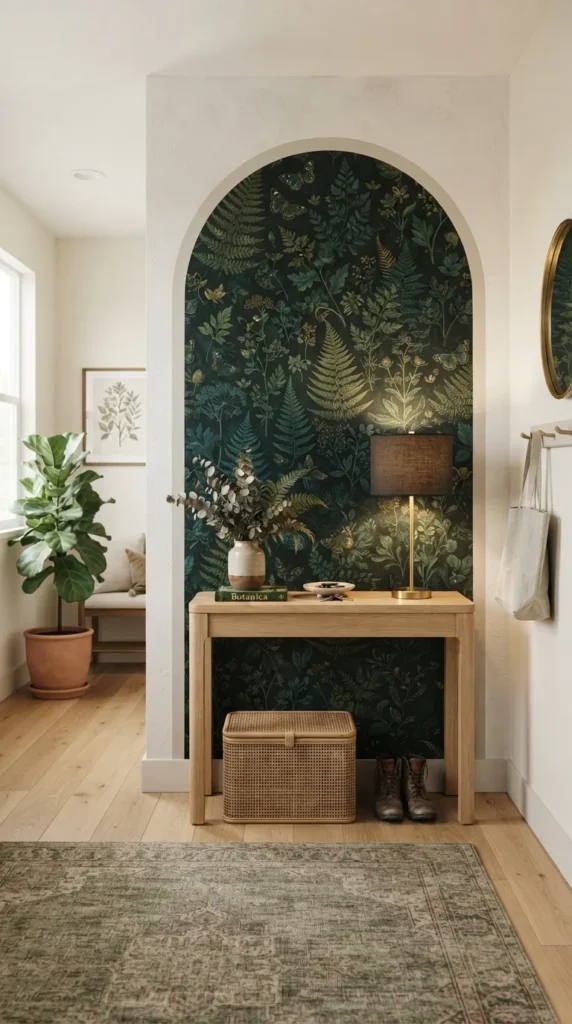
18. Botanical Wallpaper Feature Arch
Painting or installing a peel-and-stick architectural feature arch lined with dark, moody vintage botanical wallpaper behind a console table or entryway bench provides instant visual depth without taking up physical floor space.
What This Idea Means
An arch motif creates an illusion of a gateway or doorway into a natural garden, transforming flat drywall into a dynamic focal point.
How to Make It
- Draw the Arch: Measure and mark a vertical rectangle on your chosen wall (e.g., 4 feet wide by 7 feet high). Use a pencil tied to a string anchored at the top center to trace a clean, smooth semicircle arch top.
- Mask or Paint Border: Paint the wall outside the arch lines in a neutral ivory or warm grey hue, or paint a bold 2-inch border frame around the arch in deep forest green.
- Apply Wallpaper: Cut strips of high-quality peel-and-stick botanical wallpaper featuring rich green ferns, palms, or moody floral patterns.
- Smooth and Trim: Apply wallpaper from top to bottom inside the traced arch, matching pattern seams carefully. Smooth out air bubbles with a vinyl squeegee and trim the curved top edges precisely along your pencil guide using a utility knife.
- Anchor Space: Position a natural oak console table or entryway bench directly in front of the completed arch feature.
Tips and Variations
- Materials Needed: Botanical wallpaper, utility knife, vinyl squeegee, tape measure, pencil, string, painter’s tape, wall paint.
- Pattern Tip: Choose dark, moody backgrounds (black, deep emerald) with rich foliage prints for high-end drama.
- Variation: Hang a round brass-framed mirror directly in the center of the botanical wallpaper arch to reflect natural room light.
19. Moss-Inlaid Resin Side Table
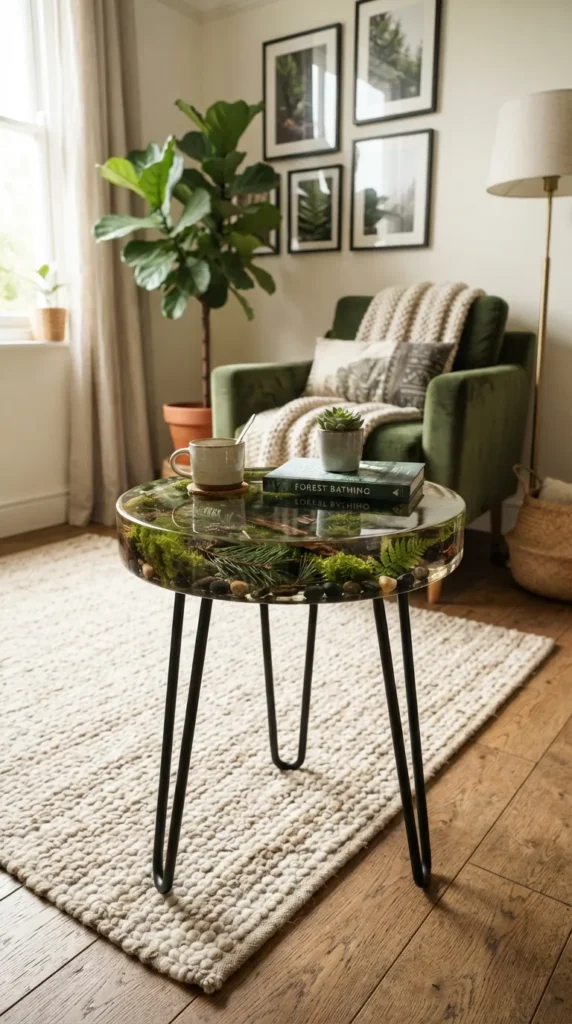
A custom resin side table featuring real preserved forest mosses, sprigs of cedar, and polished river pebbles encapsulated under a crystal-clear, glass-smooth epoxy top set upon sleek matte black metal hairpin legs.
What This Idea Means
This modern craft merges functional furniture design with raw natural preservation, creating a striking conversation piece that brings woodland textures to your seating layout.
How to Make It
- Prepare Mold/Table Frame: Source a round wooden tray table frame with a raised 2-inch lip or construct a round silicone furniture mold (18–24 inches in diameter). Seal inner edges thoroughly.
- Arrange Nature Elements: Lay preserved moss varieties, dried fern leaves, flat quartz stones, and pine bark inside the base of the mold in an aesthetic layout.
- Pour Deep-Pour Epoxy: Mix a specialized deep-pour epoxy resin according to strict weight ratios. Slowly pour resin over the nature composition until completely submerged by at least 0.5 inches of liquid.
- Pop Bubbles & Cure: Pass a heat gun over the surface repeatedly during the first hour to pop emerging micro-bubbles. Allow the table top to cure undisturbed in a dust-free environment for 72 hours.
- Attach Legs: De-mold or smooth edges, then secure three matte black steel hairpin legs to the underside using sturdy wood screws and mounting plates.
Tips and Variations
- Materials Needed: Round wooden tray frame/mold, preserved moss/botanicals, deep-pour epoxy resin, heat gun, matte black hairpin legs, drill, screws.
- Resin Tip: Ensure preserved (not fresh live) moss is used, as any moisture trapped in fresh plants will turn resin cloudy or create bubbles during curing.
- Variation: Add small slice pieces of dried natural wood trunks alongside moss for a forest cross-section design.
20. Layered Foliage Room Divider Screen
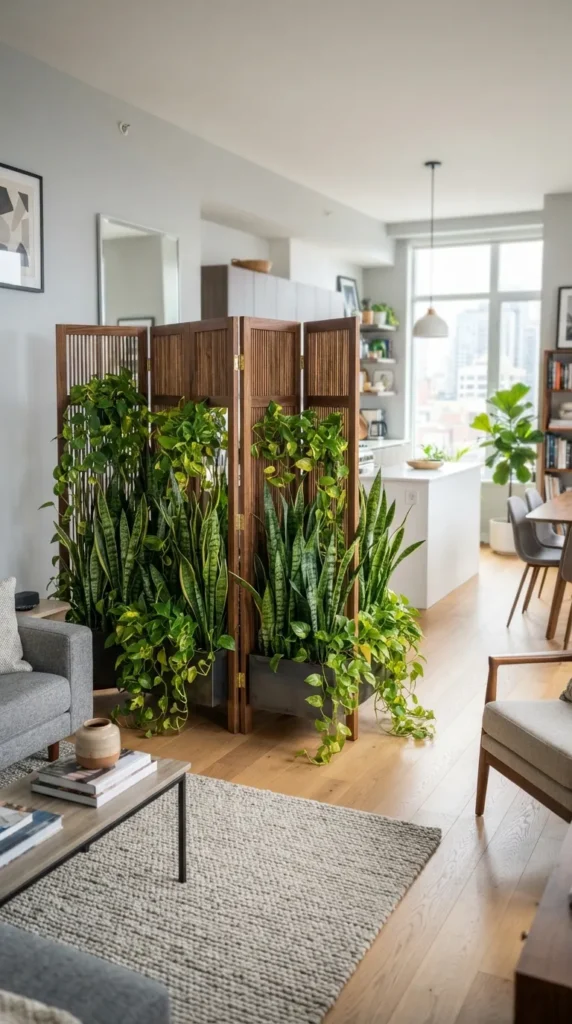
A freestanding three-panel wooden room divider fitted with horizontal planter troughs and open metal mesh lattice. Populated with dense, layered upright foliage like Snake Plants alongside trailing Pothos, it serves as an organic living privacy partition.
What This Idea Means
This idea provides an elegant, eco-friendly way to break up open-plan living areas, replacing solid drywall or plain plastic screens with a breathable screen of living foliage.
How to Make It
- Source Screen Frame: Acquire or build a 3-panel hinged wooden screen frame equipped with central black wire grid inserts and built-in lower planter boxes.
- Line Planter Boxes: Line the bottom wooden planter troughs with waterproof plastic heavy-duty liners to protect the wood framework from water runoff.
- Plant Architectural Foliage: In the planter troughs, plant tall, upright structural plants like Snake Plants (Sansevieria) and Cast Iron Plants (Aspidistra) toward the center.
- Add Trailing Edge Plants: Plant trailing Marble Queen Pothos or Heartleaf Philodendron along the outer edges of the planter boxes.
- Weave and Guide: As trailing plants grow, weave their vines up through the metal mesh lattice screen panels to fill out the upper grid space.
Tips and Variations
- Materials Needed: 3-panel mesh wooden screen frame, waterproof box liners, potting soil, upright plants (Snake Plants), trailing vines (Pothos).
- Mobility Tip: Install small lockable castor wheels onto the bottom base of the wooden panels to make moving the divider screen easy.
- Variation: Use preserved moss panels instead of living plants inside the screen inserts for a zero-maintenance sound-absorbing partition.