Hand-painted ceramics have taken the DIY and interior décor world by storm. From cozy coffee mugs and rustic terracotta pots to elegant trinket trays and decorative serving platters, hand-painted pottery blends functionality with fine art. Painting your own ceramics allows you to infuse your personal style into everyday objects while enjoying a calming, deeply rewarding creative process.
If you are looking for fresh, Pinterest-worthy inspiration, this comprehensive guide explores 20 hand-painted ceramic ideas. Each idea covers what makes the concept special, a step-by-step guide to executing it, key tips and variations to try, and the exact supplies needed to craft stunning ceramic pieces for your home.


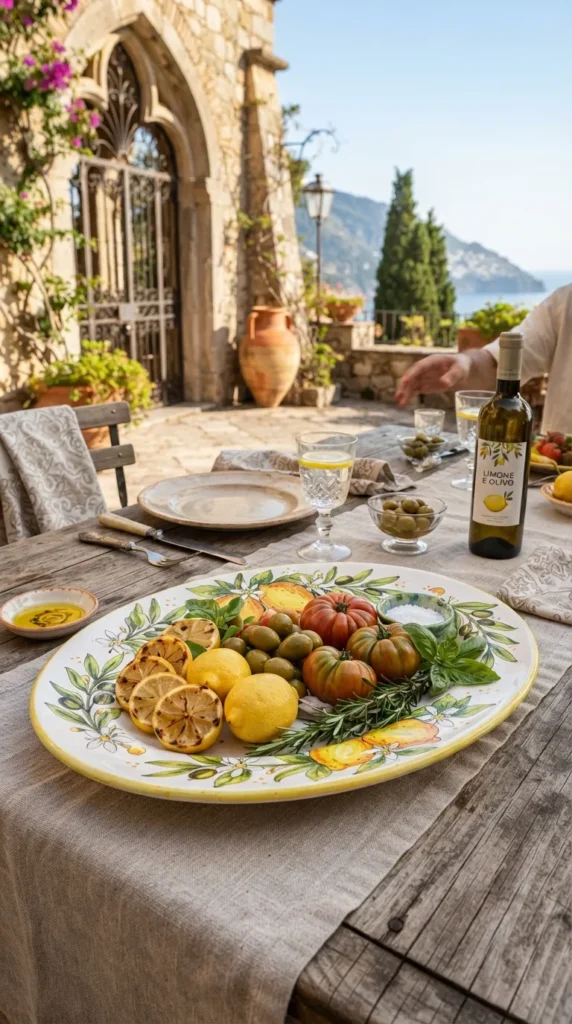


1. Scandinavian Folk Floral Mug
What This Idea Means
Scandinavian Folk Floral design draws inspiration from traditional Nordic Spatmaling and folklore motifs. It features symmetrical, stylized botanical shapes—such as bellflowers, tulip buds, and leafy vines—painted in crisp primary or muted tones over a clean white or bare ceramic base.
How to Make It
- Prep the Mug: Wipe down a plain white ceramic mug with rubbing alcohol to remove oils and dust.
- Sketch Symmetry: Use a soft-lead pencil to lightly draw a vertical symmetry line down the center of the mug face. Pencil in simplified flower shapes along the axis.
- Paint Primary Flowers: Fill the central tulip or rose motifs with muted red, deep blue, or mustard yellow ceramic paint using a small round brush.
- Add Leafy Vines: Use a fine liner brush (#0) with sage green or navy paint to draw symmetrical vines, leaves, and teardrop dots branching outward.
- Cure & Bake: Allow the paint to dry for 24 hours, then bake in a household oven according to the ceramic paint manufacturer’s instructions to set the finish.
Tips & Variations
- Monochrome Folk: Paint the entire folk pattern using only cobalt blue over white porcelain for a classic Delftware-inspired look.
- Negative Space: Leave the flowers raw ceramic and paint the background surrounding the folk motif in deep forest green.
Needs & Materials
- White ceramic mug
- Pebeo Porcelaine 150 or acrylic ceramic paints (Red, Ochre, Navy, Sage)
- Fine liner brush (#0) and small round brush (#2)
- Rubbing alcohol and soft pencil
- Household oven (for heat-setting)
2. Speckled Eggshell Ring Dish
What This Idea Means
Inspired by robin eggs and natural granite stone, this minimalist aesthetic turns plain ceramic ring dishes into rustic, tactile treasures. It combines soft pastel base washes with fine, deliberate dark paint speckles.
How to Make It
- Prepare Base: Clean a small ceramic dish or coaster. Apply two thin, smooth coats of pale duck-egg blue, soft sage, or blush pink ceramic paint. Let dry completely.
- Prepare Speckling Mixture: Mix dark charcoal or espresso brown paint with a few drops of water or ceramic medium to achieve a fluid consistency.
- Flick Speckles: Dip a stiff toothbrush into the dark paint mixture. Hold the brush facing the dish and drag your thumb back across the bristles to spray tiny, irregular flecks across the surface.
- Paint Rim Accent: Trace the outer edge rim of the dish with a thin stroke of liquid gold or dark brown paint using a fine liner brush.
- Bake & Seal: Bake to cure, then apply a high-gloss glaze to seal.
Tips & Variations
- Gold Speckles: Swap dark brown speckles for metallic gold flecks for a glamorous night-sky ring dish.
- Wavy Edge Dish: Apply this technique to handmade polymer or clay dishes with organic wavy edges.
Needs & Materials
- Small ceramic trinket dish
- Ceramic paint (Duck-Egg Blue/Pastel, Dark Brown, Liquid Gold)
- Stiff toothbrush
- Fine detail brush (#00)
- Glossy topcoat varnish
3. Terracotta Botanical Arch Planter
What This Idea Means
This idea merges raw, earthy terracotta clay textures with clean architectural geometry and leafy botanicals. Painting modern arches directly onto plant pots creates a striking frame for trailing houseplants.
How to Make It
- Clean Terracotta: Brush away loose dust from an unglazed terracotta pot.
- Draft Arch Outline: Trace a tall arch shape on the front of the pot using a pencil and a flexible curve stencil.
- Paint Arch Base: Fill the interior of the arch with two coats of warm off-white or cream masonry/acrylic paint.
- Draw Botanical Overlay: Once the white base dries, use a fine liner brush dipped in terracotta or olive paint to draw delicate monstera silhouettes or fern fronds inside the arch frame.
- Seal Exterior: Coat the inside and outside of the pot with a waterproof terracotta sealer to protect the artwork from soil moisture.
Tips & Variations
- Color Block Layering: Paint a smaller mustard yellow arch inside the white arch before adding green leaf details.
- Dipped Base: Combine the arch with a solid color-dipped bottom half along the pot’s base.
Needs & Materials
- Unglazed terracotta pot
- Acrylic or ceramic paints (Cream, Terracotta, Olive Green)
- Flexible curve stencil or compass
- Medium flat brush and liner brush
- Waterproof pot sealer
4. Vintage Botanical Lemon Serving Platter
What This Idea Means
Evoking the warmth of the Italian countryside and Mediterranean dining, this design features plump, sun-ripened yellow lemons, glossy leaves, and delicate white citrus blossoms framing the rim of a large oval serving platter.
How to Make It
- Plan Border Composition: Wipe down a large white ceramic platter. Pencil a garland of lemons and leafy vines wrapping around the oval rim.
- Paint Lemon Fruit: Paint lemon shapes with bright canary yellow ceramic paint. Stipple a touch of warm ochre on one side to build dimensional depth.
- Paint Leaves & Twigs: Use a round brush to paint dark olive leaves and woody brown twigs connecting the fruit clusters.
- Add Blossom Details: Add small 5-petal white flowers with yellow stamen dots in empty spaces.
- Bake & Finish: Curing in the oven sets the glaze, making the platter food-safe (according to paint specifications).
Tips & Variations
- Majolica Tile Pattern: Paint a traditional blue geometric border around the rim to frame the lemons.
- Sliced Citrus: Paint half-lemons showing detailed white pith and juicy pulp segments.
Needs & Materials
- Large white ceramic oval platter
- Ceramic paint (Canary Yellow, Ochre, Olive Green, White, Brown)
- Round synthetic brushes (#2, #6)
- Rubbing alcohol and soft pencil
- Oven for curing
5. Celestial Zodiac Constellation Coasters
What This Idea Means
Mystical and personal, this design transforms simple ceramic coasters into dark sky maps featuring hand-painted celestial star constellations, moon phases, and glowing gold accents.
How to Make It
- Dark Base Coat: Paint round ceramic tile coasters in deep midnight blue or rich black ceramic paint. Let dry.
- Sponge Nebula Depth: Lightly dab purple and teal paint over the center using a sea sponge to mimic deep space nebulae.
- Paint Constellation Nodes: Use a white gel pen or fine detail brush with white paint to dot the main stars of a specific zodiac constellation (e.g., Leo, Scorpio).
- Connect Lines: Draw whispy, ultra-thin gold lines connecting the star nodes.
- Add Rim & Seal: Trace a gold rim around the coaster edge and seal with a waterproof, heat-resistant topcoat.
Tips & Variations
- Custom Zodiac Sets: Paint a personalized set of four coasters featuring the astrological signs of your family members.
- Moon Phases Sequence: Paint four individual coasters showing New Moon, Waxing Crescent, Full Moon, and Waning Moon.
Needs & Materials
- Round ceramic coasters or tile blanks
- Ceramic paint (Midnight Blue, Black, Purple, Metallic Gold, White)
- Sea sponge and ultra-fine liner brush (#000)
- Heat-resistant acrylic sealant
6. Abstract Pastel Swirl Vase
What This Idea Means
Inspired by modern Danish interiors and pastel decor trends, this project covers ceramic vases in fluid, overlapping ribbons of soft color that wind around the vessel’s contours.
How to Make It
- Prep Ceramic Vase: Clean a white or beige matte ceramic vase thoroughly.
- Pencil Fluid Curves: Draw continuous, wavy S-curves wrapping diagonally up and around the vase body.
- Paint Color Bands: Using a soft flat brush, paint sweeping bands of pastel lavender, mint green, butter yellow, and blush pink.
- Maintain Fluidity: Keep paint coats even and follow the natural curves without stopping mid-stroke.
- Bake or Seal: Cure in the oven or seal with a satin varnish spray.
Tips & Variations
- Black Outline Accent: Trace thin black ink lines along the borders of each pastel band for a graphic pop-art feel.
- Tone-on-Tone: Use three shades of a single color (e.g., pale sage, mid-green, and deep forest green) for a subtle gradient swirl.
Needs & Materials
- White or light grey ceramic vase
- Pastel ceramic or acrylic paints (Lavender, Mint, Blush, Butter Yellow)
- Medium flat brush (1/2 inch)
- Satin protective varnish
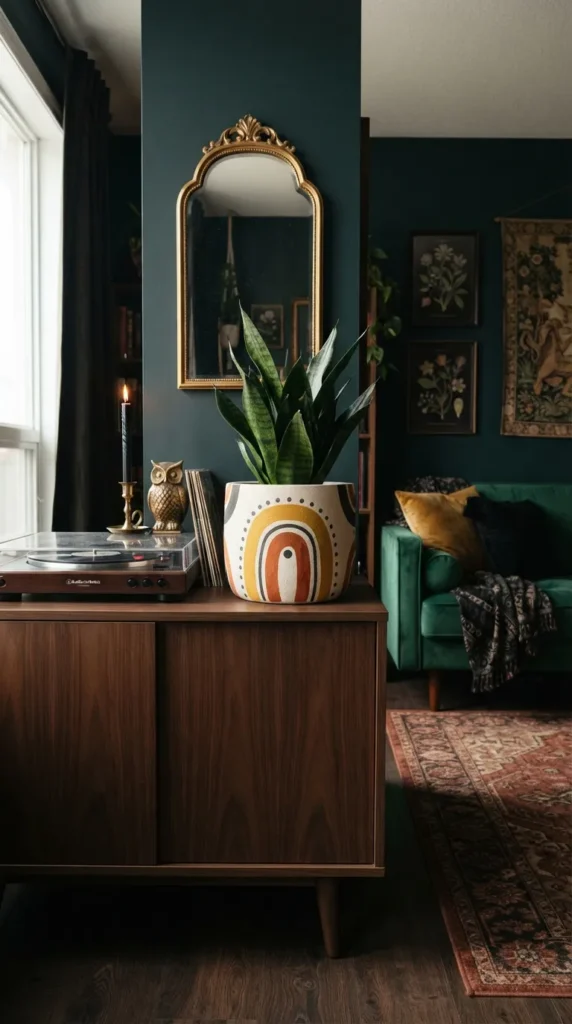
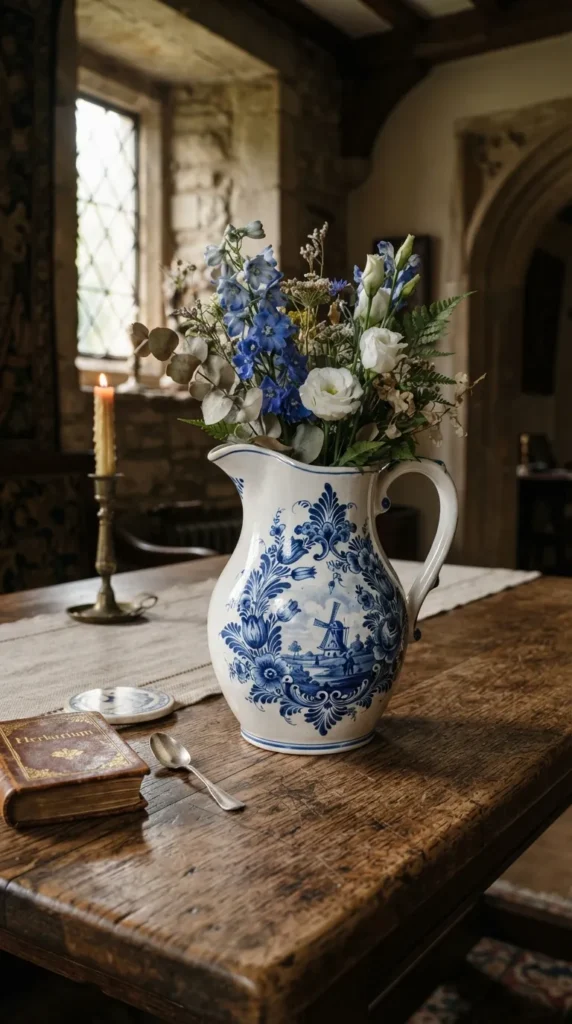

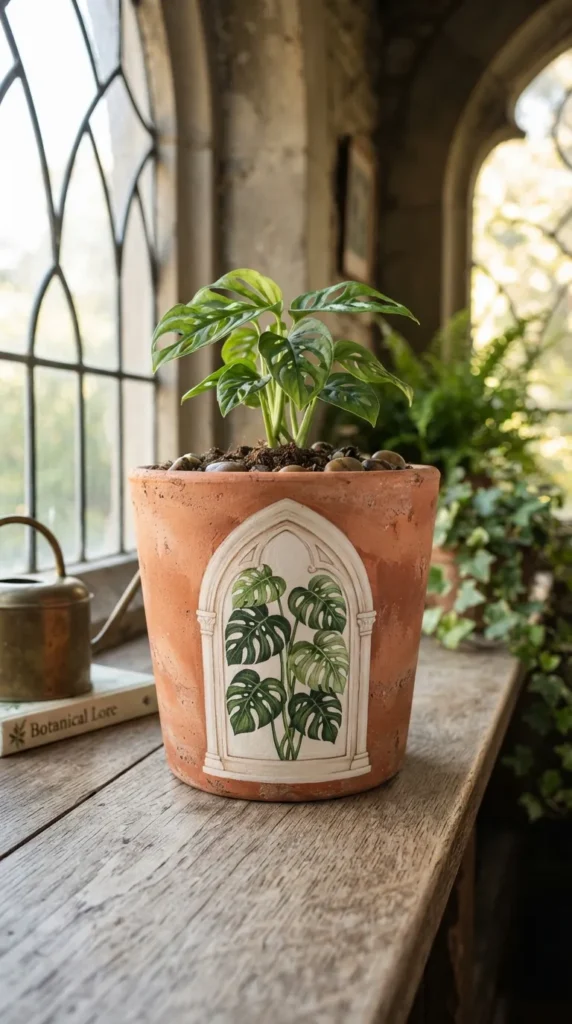

7. Delftware-Inspired Cobalt Floral Pitcher
What This Idea Means
Nodding to historic 17th-century Dutch and Chinese porcelain art, this timeless concept relies solely on vivid cobalt blue pigment painted onto crisp white ceramics to showcase intricate floral vines and ornate flourishes.
How to Make It
- Prep Surface: Clean a white ceramic water pitcher or jug.
- Draft Layout: Sketch central floral medallions and trailing corner vines using a light graphite pencil.
- Paint Base Outlines: Use a fine liner brush with diluted cobalt blue paint to trace fine vine outlines and petal borders.
- Build Shading: Fill petals using varying depths of cobalt blue—dilute with ceramic medium for pale blue highlights, and use pure pigment for deep shadows.
- Cure: Bake according to paint guidelines for a durable, glossy finish.
Tips & Variations
- Modern Geometric Delft: Replace traditional roses with modern abstract geometric shapes painted entirely in cobalt blue.
- Bird & Willow: Add small songbird silhouettes perched among blue willow branches.
Needs & Materials
- White ceramic pitcher or jug
- Cobalt blue ceramic paint / Porcelaine 150
- Ceramic dilution medium
- Fine liner brush (#0) and pointed round brush (#4)
- Oven for curing
8. Moody Dark Floral Teacups
What This Idea Means
Emulating vintage oil paintings, this romantic design features lush, dramatic blooms—such as burgundy peonies, dusty roses, and dark foliage—painted over dark matte charcoal or black teacups.
How to Make It
- Apply Dark Base: Paint the exterior of ceramic teacups in matte black or charcoal if using plain white cups. Let dry.
- Block Floral Shapes: Paint dark plum or deep red circles where main flower heads will sit.
- Layer Petals: Using a small round brush, build overlapping petals from outer edges inward using lighter pinks, blush, and cream shades.
- Add Leaf & Vine Accents: Tuck deep olive green leaves and trailing stems behind flower heads.
- Highlight Centers: Add fine yellow and white stamen dots in flower centers and bake to set.
Tips & Variations
- Gold Leaf Trim: Gild the rim and handle of the teacup with liquid gold paint to elevate the dramatic aesthetic.
- Saucer Accent: Paint a single falling petal on the accompanying dark saucer dish.
Needs & Materials
- Ceramic teacups and saucers
- Ceramic paint (Black, Plum, Burgundy, Blush Pink, Olive, Gold)
- Fine round brushes (#1, #3)
- Oven for heat curing
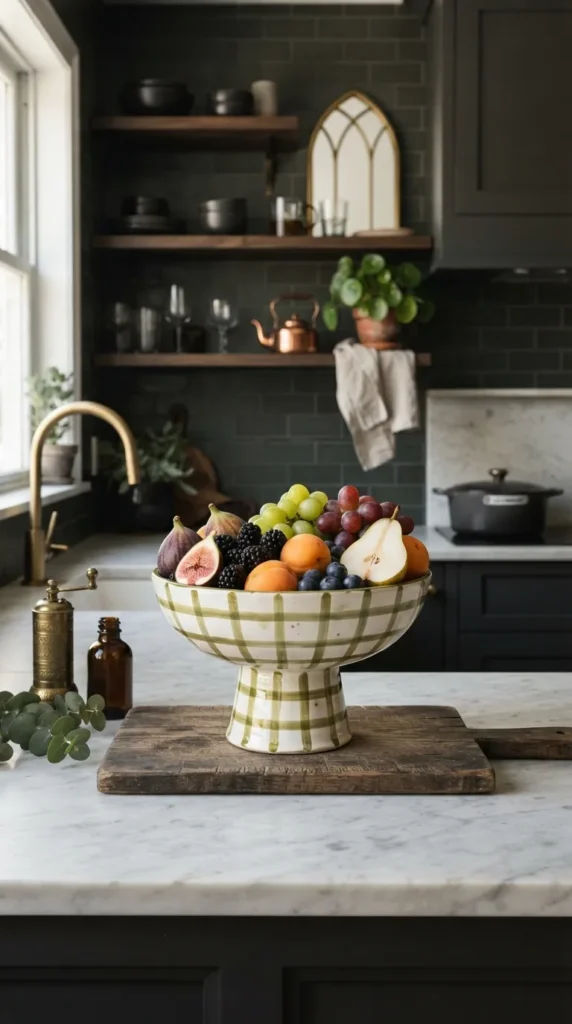
9. Checkerboard Grid Footed Bowl
What This Idea Means
Checkerboard patterns add instant retro whimsy to modern home décor. Applying a hand-painted check pattern to a footed ceramic bowl creates a stylish statement piece for fruit or keys.
How to Make It
- Prep Surface: Clean a white ceramic footed bowl.
- Map the Grid: Use a flexible tape ruler and soft pencil to lightly draw intersecting horizontal and vertical grid lines across the bowl exterior.
- Mark Alternating Squares: Lightly pencil an “X” inside alternating squares to keep the pattern accurate.
- Paint Pattern: Use a flat square synthetic brush to carefully fill marked squares with your chosen color (e.g., olive, sage, or burnt orange).
- Touch Up & Cure: Clean up line edges with a fine brush dipped in white paint, then bake to fix the glaze.
Tips & Variations
- Wavy Grid: Paint freehand squiggly lines instead of straight ruler lines for an organic, playful checkerboard pattern.
- Two-Tone Color: Alternate between two pastel shades (e.g., lilac and butter yellow) instead of white and a color.
Needs & Materials
- White ceramic footed bowl
- Ceramic paint (Olive Green, Sage, or Burnt Orange)
- Flat square synthetic brush (1/4 inch)
- Flexible tape ruler and soft pencil
- Oven for heat curing
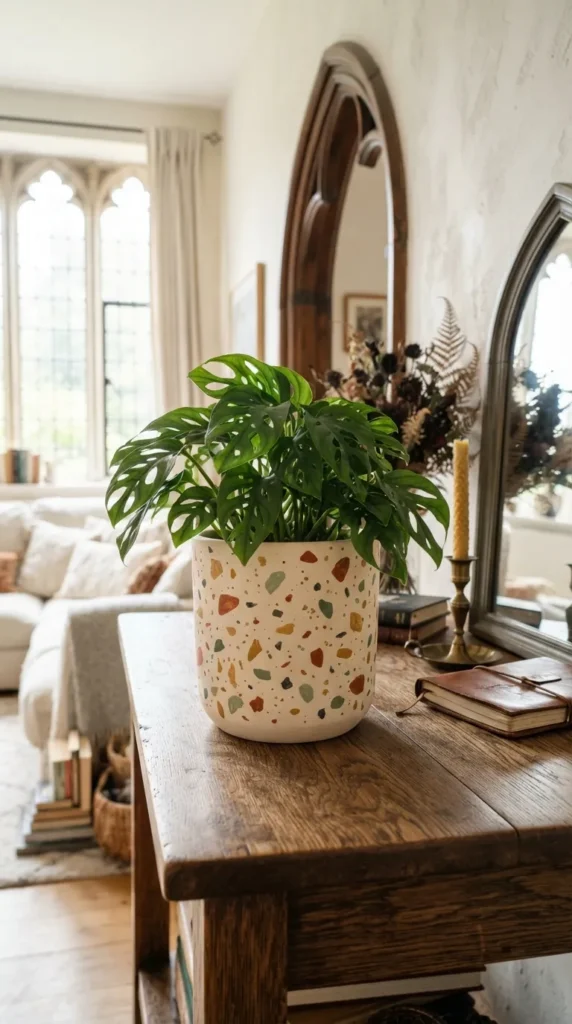
10. Terrazzo Flecked Planter
What This Idea Means
Mimicking classic Italian composite stone, this project scatters flat, colorful geometric flecks across a neutral ceramic pot to yield a playful, architectural look.
How to Make It
- Base Coat: Paint a ceramic planter in solid off-white, light beige, or pale blush pink. Allow to dry.
- Prepare Color Palette: Select 3–4 complementary paint shades (e.g., rust, sage green, mustard, dark navy).
- Paint Shapes: Use a small flat square brush to randomly paint small, irregular polygon shapes across the planter surface.
- Vary Scale: Ensure shapes vary in size—some tiny speckles, some medium chip shapes.
- Seal Finish: Once dry, seal with a high-gloss topcoat to recreate the look of polished terrazzo stone.
Tips & Variations
- Gold Leaf Chips: Add a few chips of genuine gold leaf among painted flecks for elevated shine.
- Dark Background Terrazzo: Use a dark slate grey base coat and paint pastel white, mint, and pink terrazzo chips over it.
Needs & Materials
- Ceramic planter pot
- Ceramic paints (Beige base + Rust, Sage, Ochre, Navy)
- Small flat synthetic brush
- High-gloss clear sealant
11. Minimalist Line Art Face Jar
What This Idea Means
Drawing inspiration from continuous line drawings and modern Scandinavian art, this design features single black ink outlines of human profiles painted over raw or neutral ceramic storage jars.
How to Make It
- Prep Ceramic Surface: Clean a matte white or unglazed beige ceramic storage jar.
- Practice Your Line: Practice continuous-line face drawings on paper first to build muscle memory.
- Pencil Outline: Trace your single-line face profile onto the jar surface using a soft pencil.
- Paint Line Work: Using jet black ceramic paint and a fine liner brush (#0), paint the continuous line smoothly without lifting your brush.
- Bake to Set: Bake in the oven according to paint instructions to set the permanent design.
Tips & Variations
- Color Blob Underlay: Paint 2–3 soft pastel background color blobs on the jar before drawing the black line art face over them.
- Gold Wire Line: Use metallic gold ceramic paint instead of black for a subtle, glamorous look.
Needs & Materials
- Matte ceramic storage jar with lid
- Jet black ceramic paint or paint pen
- Fine liner brush (#0)
- Soft pencil and rubbing alcohol
- Household oven
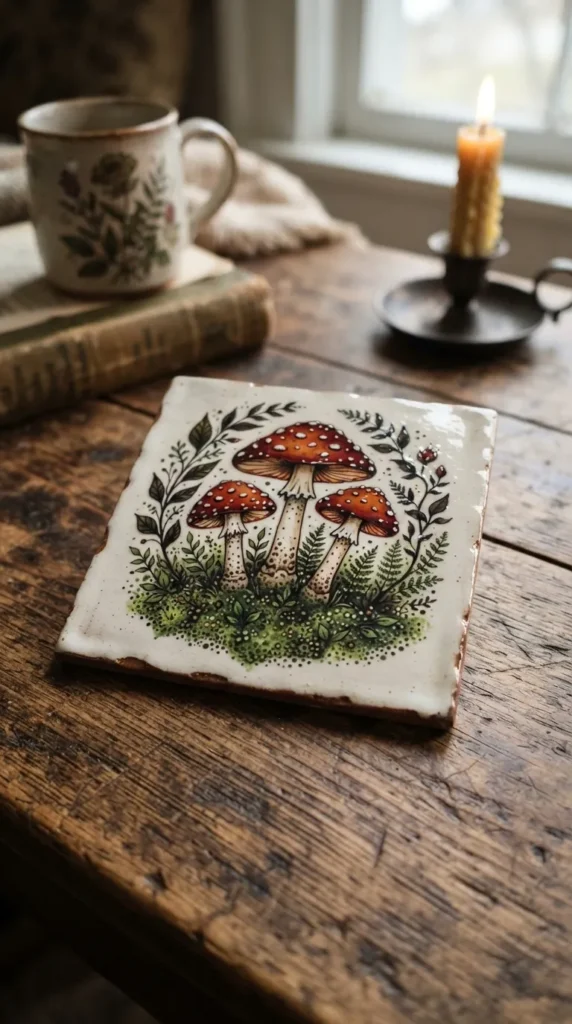
12. Cottagecore Mushroom & Moss Tile Coasters
What This Idea Means
Whimsical and nature-inspired, this concept covers square ceramic tiles in detailed Amanita mushrooms, wild ferns, and lush green moss patches, perfect for a cozy woodland cottage aesthetic.
How to Make It
- Prep Tile Blanks: Clean plain white unglazed or matte ceramic tiles.
- Pencil Composition: Sketch clusters of mushrooms sprouting from the bottom edge of the tile.
- Paint Stems & Caps: Paint stems in warm off-white and caps in rich terracotta or cardinal red.
- Add Cap Dots: Use the back end of a paintbrush handle dipped in white paint to stamp classic white dots across red caps.
- Stipple Moss Base: Stipple moss green paint around stem bases using a tiny sea sponge for natural texture. Seal with waterproof topcoat.
Tips & Variations
- Vintage Sepia Tone: Paint mushrooms entirely in shades of brown and beige on raw clay for a vintage field guide look.
- Fairy Dust Accents: Sprinkle a touch of fine iridescent glitter over damp moss paint before sealing.
Needs & Materials
- Square ceramic tiles
- Acrylic/ceramic paint (Red, Off-White, Moss Green, Earthy Brown)
- Fine detail brush and sea sponge
- Waterproof tile sealer
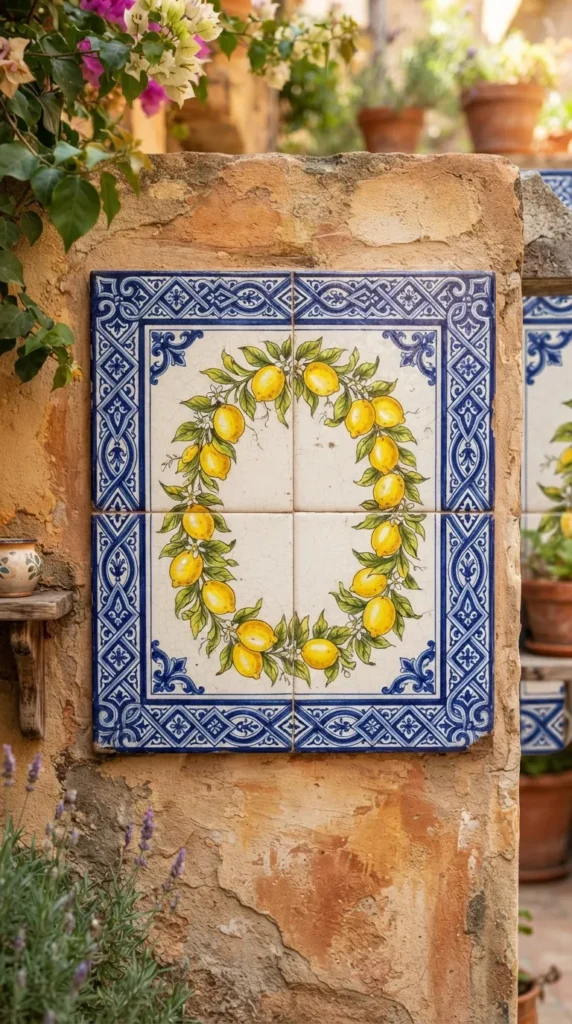
13. Sun-Kissed Amalfi Citrus Tile Wall Art
What This Idea Means
Inspired by traditional Italian ceramic street signs, this project paints vibrant lemon branches, blue geometric tile borders, and sunny Mediterranean motifs onto ceramic wall-hanging tiles.
How to Make It
- Prep Tile: Clean a square or rectangular ceramic wall tile.
- Paint Border: Use blue ceramic paint and a ruler to frame the tile edge with a classic Italian geometric border pattern.
- Draft Citrus Center: Pencil a central arrangement of lemons with leaves in the middle space.
- Paint Lemons & Leaves: Fill lemons with canary yellow paint and leaves with rich emerald and olive tones.
- Bake & Mount: Bake to cure, then glue a sawtooth picture hanger to the tile back for wall mounting.
Tips & Variations
- Add House Numbers: Paint your house or apartment number inside the citrus border for functional outdoor curb appeal.
- Mediterranean Orange: Swap lemons for bright blood oranges and dark green foliage.
Needs & Materials
- Ceramic wall tile
- Ceramic paints (Yellow, Olive Green, Cobalt Blue, White)
- Fine detail brush and flat brush
- Sawtooth picture hanger and strong adhesive
- Household oven


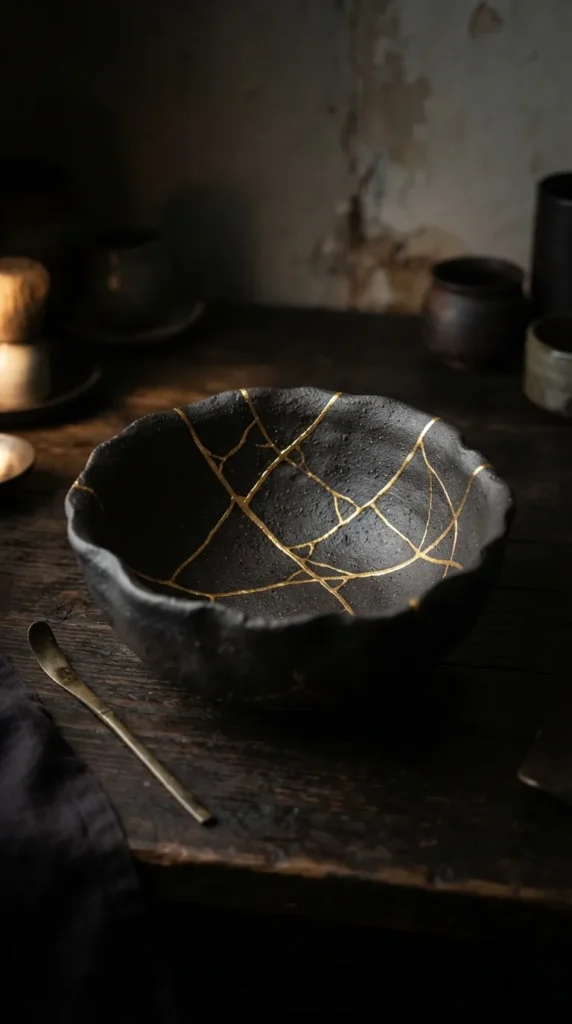
14. Golden Gilded Kintsugi-Inspired Bowl
What This Idea Means
Inspired by the ancient Japanese art of Kintsugi (repairing broken pottery with gold lacquer), this idea paints intentional, fluid gold fracture veins across a plain ceramic bowl to celebrate imperfection and elegance.
How to Make It
- Prep Bowl Surface: Clean a matte black or dark grey ceramic bowl.
- Pencil Fracture Lines: Lightly sketch jagged, branching crack lines extending across the bowl interior and over the rim.
- Paint Primary Veins: Use a fine liner brush (#00) and liquid gold enamel paint or ceramic gold leaf paint to trace sketched lines.
- Vary Line Thickness: Keep lines uneven—thicker at convergence points and whispy near line ends.
- Set & Polish: Allow to cure fully and seal with a non-yellowing protective coat.
Tips & Variations
- White & Gold: Apply gold veins across a smooth white ceramic bowl for a light, ethereal aesthetic.
- Raised Texture: Mix thick dimensional glass/ceramic liner paint with gold pigment to create physically raised 3D gold seams.
Needs & Materials
- Matte black or dark ceramic bowl
- Liquid gold enamel paint or gold leaf paint
- Ultra-fine liner brush (#00)
- Non-yellowing clear varnish
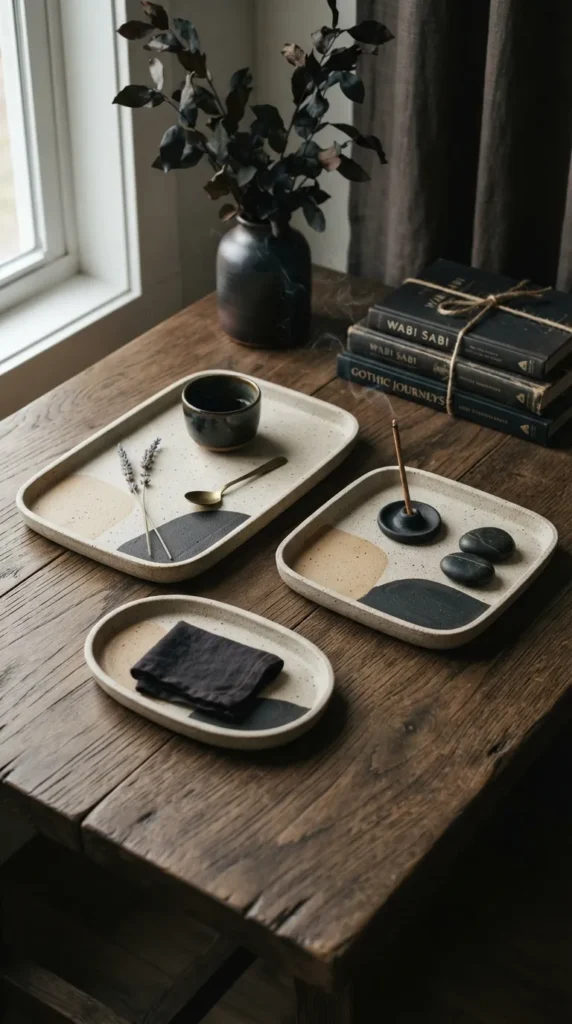
15. Japandi Organic Pebble Dish Set
What This Idea Means
Embracing the calm crossover of Japanese minimalism and Scandinavian warmth (Japandi), this design uses organic ceramic dishes painted with muted earth-tone color blocks and dry-brush stone textures.
How to Make It
- Select Vessels: Choose flat, organic-shaped ceramic dishes or shallow catchall trays.
- Apply Neutral Color Blocks: Paint half the dish in warm oat-beige and the opposite side in muted charcoal or taupe.
- Dry-Brush Texture: Dip a dry, stiff brush lightly into dark grey paint, wipe off excess, and drag across color borders to create stone texture.
- Paint Minimalist Stems: Add a single, thin black stem stroke extending across color blocks.
- Finish: Seal with a ultra-matte protective topcoat.
Tips & Variations
- Raw Clay Border: Leave the outer rim unpainted to highlight raw ceramic clay against soft painted interiors.
- Speckled Glaze Finish: Stipple tiny off-white flecks over charcoal sections for granite-like depth.
Needs & Materials
- Shallow ceramic dishes/trays
- Matte ceramic paints (Oat-Beige, Charcoal, Taupe, Black)
- Stiff dry brush and fine liner brush
- Ultra-matte sealer spray
16. Retro 70s Arch Planter
What This Idea Means
Channeling nostalgic mid-century warmth, this concept paints concentric rainbow arches in retro sunset tones—mustard yellow, burnt orange, rust, and chocolate brown—onto ceramic pots.
How to Make It
- Prep Surface: Clean a round ceramic planter.
- Draft Arches: Use a flexible curve tool to pencil 3–4 concentric arched bands across the front face.
- Paint Inner Arch: Fill the small central arch with mustard yellow ceramic paint using a round brush.
- Paint Outer Bands: Paint surrounding bands in burnt orange, rust red, and chocolate brown working outward.
- Cure & Seal: Bake to set paint, then seal with a satin topcoat.
Tips & Variations
- Pastel Sunset: Swap retro earth tones for pastel peach, sage green, and lavender arches.
- 360-Degree Repeat: Repeat arch groupings three times around the circumference of the planter.
Needs & Materials
- Ceramic planter
- Ceramic paints (Mustard, Burnt Orange, Rust, Chocolate)
- Round synthetic brushes (#2, #4)
- Flexible curve ruler
- Oven for curing
17. Pressed Botanical Leaf Transfer Plate
What This Idea Means
This negative-space silhouette technique uses real pressed leaves as stencils to leave behind clean, unpainted ceramic shapes surrounded by soft sponged color washes.
How to Make It
- Prep & Position Leaf: Clean a plain ceramic plate. Lightly dampen the back of a real pressed fern or leaf and press flat onto the ceramic surface.
- Sponge Paint Over Leaf: Dip a sea sponge into sage or forest green ceramic paint. Stipple paint evenly over the leaf and surrounding plate face.
- Peel Leaf Away: Carefully lift the leaf stencil using tweezers while paint is still slightly damp to reveal the sharp white silhouette underneath.
- Clean Edges: Touch up any paint bleeding with a damp fine brush.
- Bake to Cure: Bake in household oven according to paint instructions.
Tips & Variations
- Gradient Wash: Sponge paint in a dark-to-light gradient across the plate surface before removing the leaf stencil.
- Gold Vein Detail: Paint delicate metallic gold veins inside the white leaf silhouette after removing the stencil.
Needs & Materials
- Plain white ceramic plate
- Real pressed fern fronds or leaves
- Ceramic paint (Sage Green / Forest Green)
- Sea sponge and tweezers
- Household oven
18. Whimsical Daisy Pattern Teapot
What This Idea Means
Sweet and nostalgic, this design covers a ceramic teapot in cheerful, hand-painted daisies featuring white teardrop petals and bright yellow centers, bringing springtime charm to tea time.
How to Make It
- Prep Teapot: Clean a pastel or white ceramic teapot.
- Paint Yellow Centers: Use the wooden end of a brush handle dipped in yellow paint to stamp scattered dots across the teapot body.
- Add Petals: Use a fine round brush dipped in white ceramic paint to pull 5–8 short teardrop strokes outward from each yellow center.
- Paint Lid Details: Repeat tiny daisy patterns around the teapot lid edge and handle.
- Bake & Cure: Bake in the oven to cure paint for safe daily handling.
Tips & Variations
- Multicolored Daisies: Keep flower centers yellow, but alternate petal colors between pastel lavender, pink, and sky blue.
- Stem Connections: Connect daisies with delicate wavy green stem lines wrapping around the teapot.
Needs & Materials
- Ceramic teapot
- Ceramic paint (Bright Yellow, White, Pastel base)
- Fine round brush (#1) and dotting tool
- Household oven
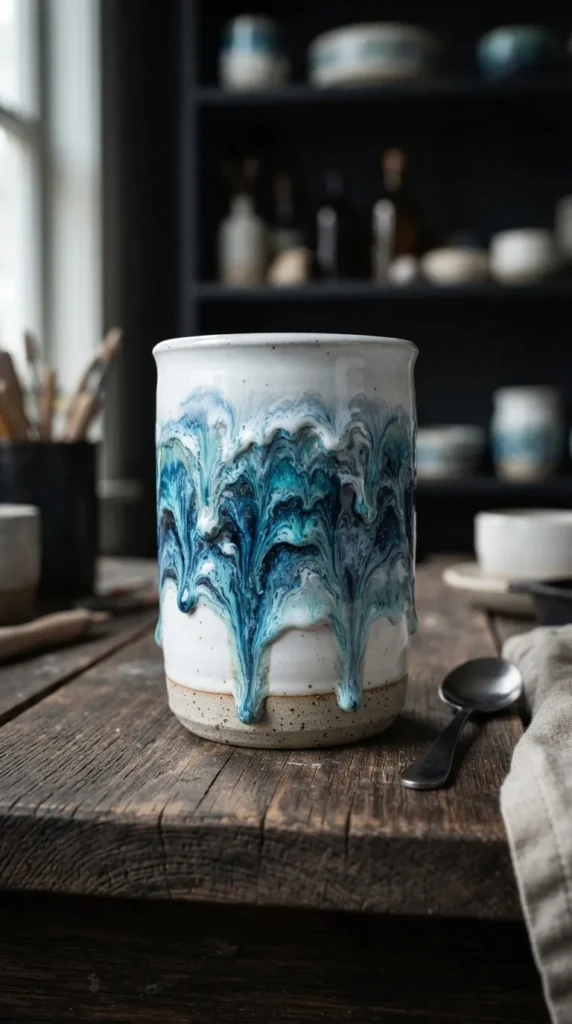
19. Ocean Wave Drip Glaze Tumbler
What This Idea Means
Recreating the dynamic movement of sea foam and ocean currents, this technique layers fluid ceramic paints around the rim of tumblers, allowing gravity to form organic dripping wave runners.
How to Make It
- Prep & Elevate: Elevate a ceramic tumbler upside down on a narrow glass over a catch tray.
- Apply Base Layer: Paint the bottom half of the tumbler in deep navy ceramic paint.
- Apply Heavy Top Glaze: Apply generous, thick coats of light turquoise, sky blue, and white glazes around the top base edge while base paint is wet.
- Encourage Drips: Gently tilt or blow through a straw to force thick top paint layers to run downward toward the rim.
- Dry & Bake: Allow drips to settle naturally, then dry and bake according to glaze instructions.
Tips & Variations
- Sand Base Accent: Paint the bottom third of the tumbler in textured beige sand paint before applying blue ocean drips.
- Metallic Foam: Add flecks of metallic bronze or silver to blue drips for a shimmering sea crest effect.
Needs & Materials
- White ceramic tumbler
- Fluid ceramic glazes (Navy, Turquoise, Sky Blue, White)
- Catch tray and elevation stand
- Drinking straw for directing drips
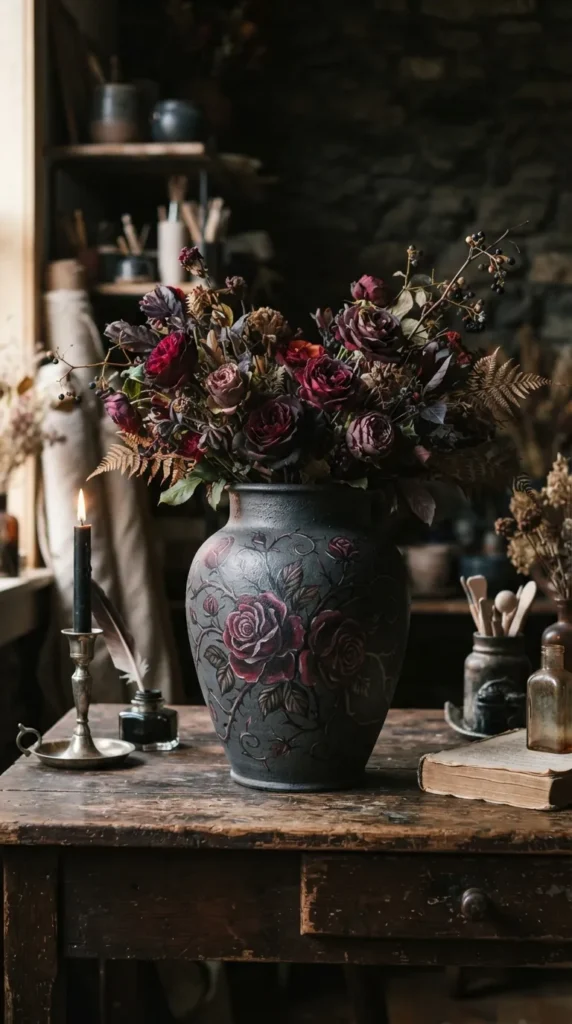
20. Gothic Dark Rose Ceramic Urn Vase
What This Idea Means
Full of dramatic moody elegance, this gothic-inspired concept features dark crimson and black roses with thorny vines painted over dark ceramic vases or jars.
How to Make It
- Prep Dark Vase: Clean a matte black or charcoal ceramic urn vase.
- Block Rose Shapes: Paint deep burgundy circular bases where flower heads will sit.
- Build Layered Petals: Using a fine round brush, build overlapping petals working from outer edges inward using lighter crimson, rose, and blush shades.
- Add Thorny Vines: Draw dark green and black stems with sharp thorns winding around the vase body.
- Cure Finish: Bake or seal with a satin topcoat for a rich gallery finish.
Tips & Variations
- Gold Leaf Thorns: Paint thorns and leaf tips with liquid gold leaf for a luxurious gothic contrast.
- Single Focal Rose: Paint one oversized, hyper-detailed dark rose on the front face, leaving the rest plain black.
Needs & Materials
- Dark charcoal or black ceramic urn vase
- Ceramic paint (Burgundy, Crimson, Blush, Dark Green, Black)
- Fine round brushes (#0, #2)
- Satin sealer or oven curing
Summary Overview & Quick Comparison
| Idea # | Style / Theme | Primary Color Palette | Difficulty Level | Recommended Ceramic Vessel |
| 1 | Scandinavian Folk Floral | Muted Red, Navy, Sage, Ochre | Beginner | Ceramic Mugs |
| 2 | Speckled Eggshell Ring Dish | Duck-Egg Blue, Dark Brown, Gold | Beginner | Trinket Dishes, Coasters |
| 3 | Terracotta Botanical Arch | Cream, Terracotta, Olive Green | Intermediate | Terracotta Planter Pots |
| 4 | Mediterranean Citrus Platter | Canary Yellow, Ochre, Olive Green | Intermediate | Large Oval Serving Platters |
| 5 | Celestial Zodiac Constellations | Midnight Blue, Gold, White | Intermediate | Coaster Sets, Tiles |
| 6 | Abstract Pastel Swirl | Lavender, Mint, Blush, Yellow | Beginner | Tall Ceramic Vases |
| 7 | Delftware Cobalt Floral | Vivid Cobalt Blue, White | Intermediate | Water Pitchers, Jugs |
| 8 | Moody Dark Floral Teacups | Plum, Burgundy, Blush, Black | Advanced | Teacups & Saucers |
| 9 | Checkerboard Grid Bowl | Olive Green, Sage, White | Intermediate | Footed Fruit Bowls |
| 10 | Terrazzo Flecked Planter | Off-White, Rust, Sage, Ochre | Beginner | Cylindrical Planters |
| 11 | Minimalist Line Art Face | Jet Black, Off-White | Beginner | Storage Jars with Lids |
| 12 | Cottagecore Mushroom Tile | Red, Off-White, Moss Green | Intermediate | Square Tile Coasters |
| 13 | Sun-Kissed Amalfi Citrus Tile | Canary Yellow, Cobalt Blue, Green | Intermediate | Ceramic Wall Tiles |
| 14 | Golden Gilded Kintsugi | Liquid Gold, Matte Black | Intermediate | Shallow Ceramic Bowls |
| 15 | Japandi Organic Pebble | Oat-Beige, Taupe, Charcoal | Beginner | Flat Catchall Trays |
| 16 | Retro 70s Arch Planter | Mustard, Burnt Orange, Rust | Beginner | Round Ceramic Pots |
| 17 | Pressed Botanical Leaf Plate | Sage Green, White | Intermediate | Ceramic Plates |
| 18 | Whimsical Daisy Teapot | Bright Yellow, White, Pastel Base | Beginner | Ceramic Teapots |
| 19 | Ocean Wave Drip Glaze | Navy, Turquoise, Sky Blue, White | Advanced | Ceramic Tumblers |
| 20 | Gothic Dark Rose Urn | Burgundy, Crimson, Dark Green | Advanced |