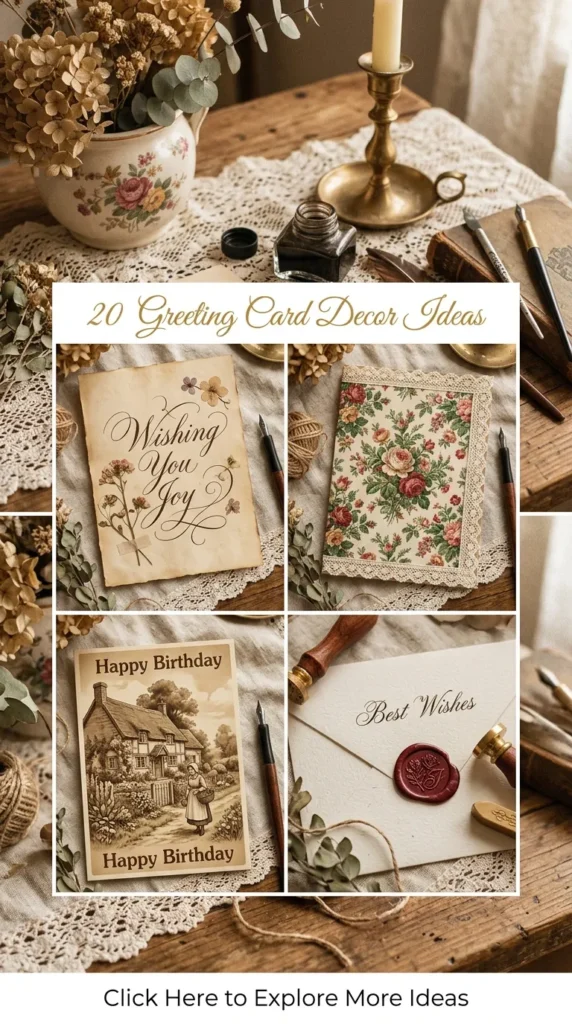
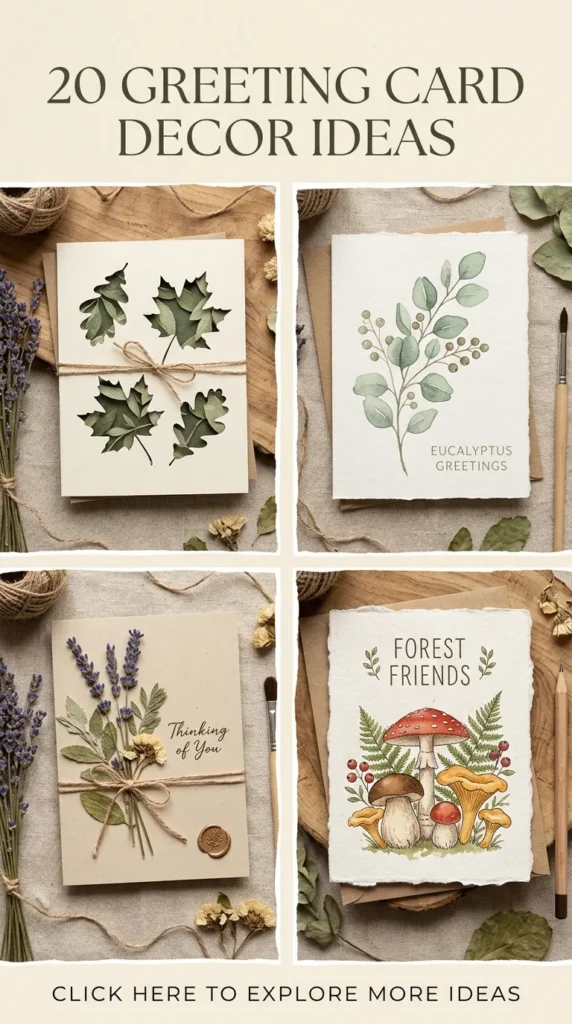
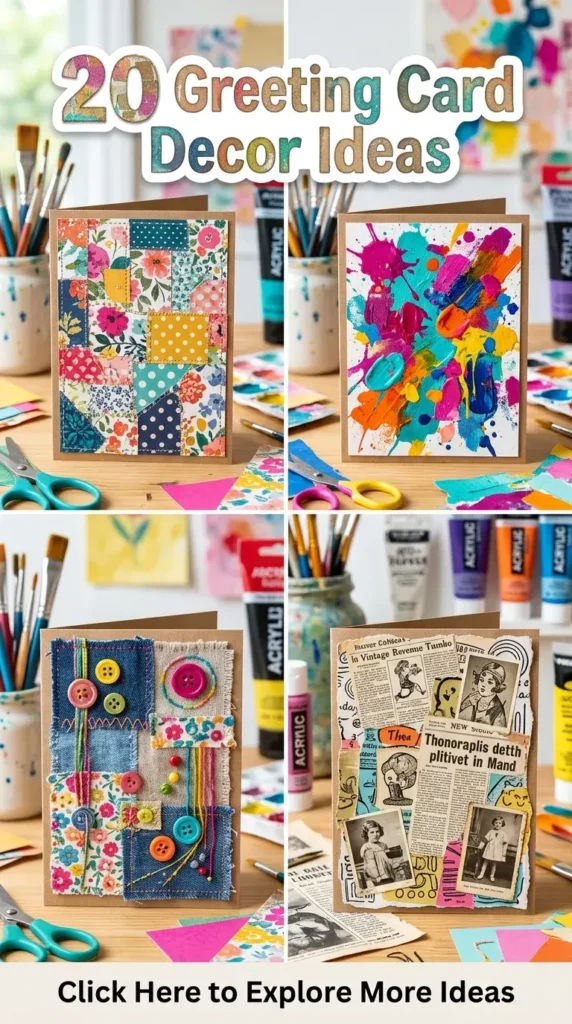
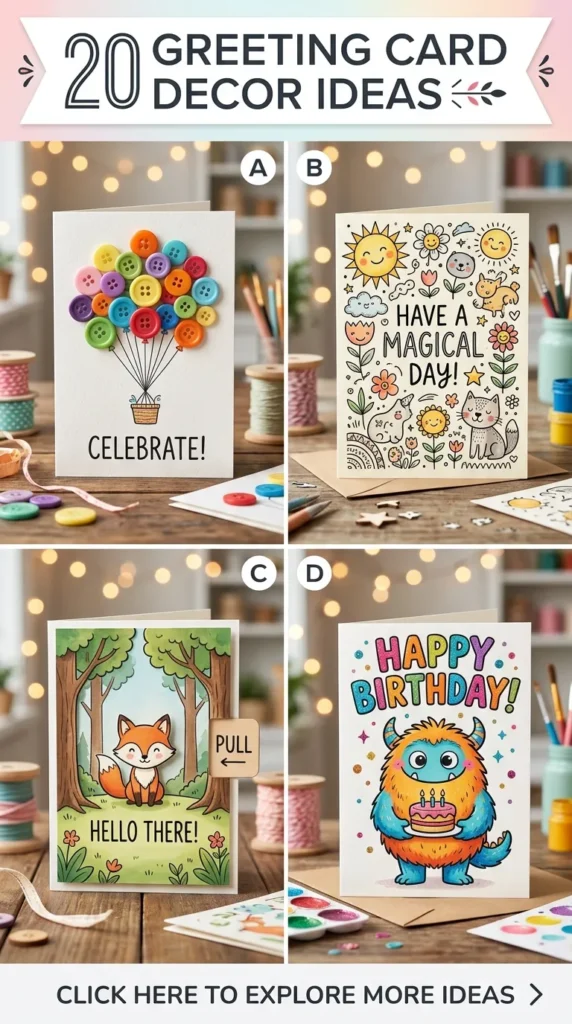
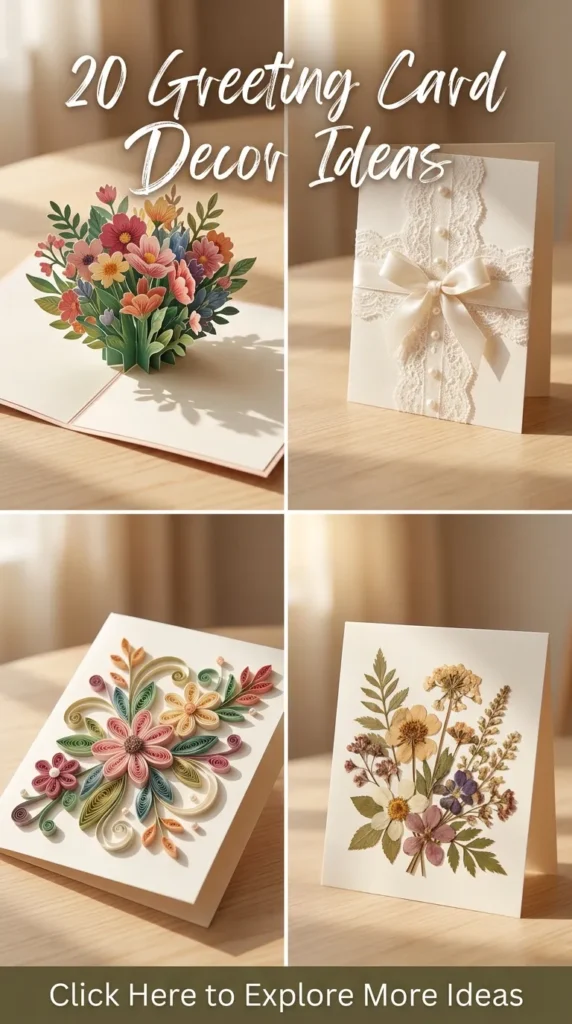
Handcrafted greeting cards blend tactile artistry with emotional connection. Elevate paper crafting with twenty curated, gallery-grade greeting card decor ideas designed to inspire keepsakes rather than disposable stationery.
1. Deckle-Edge Botanical Parchment with Real Wax Seal
What This Idea Means
This aesthetic combines antique European stationery traditions with raw, organic minimalism. It utilizes the natural, feathered edge of handmade rag paper paired with genuine botanical matter, closed with a melted wax seal. It signals intentionality, old-world romance, and heirloom-quality craftsmanship.
Materials Needed
- 300 GSM handmade cotton rag paper with natural deckle edges
- Flexible sealing wax beads in muted tones (antique gold, sage, terracotta, or pearl)
- Brass wax seal stamp (botanical leaf, monogram, or crest design)
- Wax melting spoon and tealight candle
- Ultra-fine point archival ink pen in warm sepia or slate
- Small sprig of dried gypsophila (baby’s breath) or pressed olive leaf

How to Make It
- Fold the handmade cotton deckle-edge sheet precisely down the center using a bone folder, taking care not to crush the natural feathered edges.
- Inscribe your handwritten message or front calligraphy using warm sepia archival ink. Let dry completely for ten minutes to prevent smearing.
- Place 3 to 4 wax beads into the melting spoon and hold it approximately one inch above the tealight flame until the wax reaches a honey-like consistency.
- Position a micro-sprig of pressed greenery diagonally across the bottom third of the card face.
- Pour the molten wax directly over the stem base in a single fluid pool, allowing the perimeter to settle organically.
- Rest the cold brass stamp flat onto the wax pool without pressing down forcefully; let gravity seat it. Leave it in place for 30 seconds before peeling the stamp away cleanly.
Tips and Variations
- Temperature Control: If the wax bubbles or smokes, it is too hot and will create air pockets in your seal. Let it cool for 5 seconds before pouring.
- Modern Minimalist Variation: Omit the botanical sprig and use translucent white wax on a warm taupe deckle sheet with gold leaf flakes stirred into the molten pool.
- Two-Tone Accent: Rub a tiny dab of metallic gold mica powder over the raised relief of the cooled wax seal using a fingertip to highlight the brass pattern.
2. Pressed Wildflower & Translucent Vellum Overlay
What This Idea Means
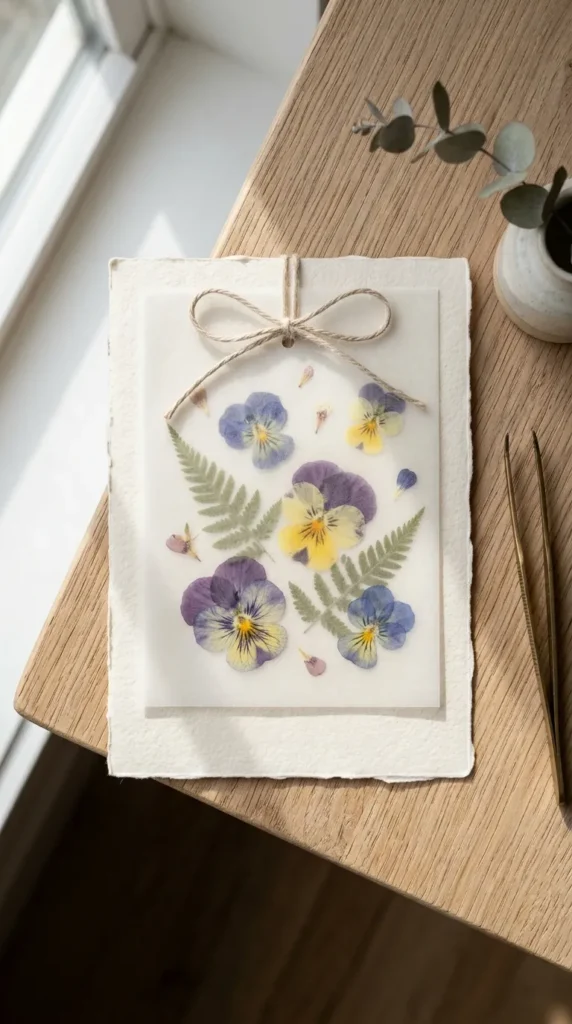
This design relies on depth, filtration, and transparency. By sandwiching real, vibrant pressed petals beneath a frosted vellum sheath, the colors appear softly diffused, reminiscent of a frosted morning window.
Materials Needed
- Translucent frosted vellum paper (115–150 GSM)
- Heavyweight cold-press watercolor cardstock base (350 GSM)
- Pressed, fully dehydrated meadow flowers (pansies, larkspur, fern fronds, or buttercups)
- Acid-free matte mod podge or water-based craft adhesive
- Flat miniature craft paintbrush
- Neutral linen twine or metallic mini eyelets
How to Make It
- Cut your watercolor cardstock base to a standard 5×7 inch flat panel.
- Cut a sheet of frosted vellum to matching dimensions.
- Arrange your pressed flowers across the front face of the watercolor base until the composition is balanced.
- Use a micro-drop of adhesive on the back of each flower center and leaf node using the fine craft brush to anchor them to the watercolor base.
- Lay the vellum sheet directly over the botanical base.
- Punch two miniature 1/16-inch holes along the top margin through both layers and thread natural linen twine through, tying a relaxed square knot to secure the overlay.
Tips and Variations
- Botanical Preservation: Ensure flowers are completely dry before mounting; any residual moisture trapped under vellum will cause discoloration over time.
- Gold Lettering: Write your sentiment directly onto the vellum sheet using a gold oil-based paint marker before binding the layers together.
- Floating Frame Effect: Adhere tiny foam adhesive dots beneath the top border only, letting the vellum float 1mm above the petals for added dimension.
3. Minimalist Blind Embossing with Raw Linen Ribbon
What This Idea Means
Blind embossing creates tactile, raised patterns in paper without using ink or foil. Combined with the loose, soft texture of hand-torn linen ribbon, this concept delivers a clean, high-end architectural look focused entirely on texture, shadow, and light.
Materials Needed
- Heavy cotton cardstock (minimum 400 GSM, bright white or stone grey)
- Embossing folder with geometric or micro-floral patterns
- Manual die-cutting and embossing machine
- Hand-torn raw edge linen or habotai silk ribbon (1-inch width)
- Scissors and craft knife

How to Make It
- Cut your cardstock panel to size.
- Lightly mist the back of the cardstock panel with fine water mist from 12 inches away to soften the cotton fibers and prevent cracking during deep relief pressing.
- Insert the card panel into the embossing folder, align it straight, and pass it through the manual roller machine according to manufacturer pressure plate settings.
- Let the embossed card dry completely flat under a heavy book for twenty minutes.
- Cut an 8-inch strip of raw-edge linen ribbon, fray the ends gently by pulling lateral threads.
- Wrap the ribbon vertically around the card’s left quadrant, tying a single minimal knot across the front without a bow.
Tips and Variations
- Tone-on-Tone Depth: Use ultra-pale greige cardstock for a softer, warmer finish than stark white.
- Asymmetrical Debossing: Emboss only the bottom-right corner rather than the entire panel to preserve negative space for custom hand lettering.
- Ribbon Stiffening: Run a thin bead of fabric glue behind the knot on the reverse side to prevent loosening during transit.
4. Gilded Edge & Metallic Gold Leaf Splatter
What This Idea Means
Taking inspiration from classical bookbinding and Japanese Kintsugi, this concept elevates understated stationery with controlled accents of genuine or imitation gold leaf, turning organic paper imperfections into luxury accents.
Materials Needed
- Thick, smooth bristol or cotton card base (300+ GSM)
- Gold leaf sheets (24k imitation or genuine composition metal)
- Water-based gold leaf size (gilding adhesive)
- Soft goat-hair mop brush and a stiff-bristled toothbrush
- Gold liquid leaf pigment or gouache
- Low-tack artist masking tape
How to Make It
- Stack several trimmed card blanks tightly between two wooden blocks and clamp them securely.
- Apply sizing adhesive along the exposed, compressed paper edges using a sponge applicator.
- When the adhesive becomes tacky (3–5 minutes), lay sheets of gold leaf over the edges, burnishing gently with a dry tissue.
- Unclamp and separate the cards gently with a palette knife to reveal crisp gilded edges.
- Lay a single card flat on a protected surface. Thin a penny-sized dab of gold gouache or liquid leaf with water.
- Dip a stiff toothbrush into the liquid, hold it horizontally 6 inches above the card face, and run your thumb across the bristles to spray fine, organic gold speckles across the surface.

Tips and Variations
- Controlled Splatter: Mask off a clean geometric window or the center zone with low-tack tape before splattering to create a clean border.
- Distressed Gilding: Lightly sand the gilded edges with ultra-fine 1000-grit sandpaper for an authentic, aged vintage aesthetic.
- Rose Gold & Copper: Substitute classic yellow gold leaf with rose gold, warm bronze, or silver leaf depending on your base paper palette.
5. Hand-Torn Cotton Paper with Japanese Wabi-Sabi Thread Binding
What This Idea Means
Rooted in the Japanese philosophy of embracing natural imperfection, this design celebrates rough edges, visible exposed stitching, and raw fiber textures. It frames the greeting card as an artisanal art object.
Materials Needed
- 100% long-fiber handmade cotton rag paper sheets
- Waxed bookbinding thread (natural beige, charcoal, or terracotta)
- Bookbinding awl
- Large-eye blunt tapestry needle
- Metal ruler with a cork back
- Bone folder
How to Make It
- Lay the handmade paper flat on a self-healing cutting mat. Position the metal ruler along the desired tear line.
- Dampen the tear line with a water brush pen, wait 10 seconds, and pull the paper upward against the ruler edge to produce a consistent deckled tear.
- Fold an outer cover and two internal insert sheets down the center.
- Mark three equidistant puncture points along the central spine (top, center, bottom).
- Pierce the holes through all folded layers using the bookbinding awl.
- Execute a three-hole pamphlet stitch: insert the threaded needle through the center from the outside in, up through the top hole from inside out, down through the bottom hole from outside in, and back out through the center. Tie the thread ends securely over the central spine cord.
Tips and Variations
- Accent Threads: Use contrasting metallic copper thread or unbleached hemp cord for an earthy, tactile contrast.
- Pressed Petal Inclusions: Use handmade paper embedded with real marigold petals or straw fibers for added organic character.
- Long Tail Finish: Leave the knot tails 3 inches long and secure a tiny ceramic bead or brass charm at the ends.

6. Monochromatic Watercolor Wash with Calligraphy Flourish
What This Idea Means
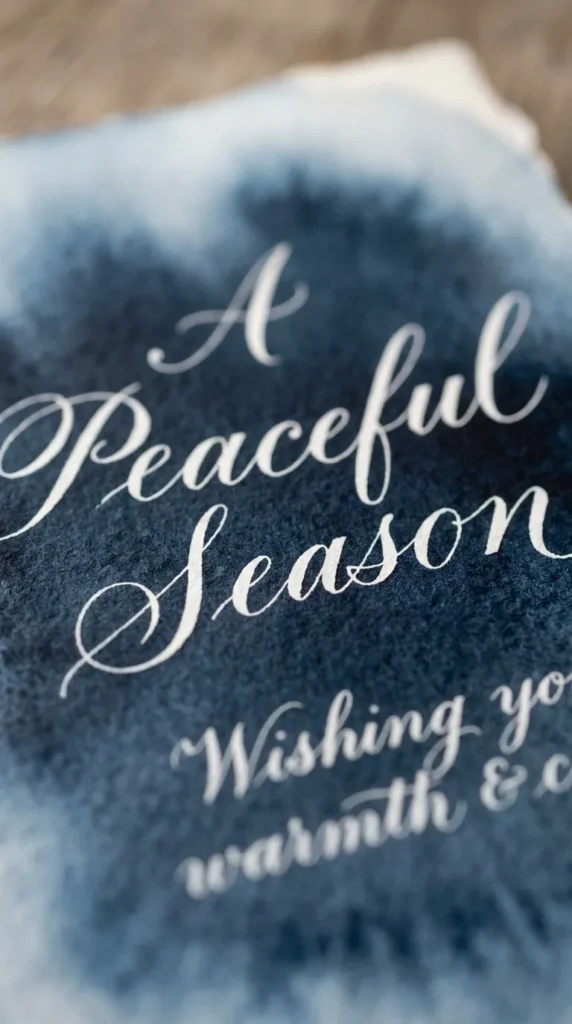
This style harnesses wet-on-wet watercolor gradients in a single cohesive color family—such as smoky slate, eucalyptus green, or dusty terracotta—to create an atmospheric background that highlights fine modern calligraphy.
Materials Needed
- 300 GSM cold-press 100% cotton watercolor cardstock
- Professional-grade watercolor tubes (e.g., Payne’s Grey, Indigo, or Raw Umber)
- Wide flat wash watercolor brush (1.5 to 2 inches)
- Oblique calligraphy pen holder and flexible pointed nib (Nikko G or Brause Steno)
- Waterproof white acrylic calligraphy ink or rich metallic gouache
- Ceramic mixing palette and water jars
How to Make It
- Secure the edges of your folded watercolor card blank to a rigid board using drafting tape to prevent paper warping.
- Wet the front face evenly with clear water using the flat wash brush until it exhibits a glossy sheen without pooling.
- Mix a concentrated wash of pigment on your palette. Sweep the loaded brush across the top edge, dragging pigment downward while diluting with water toward the bottom to create a seamless gradient.
- Allow the wash to dry completely flat. Remove the drafting tape cleanly at a 45-degree angle.
- Inscribe the primary sentiment across the dry gradient using the pointed pen nib dipped in opaque white acrylic ink, maintaining thin upstrokes and confident shaded downstrokes.


Tips and Variations
- Salt Crystal Texture: Sprinkle coarse sea salt granules across the wet watercolor wash; leave until dry, then brush away to create organic, crystalline starburst textures.
- Bleed Edge Technique: Allow the watercolor wash to intentionally bleed into a rough deckled edge for an organic watercolor border.
- Palette Variations: Indigo blue washes paired with bright copper ink deliver striking, dramatic results for milestone greetings.
7. Vintage Ephemera Collage with Aged French Script & Lace
What This Idea Means
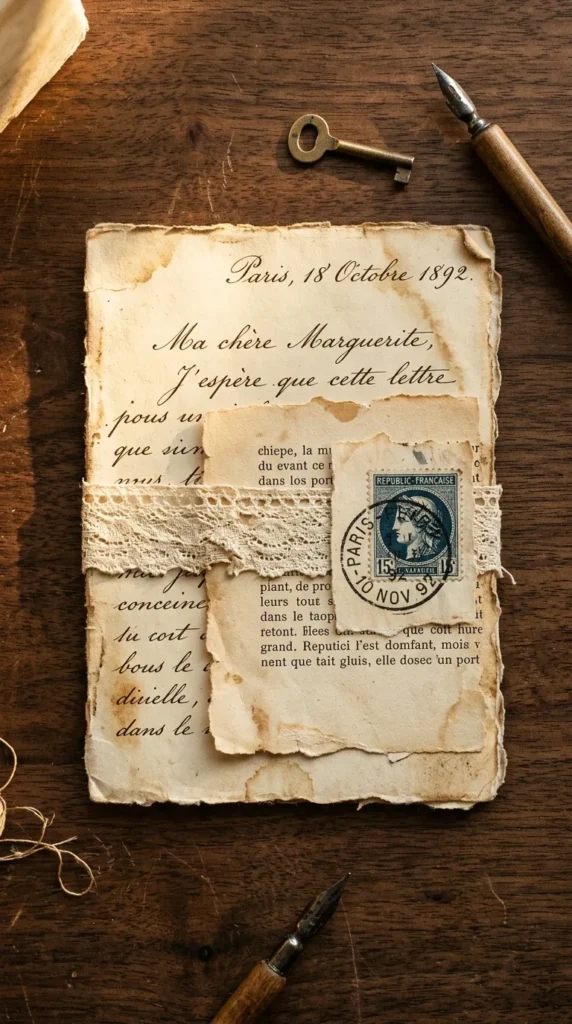
A curated layered composition of nostalgic textures: antique book leaves, French epistolary script, fragile lace trims, and vintage postal stamps. It turns the card surface into a dimensional scrap of preserved history.
Materials Needed
- Heavy kraft or tea-dyed cardstock base
- Antique book pages, dictionary clippings, or authentic aged music sheets
- Cotton bobbin lace or vintage tatting trims
- Vintage canceled postage stamps
- Matte decoupage medium or double-sided adhesive film
- Distress ink pad (Vintage Photo or Walnut Stain) and blending sponge
How to Make It
- Tear fragments of vintage book text and French script into varied rectangular shapes, keeping all edges ragged.
- Lightly sweep the blending sponge loaded with distress ink around the torn edges of each paper piece to simulate decades of oxidation.
- Lay out the collage composition: place the largest, text-heavy piece in the background, overlap a fragment of aged music score diagonally, and tuck a strip of cotton lace beneath the right edge.
- Adhere each layer flat using matte decoupage medium, working from the base layer forward.
- Place a canceled vintage postage stamp on the upper right corner, slightly overlapping the underlying text.
- Seal the entire surface with an ultra-thin layer of matte medium to lock down the delicate paper fibers.
Tips and Variations
- Authentic Aging: Soak modern copy paper in strong black tea or instant coffee for 15 minutes and bake flat at 175°F (80°C) for 8 minutes to create your own authentic vintage base paper.
- Sewn Details: Machine-stitch around the collage perimeter using an irregular straight stitch and dark beige thread, leaving loose thread tails.
- Modern Ephemera: Use vintage street maps or botanical dictionary plates as the primary focal background.
8. Dried Lavender Sprig & Eco-Kraft Paper Pocket
What This Idea Means
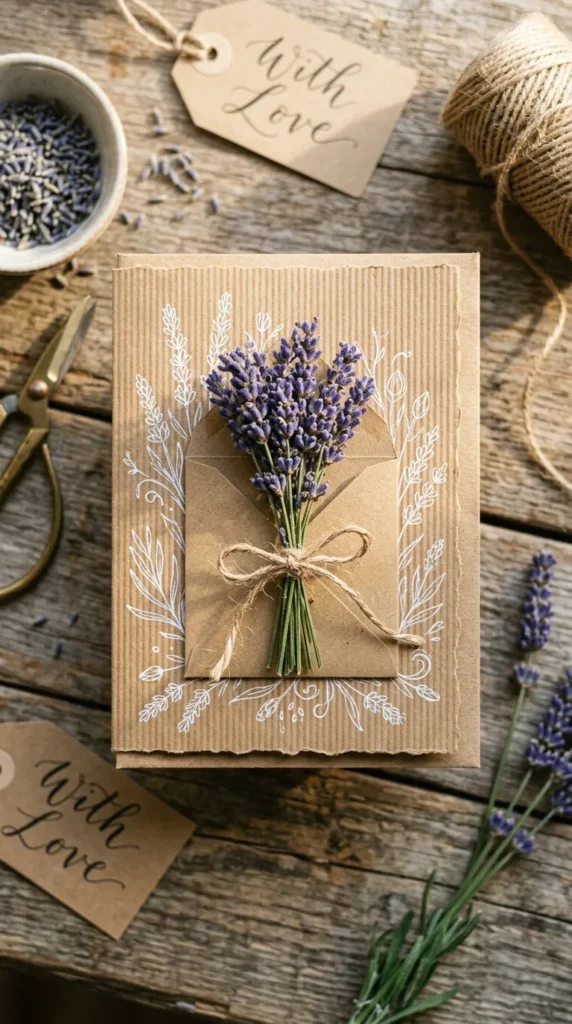
Combining rustic simplicity with sensory appeal, this design incorporates fragrant, real dried herbs housed in a custom-folded kraft envelope-pocket adhered directly to the card face.
Materials Needed
- Recycled unbleached ribbed kraft cardstock (280–350 GSM)
- Naturally dried French or English lavender stems
- Natural jute twine or cotton baker’s twine
- Mini hole punch (1/8-inch diameter)
- Hot glue gun with low-temperature glue sticks
- White pigment gel pen (0.8mm or 1.0mm)
How to Make It
- Cut a piece of kraft paper into a 3×3 inch square. Fold the left, right, and bottom points inward to form a mini open pouch, securing the bottom seam with a dab of glue.
- Using the white pigment pen, draw simple, fine botanical leaf branches or write a clean hand-lettered phrase across the front of the kraft pouch.
- Adhere the completed pocket centrally onto the front panel of your folded kraft greeting card.
- Gather 3 to 4 uniform stems of dried lavender, align the purple flower heads, and tie the stems together using natural jute twine, finishing with a tidy micro-bow.
- Slide the lavender bundle directly into the mini kraft pocket, anchoring the back with a tiny dab of hot glue inside the fold to secure it in transit.
Tips and Variations
- Aromatherapy Elements: Swap lavender for dried baby eucalyptus, rosemary sprigs, or miniature wheat stalks for seasonal adjustments.
- Lined Pockets: Line the interior of the mini kraft pocket with floral calico paper or gold foil sheet before assembling.
- Gift Card Dual Function: Size the pocket slightly larger (3.75 x 2.5 inches) so it holds a standard gift card alongside the botanical bundle.
9. Frosted Acrylic Plate with Etched Botanical Motifs
What This Idea Means
Departing from conventional cardstock, this design pairs modern frosted acrylic with traditional paper crafting. The semi-transparent, rigid surface brings an architectural, ultra-modern luxury feel to greeting cards.
Materials Needed
- Precision-cut frosted cast acrylic sheets (0.04 to 0.06 inch thickness, 4×6 inch size)
- High-speed rotary precision tool with fine diamond ball engraving burr (or micro-tip metal scribe)
- Heavyweight envelope lined with protective tissue
- Soft microfiber polishing cloth
- Printed line-art botanical template
- Low-tack surface tape
How to Make It
- Print your desired botanical illustration or lettering onto plain paper scaled to 4×6 inches.
- Secure the frosted acrylic sheet directly over the printed template using low-tack tape.
- Put on safety glasses. Using the rotary tool with the diamond burr on low speed, lightly trace over the design lines visible through the acrylic, carving the motif into the frosted surface.
- Brush away acrylic powder regularly using a dry makeup brush or microfiber cloth.
- Deepen primary stems by making a second light pass to create dynamic line weight variations.
- Wipe the completed acrylic card with a damp microfiber cloth to remove all dust, revealing bright white etched linework against the frosted base.
Tips and Variations
- Back-Panel Contrast: Slip a rich, jewel-toned paper cardstock insert behind the acrylic to highlight the white etching.
- Hand-Painted Details: Flip the acrylic over and paint the leaves on the reverse side using pastel acrylic paint for a dimensional glass-relief effect.
- Mounting Options: Fasten the acrylic plate to a folded paper card base using two low-profile brass Chicago screws through pre-drilled holes.
10. Cyanotype Sun-Print with Indigo Botanical Silhouettes
What This Idea Means
Cyanotype is a 19th-century photographic printing process that harnesses natural sunlight to produce rich, archival Prussian blue prints. Every print features genuine silhouettes of actual plants, making each card unique.
Materials Needed
- Heavy cotton watercolor paper treated with cyanotype chemicals (or pre-treated cyanotype paper)
- Fresh or pressed flat botanicals (ferns, monstera clippings, wild grasses)
- Sheet of clear glass or acrylic and a stiff backing board
- Four binder clips
- Water tray with cold running water and 1 tablespoon of hydrogen peroxide
- Clean folded card blanks to mount prints
How to Make It
- In a dim room, place your treated cyanotype paper onto the backing board.
- Arrange your botanicals directly on the yellowish-green chemical surface.
- Place the clear glass sheet tightly over the botanicals and clamp all four sides with binder clips to hold flat contact.
- Carry the assembly outside and expose it to direct midday sunlight for 3 to 8 minutes (until the exposed paper turns a bronze-grey shade).
- Bring the frame back inside, remove the botanicals, and submerge the exposed paper in the cold water bath, agitating for 5 minutes.
- Add the hydrogen peroxide to the bath to oxidize the print into vibrant Prussian blue instantly. Rinse with clean water and dry flat.
- Mount the dry cyanotype sun-print onto the center of a crisp white folded cardstock base.
Tips and Variations
- Lace Patterns: In place of leaves, expose antique lace or crochet doilies to produce intricate, geometric indigo prints.
- Wet Cyanotype: Soap bubbles, vinegar, and coarse salt sprinkled onto the chemical surface prior to glass compression produce cosmic, marbled watermarks.
- Calligraphy Integration: Inscribe crisp white gouache or copperplate script over the darkest indigo areas for contrast.
11. Fine-Line Architectural Sketch on Heavy Handmade Rag Paper
What This Idea Means
This aesthetic merges technical structural draftsmanship with organic, rough-textured paper. It turns the greeting card into an art print suitable for framing.
Materials Needed
- 100% Cotton handmade rag paper blanks (rough grain, warm ivory)
- Technical fine-liner drawing pens (pigment-based waterproof ink, sizes 0.05, 0.1, and 0.3)
- Transparent drafting triangle or ruler
- Light-toned graphite pencil (2H or 4H) and kneaded eraser
- Water brush pen filled with diluted grey wash ink
How to Make It
- Use the hard 2H pencil to lay down construction lines, perspective axes, and window frames of the building or landmark.
- Trace the key architectural contours using the 0.3 fine-liner pen, keeping the lines straight and crisp to contrast with the rough paper texture.
- Render micro-details—brick textures, roof tiles, arch shadows, and doorway reliefs—using the 0.05 ultra-fine pen.
- Softly dab areas of cast shadow under eaves and window ledges with the water brush pen diluted with grey wash ink to establish depth.
- When dry, remove all residual graphite construction lines by dabbing them with the kneaded eraser.
Tips and Variations
- Landmark Specificity: Sketch the recipient’s home, wedding venue, or a meaningful travel destination for a personal touch.
- Metallic Structural Lines: Replace black ink with a metallic bronze or copper fineliner on charcoal-grey cardstock.
- Deckle Window: Mount the sketch cardstock slightly recessed inside an embossed, rectangular frame on the main card face.
12. Marbleized Suminagashi Paper with Silk Gauze Wrap
What This Idea Means
Suminagashi (“floating ink”) is the traditional Japanese art of water marbling. Concentric rings of ink floated on a water bath create fluid, organic patterns that are lifted onto absorbent paper, producing calm, wave-like stationery panels.
Materials Needed
- Traditional Japanese Suminagashi marbling ink set
- Shallow plastic tray (larger than your paper dimensions)
- Surfactant/dispersant agent or pine resin
- Absorbent washi or mulberry paper sheets (sized to fit your card)
- Two soft horsehair sumi brushes
- Raw mulberry silk gauze ribbon (semi-sheer)
How to Make It
- Fill the shallow tray with 1.5 inches of still tap water and allow it to settle completely.
- Dip one brush into the black Suminagashi ink and the second brush into the dispersant liquid.
- Alternately touch the surface of the water with the ink brush, then the dispersant brush inside the ink dot. Repeat this sequence 15–20 times to build concentric ink rings.
- Gently blow on the water’s surface or fan it to swirl the concentric rings into fluid marble shapes.
- Lower a sheet of washi paper flat onto the water surface for 3 seconds, lift it smoothly by two corners, and lay it flat on newspaper to dry.
- Trim the dry marbled paper and mount it to your folded cardstock base.
- Wrap a translucent silk gauze ribbon horizontally across the middle of the card, tying it into a light knot.
Tips and Variations
- Multi-Color Marbling: Introduce two or three complementary earth-toned marbling pigments (slate blue, burnt sienna, moss green) alongside black ink.
- Gilded Marbling: Paint liquid gold leaf along one or two dominant marbled wave lines once the paper is completely dry.
- Wax Seal Anchor: Fasten the silk gauze wrap at the center using a small wax seal stamped directly over the fabric.
13. Quilled Micro-Filigree Paper Floral Wreath
What This Idea Means
Paper quilling transforms thin paper strips into coiled, shaped, and glued three-dimensional art. A minimalist micro-floral wreath provides delicate, sculptural relief that catches light and shadow across the card surface.
Materials Needed
- High-grade quilling paper strips (1/8-inch or 1/16-inch width in sage, cream, blush, and olive)
- Slotted quilling tool and fine-tip precision tweezers
- Quilling circle sizing guide template
- Acid-free clear-drying PVA craft glue with an ultra-fine metal applicator needle
- Heavy cardstock blank (400 GSM)
- Mechanical compass or circular stencil
How to Make It
- Lightly draw a 2.5-inch diameter reference circle on the front of your card blank using a pencil.
- Insert a strip of quilling paper into the slotted tool and roll it into a tight coil.
- Place the coil into the sizing guide to let it expand to your desired size (e.g., 10mm for petals, 6mm for leaves).
- Remove the expanded coil with tweezers, apply a micro-dot of glue to seal the end, and pinch the sides to shape it into marquise (leaf), teardrop (petal), or tight roll (bud) shapes.
- Create 15–20 leaf and floral modules in complementary colors.
- Apply fine lines of PVA glue directly along your pencil circle, then place the paper quilled elements around the ring with tweezers to build a balanced, dimensional wreath.
Tips and Variations
- Monochrome Palette: Construct the entire wreath using shades of pure white and ivory paper against a deep slate or navy cardstock for modern contrast.
- Center Monogram: Hand-letter a single, elegant calligraphy initial in the center of the quilled wreath.
- Bead Accents: Glue tiny ivory seed pearls into the centers of the flower coils for added texture.
14. Terrazzo Paper Cut-Out Mosaic with Warm Earth Tones
What This Idea Means
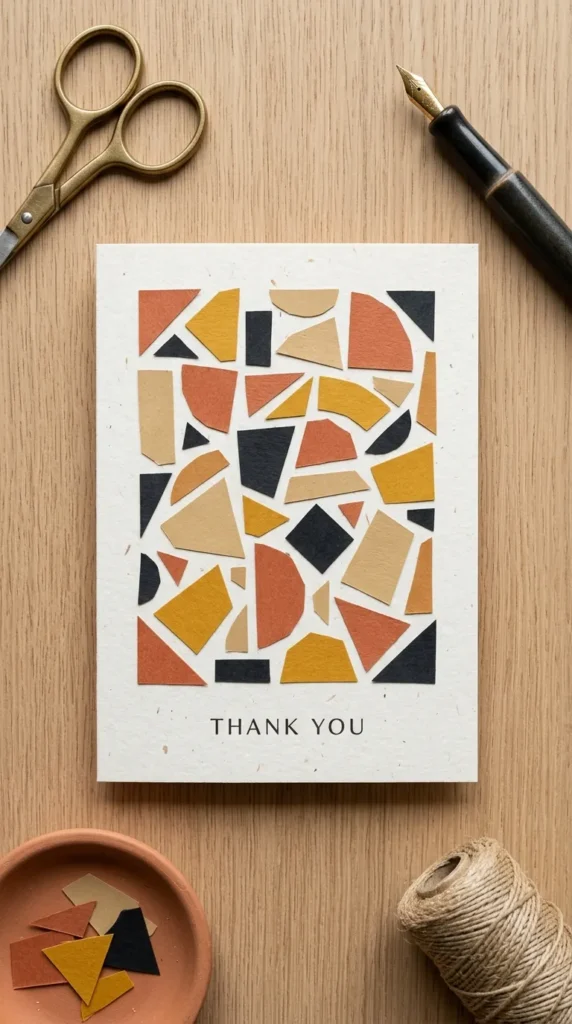
Drawing from mid-century Italian terrazzo stone architecture, this modern graphic style uses abstract, hand-cut geometric chips of earth-toned papers layered into a mosaic over a neutral, textured background.
Materials Needed
- Color-matched heavyweight cardstock scraps (terracotta, mustard, warm clay, sage, charcoal, and ivory)
- Heavy linen-textured card base (300+ GSM)
- Precision micro-tip craft scissors or swivel craft knife
- Matte gel medium or glue stick
- Flat silicone spatula or brayer roller
- Ultra-fine matte archival marker



How to Make It
- Cut your assorted colored cardstock scraps into small, irregular polygonal shapes ranging from 1/8 inch to 1/2 inch in size. Vary the shapes with triangles, trapezoids, and soft pebbles.
- Arrange the paper mosaic chips across the face of the linen card base, keeping 1–2mm of negative background space between each chip.
- Mix large and small fragments evenly to maintain a natural, stone-like visual balance.
- Adhere each chip individually with a touch of matte gel medium, smoothing it flat with the silicone spatula.
- Once dry, use the ultra-fine marker to add occasional micro-dots or flecks in the negative spaces, completing the stone terrazzo pattern.
Tips and Variations
- Foil Inclusions: Cut 3 to 5 chips out of mirror-finish gold or copper foil cardstock and scatter them through the mosaic for reflective pops.
- Framed Cut-Out: Create a negative space frame by mounting a white matte board with an oval cut-out directly over the terrazzo surface.
- Gradient Flow: Group the colored chips by tone, shifting from deep terracotta at the bottom to pale ivory at the top.
15. Moody Midnight Blue Velvet Base with Silver Stamped Constellations
What This Idea Means
This aesthetic pairs dark, tactile midnight blue velvet with reflective silver foil elements. Reminiscent of a clear night sky, it delivers a dramatic, celestial atmosphere.
Materials Needed
- Adhesive-backed velvet/flocked paper sheets in midnight blue or deep indigo
- Heavy chipboard or 350 GSM card base
- Silver metallic hot foil roll and foil heat-applicator pen (or silver pigment ink with fine-line rubber stamps)
- White gouache paint and miniature round detail brush (Size 000)
- Silver thread or metallic embroidery floss
- Metal star charms (optional)
How to Make It
- Cut the midnight blue velvet adhesive sheet to 4.75 x 6.75 inches and mount it smoothly onto the front of a 5×7 folded cardstock base.
- Use the silver foil heat pen (or silver metallic pigment ink) to transfer constellation patterns—such as Ursa Major, Cassiopeia, or the Orion nebula—onto the velvet surface.
- Hand-paint micro star points of varied sizes across the velvet using the 000 detail brush and opaque white gouache.
- Pierce tiny holes through the primary constellation anchor stars with an awl.
- Pass silver embroidery floss through the holes from behind to stitch visible star lines between the constellation points, securing the thread tails on the back with tape.
Tips and Variations
- Custom Zodiac: Personalize the card by rendering the recipient’s specific astrological constellation.
- Silver Leaf Borders: Paint gilding adhesive along the outer edges of the velvet and apply silver leaf for a distressed celestial frame.
- Envelope Pairing: Pair with a silver-foiled, lined metallic navy envelope sealed with silver wax.
16. Layered Die-Cut Shadowbox Garden Card
What This Idea Means
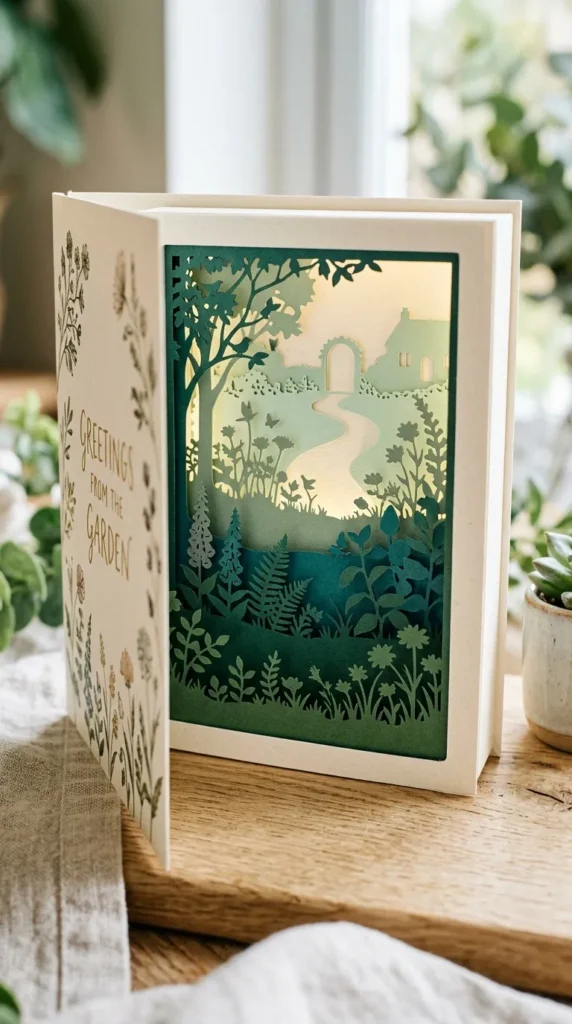
A three-dimensional greeting card that unfolds to reveal multiple receding paper-cut silhouette layers. Looking through the cut layers creates a miniature shadowbox diorama that stands independently on display.
Materials Needed
- 4 sheets of 250 GSM heavy cardstock in progressive ombre tones (e.g., forest green to pale mint)
- Precision hobby craft knife with #11 blades and cutting mat
- Precision paper scoring board and bone folder
- High-density double-sided foam adhesive strips (1/8-inch thickness)
- Die-cutting machine with botanical/garden landscape dies (or printable cut templates)
How to Make It
- Cut four cardstock panels to uniform dimensions (e.g., 5×5 inches).
- Cut an outer window frame into Panel 1 (the foreground).
- Cut deep foreground botanical elements (large leaves, foreground branches) into Panel 2.
- Cut midground elements (delicate flowers, climbing vines) into Panel 3.
- Leave Panel 4 solid as the background, optionally rendering a soft wash of color or a foiled sentiment across it.
- Apply high-density foam adhesive strips around the outer borders on the back of Panels 1, 2, and 3.
- Stack and press the panels together in sequence (Foreground -> Midground -> Background). The foam strips space the sheets apart, creating real depth and natural drop shadows inside the frame.
Tips and Variations
- Backlit Display: Design the diorama so the recipient can place a small LED tea light behind the structure to illuminate the cut layers.
- Woodland Variations: Swap garden botanicals for alpine pine forests, mountain peaks, or ocean wave silhouettes.
- Flat Folding Engineering: Use accordion-folded side tabs instead of foam tape to allow the card to fold flat into a standard envelope for mailing.
17. Botanical Linocut Block Print on Unbleached Bamboo Paper
What This Idea Means
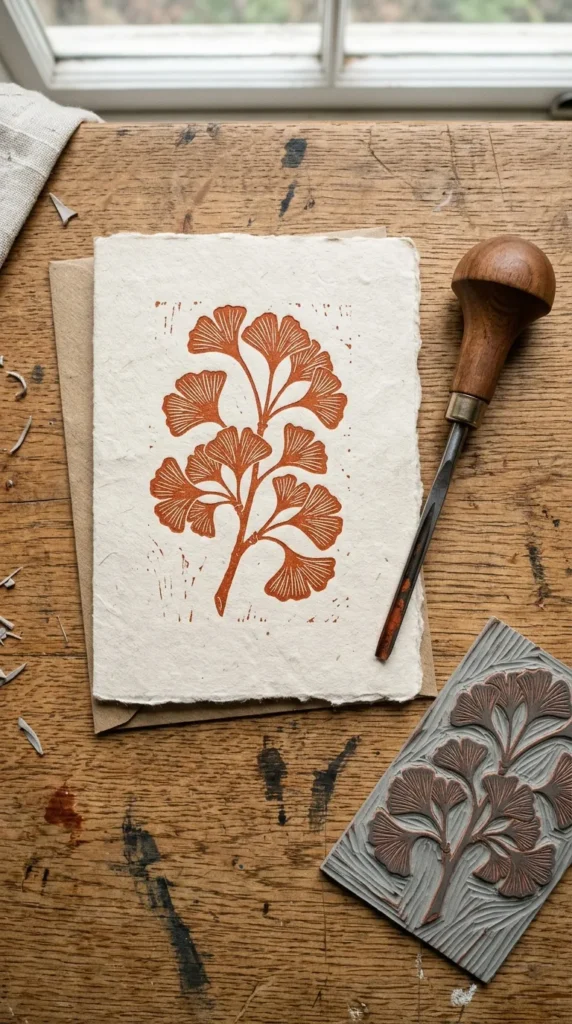
Linocut relief printmaking produces distinctive, graphic impressions characterized by organic line weights, hand-carved textures, and crisp ink stamping. Printed onto unbleached bamboo paper, it provides a warm, crafted look.
Materials Needed
- Soft linoleum or rubber carving block (Speedball Speedy-Carve)
- Linoleum carving handle with #1 V-gouge and #2 U-gouge blades
- Oil-based or water-soluble archival relief printmaking ink (warm black, forest green, or terracotta)
- Hard rubber brayer (ink roller)
- Inking glass plate or smooth ceramic tile
- Unbleached bamboo printmaking card blanks (250–300 GSM)
- Wooden barren or printmaking baren tool
How to Make It
- Draw a bold botanical motif (such as a monstera leaf, ginkgo branch, or poppy pod) onto tracing paper in pencil. Burnish the drawing face down onto the carving block to transfer the graphite.
- Carve away the negative space around the design using the #1 V-gouge for outlines and the #2 U-gouge for clearing larger fields, remembering that non-carved areas will receive ink.
- Dispense a dime-sized amount of relief ink onto the inking plate. Roll the brayer through the ink until you get an even, velvet-textured coat that makes a light hissing sound.
- Roll the inked brayer smoothly over the carved linoleum block.
- Align your bamboo card blank over the inked block and lower it into place without shifting.
- Apply firm, circular pressure across the entire back of the paper using the baren tool. Peel the paper back slowly to reveal the relief print and let cure for 24 hours.
Tips and Variations
- Two-Color Registration: Carve two separate blocks (one for leaf foliage, one for flower petals) and print them in sequence to create a multi-tone artwork.
- Deckled Print Blocks: Leave intentional chattering marks (carving gouge textures) in the background areas for raw printmaking character.
- Limited Editions: Number each print in pencil along the bottom margin (e.g., 1/50, 2/50) to frame the card as a limited original art multiple.
18. Delicate Guipure Lace Appliqué & Pearl Bead Detailing
What This Idea Means
This style brings haute-couture bridal design elements to stationery. Using open-work guipure lace motifs paired with flat-backed micro pearl accents, it creates a refined look for weddings, anniversaries, and formal milestones.
Materials Needed
- High-definition heavy guipure lace appliqué motifs (floral or baroque scroll design)
- Heavy pearlized or shimmer cardstock base (300 GSM, champagne or soft ivory)
- Flat-backed micro craft half-pearls (sizes 2mm, 3mm, and 4mm)
- Jewel setter pickup tool or fine wax pencil
- Clear-drying fabric-to-paper craft adhesive
- Fine metallic silver or champagne calligraphy ink
How to Make It
- Use sharp fabric shears to trim individual floral medallions away from your larger guipure lace fabric base, removing any stray mesh threads.
- Test-fit the lace appliqué along the vertical left flank or top arch of your shimmer cardstock blank.
- Apply fine dots of clear fabric adhesive to the back of the thick structural threads of the lace, then press it firmly onto the cardstock. Place a clean weight over it for 10 minutes.
- Using the jewel pickup tool, place micro-dots of clear glue in the center of the lace blossoms.
- Pick up half-pearls with the wax tool and press them into the glue dots, graduating pearl sizes from large in flower centers to small along trailing vines.
- Balance the rich lace applique with fine-line champagne calligraphy across the remaining negative space.
Tips and Variations
- Tinted Lace: Dip white cotton lace in dilute black tea, coffee, or watercolor dye baths to custom-match your cardstock’s palette.
- Tulle Underlay: Layer a piece of sheer bridal tulle behind the guipure lace to add soft texture and depth.
- Tone-on-Tone Simplicity: Use pure matte white cardstock with matching white lace and matte white pearl beads for a minimalist monochrome look.
19. Embossed Leather Accent Patch on Rough Slate Grey Cardstock
What This Idea Means
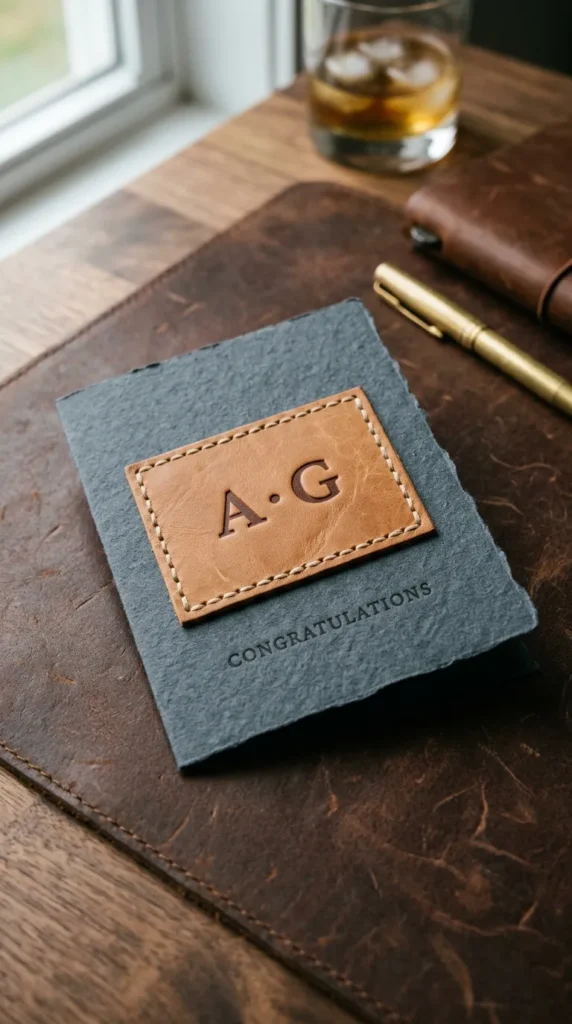
This design introduces vegetable-tanned leather to paper stationery. The rich patina of genuine leather paired with dark, fibrous slate-grey cardstock creates a structured, tactile balance of natural materials.
Materials Needed
- Thin vegetable-tanned tooling leather scraps (1.0 to 1.5mm / 2–3 oz thickness)
- Metal leather stamping alphabet set and lightweight brass mallet
- Heavy slate grey or charcoal-toned fibrous cardstock (350+ GSM)
- Leather edge beveler and burnishing gum (gum tragacanth)
- Heavy-duty leather-to-paper craft adhesive (contact cement or high-tack tape)
- Miniature stitching punch (pricking iron) and waxed linen thread
How to Make It
- Cut the vegetable-tanned leather into a 2 x 1.25 inch accent patch using a sharp craft knife and metal straightedge.
- Lightly dampen the leather surface with a wet sponge (casing the leather). Wait 2 minutes until it returns to near-original color.
- Place the metal letter stamp vertically on the leather patch and strike it firmly with the brass mallet to leave a crisp, recessed letter impression.
- Apply burnishing gum to the leather patch edges and rub briskly with a wood slicker until slick and polished.
- Punch perimeter stitching holes 2mm from the edge using the pricking iron.
- Glue the leather patch to the center-front of the slate cardstock and stitch around the edge with waxed thread for a tailored look.
Tips and Variations
- Antiqued Patina: Rub a small amount of leather antique gel or neatsfoot oil into the stamped impression to darken the debossed letters.
- Faux Leather Alternative: Substitute with premium kraft-tex (washable paper leather) for a vegan, eco-friendly version that can be sewn by machine.
- Rivet Fasteners: Secure the leather patch corners with four miniature antique-brass craft rivets instead of perimeter stitching.
20. Geometric Blind-Debossed Fold with Copper Wire Keepsake
What This Idea Means
Combining origami-inspired geometric folding, blind debossing lines, and an integrated copper wire keepsake element that the recipient can detach and keep as an ornament or bookmark.
Materials Needed
- Heavy smooth-finish cover stock (350 GSM)
- Bone folder and scoring board
- 18-gauge and 24-gauge solid raw copper jewelry craft wire
- Round-nose jewelry pliers and wire cutters
- Low-profile copper or rose-gold metal paper clip
- Tracing stylus or dead ballpoint pen
How to Make It
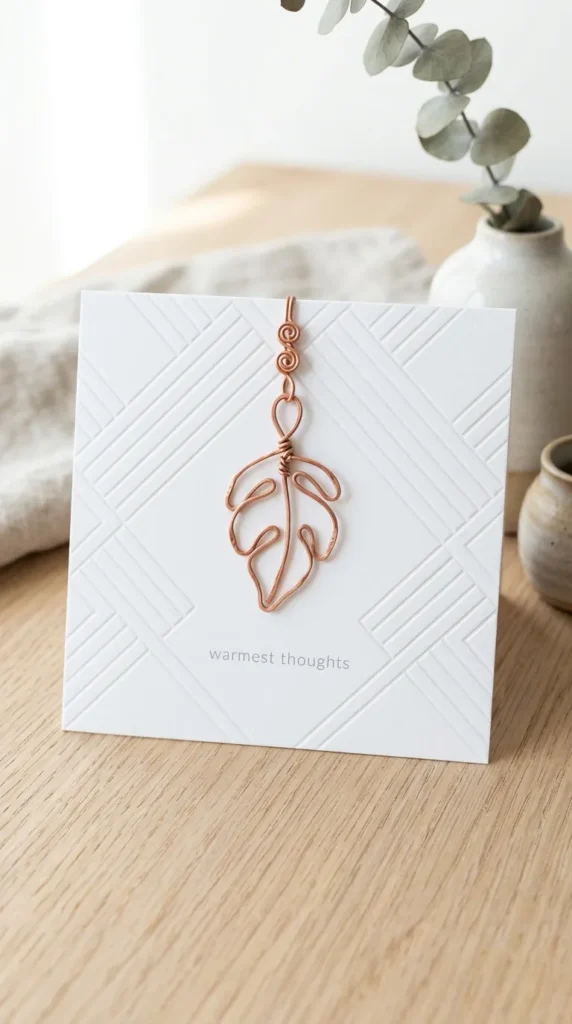
- Use the scoring board and bone folder to score geometric diagonal lines across the card panel at 45-degree angles, creating a clean, diamond-tessellated relief.
- Use the round-nose pliers to bend the 18-gauge copper wire into a clean, minimalist silhouette (such as a continuous-line botanical leaf, a heart, or a geometric polygon).
- Hammer the completed wire shape lightly on a steel bench block to work-harden the metal, ensuring it holds its form.
- Secure the handmade wire charm to the right side of the geometric scored card fold using the low-profile copper clip.
- Deboss a crisp, matching geometric frame around the keepsake’s placement using the metal scoring stylus.
Tips and Variations
- Wire Finishes: Swap raw copper for sterling silver, brass, or gold-filled craft wire to match different paper tones.
- Integrated Bookmark: Shape the bottom stem of the wire element into a 4-inch flat loop so it doubles as a functioning book page marker.
- Minimalist Monograms: Bend the wire into the recipient’s first initial as a custom keepsake monogram.